- Why Is Woodchip Wallpaper So Difficult to Remove?
- What Tools Do I Need to Remove Woodchip Wallpaper?
- How to Prepare The Room for Wallpaper Removal?
- How to Remove Woodchip Wallpaper? – Step-by-Step Guide
- What Should I Do After Removing the Wallpaper?
- Table: DIY Wallpaper Removal vs. Hiring a Professional
- Conclusion
- FAQs on Woodchip Wallpaper Removal
Woodchip wallpaper, popular decades ago, is now often viewed as outdated, and its removal can be tricky due to its textured nature.
The embedded woodchips in the wallpaper make it harder for moisture to penetrate, resulting in a more challenging removal process.
If you’re ready to tackle this home improvement project, you’re in the right place. In this guide, I’ll show you how to remove woodchip wallpaper effectively, helping you prepare your walls for a fresh, modern finish.
Why Is Woodchip Wallpaper So Difficult to Remove?
Woodchip wallpaper removal can be more time-consuming compared to other types of wallpaper as well as for the wallpaper measurement. Here’s why:
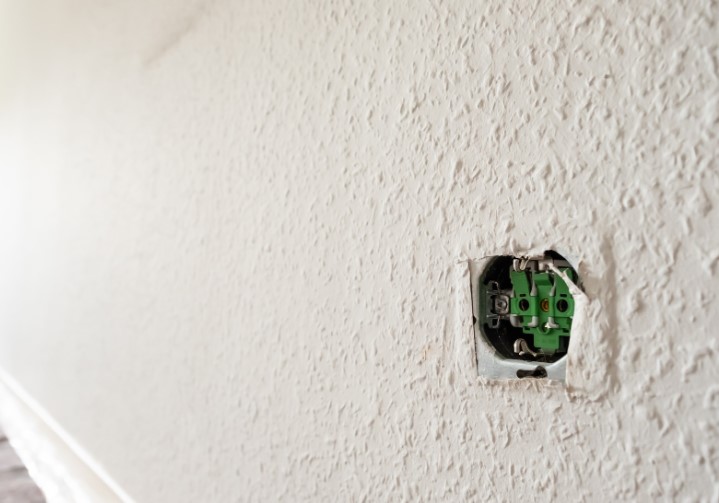
- Textured surface: The woodchips embedded in the paper make it thicker and less porous.
- Multiple layers: Often, woodchip wallpaper has been painted over several times, further sealing it to the wall.
- Adhesive: Strong adhesives used in older wallpapers can harden over time, making removal harder.

What Tools Do I Need to Remove Woodchip Wallpaper?
Before you start, make sure you’ve gathered the right tools. The process will be smoother and less frustrating with the correct equipment.
Essential Tools:
- Wallpaper steamer: This is the most effective way to soften the wallpaper and its glue.
- Scraper or putty knife: It helps to peel the wallpaper without damaging the plaster beneath especially for the wallpaper around windows.
- Sponge and water: For soaking areas that are too delicate for the steamer.
- Protective gloves: Prevents burns from the steam and protects your hands while scraping.
Optional Tools:
- Chemical wallpaper remover: Ideal for tough spots where steam alone isn’t working.
- Sanding tool: Useful for smoothing the wall after removal.
- Filler: For patching any holes or uneven areas after the wallpaper is removed.
How to Prepare The Room for Wallpaper Removal?
Preparation is key to making the wallpaper removal process easier and less messy.
Protecting Floors and Furniture:
- Cover the floor with plastic sheeting or an old cloth to catch debris.
- Move the furniture away from the walls to give yourself room to work.
- If furniture can’t be moved, cover it with plastic or fabric to protect it from dust and water.
Testing a Small Area:
Before diving in, it’s a good idea to test a small section of the wallpaper. Here’s how:
- Choose a small, less visible spot (like behind a door).
- Soak the area with warm water or steam to see how easily the wallpaper comes off.
- If it lifts without too much effort, you’re ready to proceed. If not, you might need to use a chemical wallpaper remover.
How to Remove Woodchip Wallpaper? – Step-by-Step Guide
Removing woodchip wallpaper requires patience and the right technique. Look over the following steps for better results:
Step 1: Soften the Wallpaper
- Start by using a wallpaper steamer. Run the steamer over a small section of the wall for about 30 seconds to a minute, allowing the steam to loosen the glue.
- Also in addition to this, you can use hot water to soak the wallpaper. Fill a spray bottle with warm water, spray the surface, and wait for the moisture to penetrate the paper.
Key tip: Avoid rushing – let the steam or water fully soak in before attempting to scrape the paper.
Step 2: Scrape Off the Wallpaper
Once the wallpaper is soft, use a scraper to begin peeling it off. Here’s how to do it:
- Hold the scraper at a slight angle and gently push it under the edge of the wallpaper.
- Use slow, steady motions to avoid damaging the wall underneath.
- Start to work in small sections, beginning from the top & moving down.
Be careful: If the wallpaper doesn’t come off easily, apply more steam or use water from hot water tank before scraping further.
Step 3: Removing Stubborn Sections
Some areas of the wallpaper may be more difficult to remove. For these spots:
- Reapply steam to soften the paper further.
- If the wallpaper still won’t budge, consider using a chemical remover. Apply it to the stubborn area, following the instructions on the product, and let it sit for the recommended time.
- After the chemical has softened the glue, resume scraping.
What Should I Do After Removing the Wallpaper?
Once the wallpaper is off, there are a few more steps to ensure your walls are ready for painting or re-wallpapering.
Cleaning the Wall Surface:
- Remove adhesive residue: Use a sponge soaked in warm, soapy water to scrub away any leftover glue or wallpaper paste. Ensure the walls are clean as well as smooth.
- Check for imperfections: After cleaning, run your hand over the wall to feel for any bumps or rough patches.
Preparation for Wall Painting or New Wallpaper:
- Sanding: If the wall feels uneven, use a sanding tool to smooth out the surface.
- Fill in holes or cracks: Apply a filler to any gaps or damage that was hidden under the wallpaper.
- Prime the wall: If you plan to paint, use a primer to create a smooth, even surface. This will help the paint adhere properly and give you a professional-looking finish.

Table: DIY Wallpaper Removal vs. Hiring a Professional
| Aspect | DIY Wallpaper Removal | Hiring a Professional |
| Cost | Low | High |
| Time Commitment | High | Low |
| Effort | Significant | Minimal |
| Results Control | Full control over the process | Relies on the professional |
Conclusion
Removing woodchip wallpaper can feel like a daunting task, especially if you’ve never done it before. But with the right tools, some patience, and following these step-by-step instructions, you’ll be able to remove the wallpaper effectively and prep your walls for a new look.
Whether you’re planning to paint or apply new wallpaper, the satisfaction of seeing smooth, clean walls is worth the effort. Take it one section at a time, and soon enough, you’ll have a fresh canvas to work with.
FAQs on Woodchip Wallpaper Removal
1. Can I Paint Over Woodchip Wallpaper?
Yes, but it’s not recommended. The texture will still show through the paint, so for a smooth finish, it’s better to remove the wallpaper.
2. How Long Does It Take to Remove Woodchip Wallpaper?
It depends on the room size and wallpaper condition, but for an average room, expect the process to take a few hours to a day.
3. Is It Better to Hire a Professional for Wallpaper Removal?
If you have time and patience, DIY is cost-effective. Hiring a professional saves time and ensures a quicker, hassle-free process, though it’s more expensive.


0 Comments