
by Kanimozhi BV | Jan 27, 2025 | Loft, Interior
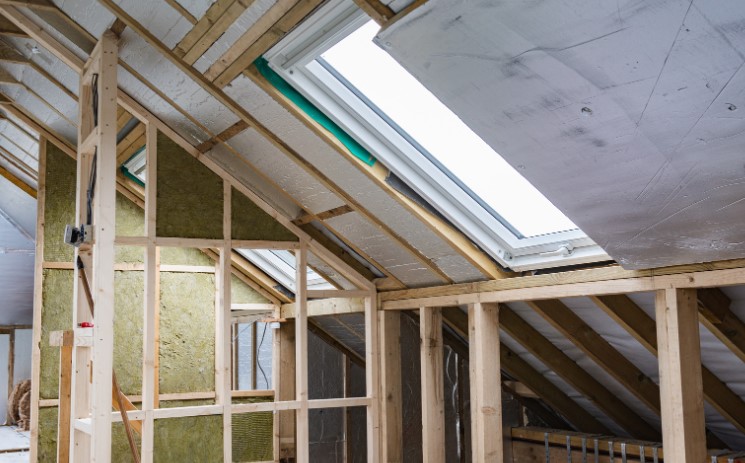
Loft insulation plays a critical role in maintaining a home’s energy efficiency, reducing heat loss, and cutting down energy bills. In the UK, adhering to loft insulation thickness regulations is not just about comfort—it’s about compliance with building standards.
In this guide, I’ll walk you through everything you need to know, from regulations and how thick should loft insulation be to material requirements and the benefits of proper insulation thickness.
What Are Loft Insulation Thickness Regulations in the UK?
Why Are There Regulations for Loft Insulation Thickness?
The UK government has established insulation thickness regulations as part of its efforts to improve energy efficiency in buildings. Proper insulation reduces heat loss, minimizes energy consumption, and helps the country move closer to its carbon reduction goals.
These regulations ensure that all homes meet specific thermal performance standards, making them cost-effective and environmentally friendly.

What are the Current Loft Insulation Standards in the UK?
The current standard for loft insulation thickness in the UK is 270mm for blanket-style materials such as fibreglass or mineral wool. This ensures the loft meets the required U-value (a measure of thermal performance), which is approximately 0.16 W/m²K in new builds.
For retrofitting older homes, achieving the same thickness is recommended but can vary depending on space and material type.
What are Types of Loft Insulation and Their Thickness Requirements?
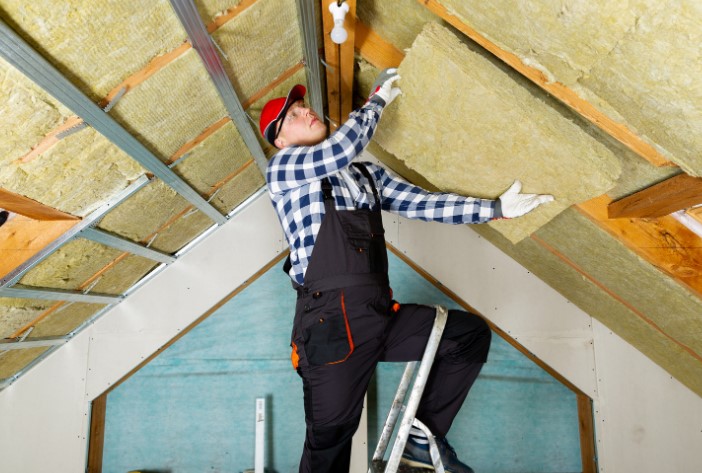
Blanket Insulation (e.g., Fibreglass and Mineral Wool)
- Recommended Thickness: 270mm.
- Best For: Easy-to-install option for standard loft spaces.
- Fibreglass and mineral wool are popular for their affordability, ease of installation, and excellent thermal resistance.
Loose-Fill Insulation
- Thickness: Approximately 250-300mm, depending on the material (e.g., cellulose or recycled products).
- Best For: Lofts with irregular or hard-to-reach areas.
- Loose-fill materials offer flexibility but may settle over time, requiring regular checks.
Rigid Foam Boards
- Required Thickness: Typically 100-150mm due to higher thermal performance (better R-value per inch).
- Best For: Spaces with limited headroom or specific structural needs.
- Commonly used in areas where a thinner layer is necessary without sacrificing insulation quality.
Reflective Foil Insulation
- Thickness: Varies and is often combined with other materials.
- Best For: Retaining heat in specific scenarios, such as cold climates or under roof tiles.
| Insulation Type |
Recommended Thickness |
Best Use Case |
| Fibreglass/Mineral Wool |
270mm |
Standard lofts |
| Loose-Fill Insulation |
250-300mm |
Irregular loft spaces |
| Rigid Foam Boards |
100-150mm |
Low headroom areas |
| Reflective Foil |
Varies |
Supplementary heat retention |
How Thick Should Loft Insulation Be?
Minimum Thickness Based on Material Types
For most UK homes, 270mm of fibreglass or mineral wool is the gold standard. However, some materials, like rigid foam boards, can achieve the same thermal resistance with thinner layers (100-150mm).
When retrofitting an older home, check existing insulation. If it’s less than 100mm thick, upgrading to meet current standards is strongly recommended.
Thickness for Retrofitting vs. New Builds
New builds must comply with the 270mm standard to pass building inspections. In older homes, retrofitting might require adjustments depending on the space and structural limitations. Adding insulation layers is often an effective solution.
How Does Insulation Thickness Impact Energy Efficiency?
Thermal Resistance (R-value) and Heat Loss Prevention
The thicker the insulation, the better its R-value—a measure of its ability to resist heat flow. Properly insulated lofts can reduce heat loss by up to 25%, significantly lowering energy consumption and utility bills.
The Cost vs. Savings Debate
While thicker insulation may involve higher upfront costs, it pays off in energy savings over time. Homeowners can save up to £250 annually on energy bills by upgrading to the recommended insulation thickness. Additionally, government grants are available to offset costs.
What Happens If Loft Insulation Isn’t Thick Enough?
Consequences of Non-Compliance with Regulations
- Reduced Efficiency: Insufficient insulation allows more heat to escape, increasing energy bills.
- Inspection Issues: New builds and renovations may fail to meet building regulations.
- Environmental Impact: Increased carbon footprint due to higher energy usage.
Addressing Insufficient Insulation in Older Homes
Retrofitting is the solution for older properties with outdated or thin insulation. Adding layers of blanket insulation or switching to high-performance rigid boards can bring your home up to code.
Final Thoughts
Proper loft insulation is crucial for meeting UK building regulations, reducing energy bills, and contributing to a greener future. If your current insulation falls short of the 270mm standard, upgrading is a worthwhile investment. With numerous materials to choose from and government grants available, there’s no better time to ensure your home stays warm and energy-efficient.
Related Article: How to Stop Condensation in Loft?
Frequently Asked Questions (FAQs)
1. What is the recommended loft insulation thickness in the UK?
The recommended thickness is 270mm for fibreglass or mineral wool insulation.
2. Can I use a thinner insulation material and still comply?
Yes, rigid foam boards can meet regulations with a thickness of 100-150mm, thanks to their higher thermal efficiency.
3. Are there grants or financial support for upgrading insulation?
Yes, schemes like the Energy Company Obligation (ECO) provide financial aid for insulation upgrades.

by Kanimozhi BV | Jan 27, 2025 | Driveway, Exterior
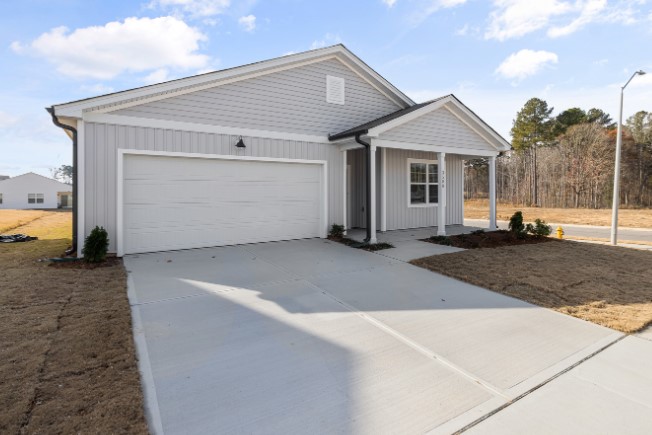
A resin bound driveway is an increasingly popular choice for UK homeowners looking to combine durability, aesthetics, and eco-friendliness. But how much does a resin bound driveway cost to install?
In this guide, I’ll walk you through the factors that influence the price, how resin driveways compare to other materials, and what you can expect when investing in one.
How Much Does a Resin Bound Driveway Cost in the UK?
What is the Cost by Driveway Size?
Here’s a general breakdown of costs based on driveway size:
- Small driveway (20m²): £800–£2,400.
- Medium driveway (50m²): £2,000–£6,000.
- Large driveway (100m²+): £4,000–£12,000.
Factors such as location and labour rates can affect these figures, so it’s always a good idea to request multiple quotes.
How Much Does a Resin Driveway Cost Per m²?
The cost of a resin driveway per square metre in the UK typically ranges between £40 and £120 per m². This variation depends on:
- Type of resin used:
- UV-stable resin: £60–£120 per m² (prevents discolouration from sunlight).
- Non-UV-stable resin: £40–£80 per m² (cheaper but prone to yellowing over time).
- Base preparation requirements:
- If the existing surface is suitable, installation will cost less (£40–£70 per m²).
- For new base preparation, additional costs of £10–£30 per m² are added.
- Driveway size: Larger driveways often benefit from economies of scale, reducing the cost per m².
| Factor |
Cost Range per m² |
| Resin Material (UV-stable) |
£60–£120 |
| Resin Material (Non-UV-stable) |
£40–£80 |
| Base Preparation (if needed) |
£10–£30 |
| Decorative Features |
£10–£20 |
Pro Tip: Larger driveways (e.g., 100m² or more) often come with bulk discounts, reducing the average cost per m².
How Much Will a Resin Driveway Cost Compared to Alternatives?
A resin bound driveway may have a slightly higher upfront cost compared to materials like tarmac. However, its long-term benefits, such as lower maintenance and greater aesthetic appeal, make it a worthwhile investment.
Is a Resin Driveway Cheaper than Paving?
Initial Installation Costs: Resin vs. Block Paving
The cost of installing a resin bound driveway typically ranges from £40–£120 per square metre, whereas block paving costs between £50–£100 per square metre. While the prices are similar, resin installations are often faster and more seamless.
Long-Term Value and Maintenance
Resin bound driveways require minimal maintenance, whereas block paving can demand frequent cleaning and weed removal. Over time, this makes resin a more cost-effective choice.

Can I Install a Resin Bound Driveway on an Existing Surface?
Suitable Base Materials for Resin Driveways
Yes, resin bound driveways can often be installed on existing surfaces like tarmac or concrete, provided they are in good condition. This reduces preparation costs and speeds up the installation process.
When a New Base Might Be Needed?
If the existing surface is cracked, uneven, or poorly drained, it may need to be replaced with a more stable base like MOT Type 1. While this adds to the cost, it ensures the driveway’s longevity and performance.
How Long Will a Resin Driveway Take to Install?
Installation Timeline for Resin Bound Driveways
A typical resin driveway installation takes 1–2 days for an average-sized driveway (50m²). Larger projects or those requiring extensive base preparation may take longer.
How Weather Affects Installation?
Resin driveways need dry and moderate weather conditions for proper curing. Rain or extreme cold can delay the process and may lead to additional costs if work is rescheduled.
What Factors Affect the Cost of a Resin Bound Driveway?
Type and Quality of Resin
- UV-stable resin: More expensive but prevents discolouration over time.
- Non-UV-stable resin: Cheaper but may fade or yellow in direct sunlight.
Base Preparation Costs
- Removing an old driveway: £50–£200 depending on its size and material.
- Laying a suitable base (e.g., concrete or tarmac): £10–£30 per square metre.
Customization and Extras
- Decorative borders or patterns: Add £10–£20 per square metre.
- Drainage systems: Costs vary based on the driveway’s design and local regulations.
Is Planning Permission Required for a Resin Bound Driveway?
UK Regulations for Driveway Installation
In most cases, planning permission isn’t required if the resin driveway is permeable, meaning it allows water to drain through naturally.
When Planning Permission May Be Needed?
If the driveway is non-permeable or affects drainage, you may need to seek approval from your local council. Ensuring compliance with drainage regulations can add to the overall cost.

Resin Bound Driveway vs. Alternatives: Which Should You Choose?
Resin Bound vs. Tarmac Driveways
- Cost: Tarmac ranges from £45–£90 per square metre, making it slightly cheaper.
- Durability: Resin offers a longer lifespan and better resistance to cracking.
- Aesthetics: Resin driveways come in various colours and finishes, whereas tarmac is limited in style.
Resin Bound vs. Block Paving
- Resin driveways are seamless, reducing the risk of weed growth.
- Block paving can move or settle over time, requiring more maintenance like removing grass between paving stones.
- For decorative appeal, resin driveways often have the edge.
Final Thoughts
A resin bound driveway is a versatile, durable, and low-maintenance option for homeowners in the UK. While the upfront cost ranges between £40 and £120 per square metre, the long-term benefits make it an excellent investment.
Whether you’re replacing an old surface or starting from scratch, a resin driveway offers a seamless blend of function and style by knowing how much does a resin bound driveway cost. Ready to transform your driveway? Reach out to local professionals and request quotes to find the best option for your budget.
Frequently Asked Questions (FAQs)
1. How long does a resin driveway last?
A well-installed resin driveway can last between 10 and 20 years with proper maintenance.
2. Is a resin driveway slippery in winter?
Resin bound driveways are designed to be slip-resistant, even in wet or icy conditions.
3. Can I repair a resin driveway if it cracks?
Yes, small cracks can be repaired by professionals, although severe damage may require resurfacing.
4. Are there government grants for resin driveway installation?
Some homeowners may qualify for grants under eco-friendly initiatives if the driveway enhances drainage or improves the home’s energy efficiency.

by Kanimozhi BV | Jan 24, 2025 | Kitchen, Interior
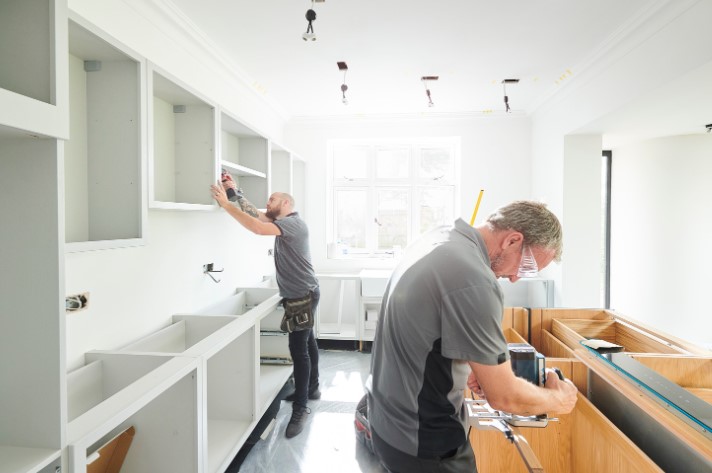
Wondering how much does kitchen fitting cost? Kitchen renovations are one of the most rewarding home improvement projects. Not only does a modern kitchen improve functionality, but it also adds significant value to your property. However, understanding the cost of kitchen fitting is essential to avoid overspending.
Whether you’re planning a full renovation or simply installing a worktop, this guide provides a detailed breakdown of costs, factors to consider, and even tips for DIY projects like fitting a worktop without cabinets.
How Much Does It Cost to Fit a Kitchen Labour Only?
If you already have all your kitchen materials and just need a professional to install them, you’re looking at labour-only costs.
In the UK, kitchen fitters charge an average of £150–£250 per day, depending on location and expertise. For a typical installation, labour costs range between £1,500 and £3,500 for an average-sized kitchen.
What Influences Labour-Only Costs?
- Kitchen Size: Larger kitchens require more time and labour, increasing costs.
- Location: Labour rates tend to be higher in cities like London and the South East compared to other parts of the UK.
- Additional Professionals:
- Electricians: £300–£1,000 for rewiring.
- Plumbers: £150–£400 for fitting sinks or taps.
- Tilers: £200–£800 for flooring or splashbacks.
To save money, ensure you hire experienced fitters, compare multiple quotes, and confirm what’s included in the service.
How Much Does Kitchen Fitting Cost?
How to Fit a Kitchen Worktop Without Cabinets?
What Are the Common Scenarios for Fitting a Worktop Without Cabinets?
You might need to fit a worktop without cabinets in the following cases:
- Temporary kitchens during home renovations.
- Minimalist designs, such as floating worktops.
- Situations where cabinets are delayed or being replaced later.
For this DIY project, you’ll need:
- Tools: Spirit level, power drill, saw, screws.
- Materials: Wall brackets, support legs, fixing plates, and sealant.
Step-by-Step Guide
- Measure and Plan: Mark the desired height and position of the worktop on the wall.
- Install Wall Brackets: Secure heavy-duty brackets evenly along the wall for support.
- Add Support Legs: For longer worktops or heavier materials, attach adjustable legs or beams for extra stability.
- Fix the Worktop: Screw the worktop into place, ensuring it is level on all sides.
- Seal the Edges: Apply sealant to protect the worktop from moisture and wear.
Tips for Durability
- Ensure wall brackets are rated for the weight of the worktop.
- Avoid overhanging worktops unless they have additional supports.
- Inspect fittings periodically to maintain long-term stability.
What Is the Kitchen Fitting Cost Per Unit in the UK?
Labour-only kitchen unit fitting costs vary depending on the size and complexity of the kitchen:
- Small kitchens: £50–£100 per unit.
- Large kitchens: £100–£200 per unit.
For a 10–15-unit kitchen, expect to pay £1,000–£3,000 for labour alone. Pre-assembled cabinets are quicker to fit and less expensive, while flat-pack kitchens take more time, increasing the overall cost.
How Much Does It Cost to Fit a Kitchen Worktop?
The cost of fitting a kitchen worktop depends on the material and the complexity of the job.
Cost by Material
Laminate Worktops:
- Labour: £100–£200.
- Total cost: £150–£400 (including materials).
Granite or Quartz Worktops:
- Labour: £300–£600.
- Total cost: £1,000–£2,000+ depending on size and thickness.
Additional Costs
- Cutting for sinks or hobs: £50–£150 per cut.
- Polishing edges: £20–£50 per metre.
Professional installation is recommended for materials like granite or quartz to ensure precision and durability.
Average Cost to Fit Kitchen Sinks, Taps, and Appliances
Sink and Tap Installation Costs
A kitchen sink and tap installation costs between £150 and £400. If additional plumbing is required (e.g., relocating pipes), costs can increase to £300–£1,000.
Appliance Installation Costs
- Integrated ovens or dishwashers: £50–£100 per appliance.
- Extractor fans: £100–£250.
Professional installation ensures safety and optimal performance of your kitchen appliances.

What’s Normally Included in Kitchen Installation Costs?
Kitchen installation quotes generally include the following:
Included in Most Quotes
- Cabinet and Worktop Assembly:
- Assembling flat-pack cabinets or fitting pre-assembled units.
- Cutting and securing worktops.
- Basic Plumbing: Connecting sinks, taps, and appliances.
- Basic Electrical Connections: Plugging in or hardwiring appliances like ovens or extractor fans.
- Finishing Touches: Adjusting cabinet doors and sealing worktops.
What’s Not Included
- Rewiring: £300–£1,000.
- Plumbing upgrades: £300–£2,000.
- Flooring installation: £500–£2,000.
- Kitchen removal and disposal: £300–£600.
Request an itemised quote to understand exactly what is covered and to avoid surprise costs.
How Much Does Kitchen Replacement Cost in the UK?
Replacing a kitchen typically involves removing the old one and installing new units, worktops, and appliances.
Cost Ranges by Kitchen Size
- Small Kitchens (8–10 units): £5,000–£8,000.
- Medium Kitchens (12–15 units): £8,000–£12,000.
- Large Kitchens (20+ units): £12,000–£20,000+.
Additional Costs
- Plumbing and rewiring: £1,000–£3,000.
- Flooring replacement: £500–£2,000.
- Removing old kitchens: £300–£600.
Tips to Save Money
- Opt for modular designs instead of bespoke units.
- Use mid-range materials to balance cost and quality.
- Compare quotes from multiple kitchen fitters before hiring.
What Is the Cost to Remove an Old Kitchen?
Removing an old kitchen typically costs between £300 and £600 for labour and waste disposal. If you need to hire a skip for additional waste removal, add £200–£400 to the total cost.
Eco-Friendly Disposal
Consider hiring fitters who recycle materials like wood or metal. Some companies include environmentally responsible disposal in their quotes.
How Much Should You Pay for a Full Kitchen Installation?
For a full kitchen installation, expect to pay £3,000–£7,000, depending on size and materials. This cost includes:
- Cabinet fitting: £1,000–£3,000.
- Worktop fitting: £300–£1,000.
- Sink and appliance fitting: £300–£1,500.
For more complex installations involving rewiring or plumbing upgrades, costs may rise significantly.
How Much Does It Cost to Replace Kitchen Flooring?
Replacing kitchen flooring is a common upgrade that can dramatically change the look of your kitchen.
Average Costs by Material
- Laminate Flooring: £10–£30 per m².
- Tile Flooring: £30–£50 per m².
- Vinyl Flooring: £20–£40 per m².
Labour Costs
- Labour for flooring installation ranges from £200 to £800, depending on the size of your kitchen and the material.
Additional Costs
- Removing old flooring: £300–£600.
- Subfloor repairs or levelling: £200–£500.
Reasons to Use a Kitchen Fitter
Hiring a professional kitchen fitter ensures a stress-free and high-quality renovation.
Advantages of Hiring a Professional
- Precise Fitting: Ensures proper alignment of cabinets, worktops, and appliances.
- Safety: Professionals adhere to UK regulations for electrical and plumbing work.
- Time Efficiency: Professionals can complete the project faster than DIY methods.
- High-Quality Finish: A polished and durable result is guaranteed.
Additional Benefits
- Many fitters provide warranties for their work.
- They have specialised tools and experience to handle bespoke designs.
Conclusion
Kitchen fitting costs vary widely depending on the size, materials, and complexity of your renovation. Whether you’re planning a full kitchen installation or a DIY project like fitting a worktop without cabinets, understanding these costs can help you stay within budget. Start planning your dream kitchen today—it’s an investment in your home and lifestyle!
by Kanimozhi BV | Jan 23, 2025 | Garden, DIY Ideas, Exterior
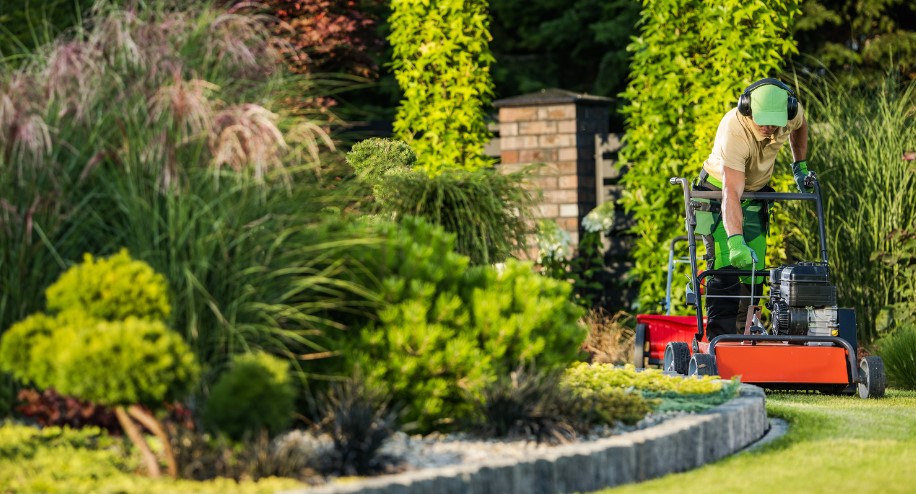
A well-maintained lawn is the heart of any garden. In the UK, the changing seasons bring unique challenges, but by following a month by month lawn care calendar uk , you can keep your lawn healthy, green, and vibrant all year round. Below, I’ll guide you through seasonal tasks, blending practical tips with a manageable routine to ensure your lawn thrives.
Month-by-Month Lawn Care Calendar for the UK
January – Winter Rest and Light Maintenance
January is a quiet month for lawn care, as the grass is dormant. However, light maintenance ensures your lawn stays in good shape for spring.
- Keep the lawn free of debris, such as leaves, branches, and twigs.
- Avoid walking on frosty grass, as it can damage the blades and leave bald patches.
- If weeds are visible, apply a spot weed treatment using strongest weed killer, but avoid overloading the lawn with chemicals.
February – Early Preparation for Spring
As February progresses, the lawn begins waking up from its winter slumber. You can start preparing it for the active growing season.
- Inspect for moss caused by winter dampness and apply a moss killer to get rid of moss in lawn.
- Begin light mowing on dry days, but keep the mower blade high.
- Check for soil compaction in problem areas; you’ll need to aerate these spots next month.

March – The Start of Lawn Recovery
March signals the start of spring, and it’s time to focus on reviving your lawn after winter.
- Aerate the lawn to improve drainage and relieve compaction. Use a garden fork or aerator to create small holes.
- Apply a balanced spring fertiliser to encourage fresh, green growth.
- Perform the first mow of the season, ensuring the mower blade is still set to a high level. Avoid scalping the grass. Learn how to cut grass with a lawn mower with us.
April – Weed, Feed, and Overseed
April is a crucial month for promoting thick and healthy growth.
- Apply a combined weed and feed product to tackle emerging weeds while nourishing the grass.
- Overseed bare patches with grass seed to improve lawn density. Rake lightly to ensure good seed-to-soil contact.
- Keep an eye out for pests like leatherjackets and chafer grubs, as they can damage grass roots.

May – Regular Mowing and Moisture Management
In May, the lawn enters its peak growing phase and requires more frequent care. In UK there are legal time to mow lawn.
- Mow weekly, but avoid cutting the grass too short. A height of 2.5–4cm is ideal.
- If dry spells occur, water the lawn deeply once or twice a week rather than daily.
- Continue addressing any weeds with spot treatments to prevent them from spreading.
June – Maintain Peak Lawn Health
With summer in full swing, June is the month to enjoy your lawn while keeping it looking its best.
- Apply a slow-release summer fertiliser to provide consistent nutrients during the warmer months.
- Keep the lawn hydrated during extended dry periods, watering early in the morning to reduce evaporation.
- Trim the edges of your lawn for a neat and polished appearance.
July – Protect Against Heat Stress
July’s warmer weather can stress your lawn if not properly managed.
- Water deeply during heatwaves, focusing on early mornings or evenings to conserve moisture.
- Avoid mowing during extremely hot weather, as it can weaken the grass.
- Monitor for signs of fungal diseases like red thread or brown patches, and treat them promptly with appropriate lawn care products.
Get to know the best time to mow your lawn for perfect lawn care.

August – Prepare for Autumn
August is the perfect time to address any mid-summer issues and prepare for the cooler months ahead.
- Perform light aeration to improve airflow and water absorption.
- Remove any visible thatch buildup by raking or scarifying lightly.
- Maintain regular mowing, but avoid cutting the grass too short to prevent stress.
September – Scarify and Feed
September is a recovery month for your lawn after the summer heat, and it’s ideal for scarifying and feeding.
- Scarify the lawn to remove moss and thatch. Use a lawn scarifier or rake vigorously.
- Overseed thin areas to encourage dense, healthy growth before the cooler months.
- Apply an autumn fertiliser rich in potassium to strengthen the grass for winter.
October – Final Prep Before Winter
October is your last chance to prepare the lawn before growth slows down.
- Perform the final mow of the year, raising the mower blade to protect the grass like hebes from frost damage.
- Keep the lawn clear of fallen leaves and debris to prevent mould and pests.
- Apply a light top dressing (a mix of sand and soil) to improve soil structure and drainage.

November – Keep it Clean and Protected
In November, focus on keeping the lawn tidy and free from frost damage.
- Regularly remove fallen leaves using a rake or leaf blower.
- Avoid heavy foot traffic, especially on frosty mornings, to prevent compacting the soil.
December – Let Your Lawn Rest
December is a month of rest for your lawn, requiring minimal maintenance.
- Inspect for signs of moss or pests and plan treatments for the new year.
- Remove any debris to keep the lawn clean and healthy.
- Avoid mowing entirely unless absolutely necessary, and only if the weather is mild and dry.
Key Lawn Care Tips Throughout the Year
1. Mowing Tips by Season
- Spring: Begin with high blade settings and lower gradually as the grass grows.
- Summer: Mow weekly, but don’t cut the grass too short during hot weather.
- Autumn: Raise the blade height to protect the grass from stress.
- Winter: Avoid mowing unless the weather is dry and the grass is actively growing.
2. Aerating and Scarifying
- Aerating: Relieves soil compaction and improves drainage. Best done in spring and autumn.
- Scarifying: Removes thatch and moss to allow better airflow and water penetration. Scarify in September or October.
3. Feeding and Fertilising
- Use a nitrogen-rich fertiliser in spring to encourage growth.
- Apply a slow-release fertiliser in summer for consistent feeding.
- Switch to an autumn fertiliser high in potassium to prepare for winter.
4. Dealing with Common Problems
- Moss: Apply a moss killer in late winter or early spring.
- Weeds: Use a weed and feed product or apply spot treatments as needed.
- Pests: Treat for chafer grubs and leatherjackets in spring or autumn.
Conclusion
By following this month by month lawn care calendar uk, you’ll ensure your lawn stays healthy, green, and inviting year-round. Regular maintenance, from mowing and fertilising to scarifying and aerating, plays a vital role in achieving a stunning lawn that’s the pride of your garden.
Start implementing these tasks today, and enjoy a beautiful, thriving lawn every season!
FAQs About Lawn Care in the UK
1. How often should I mow my lawn during summer?
Mow once a week or every 5 days during peak growth. Avoid cutting the grass too short to retain moisture.
2. When should I scarify my lawn?
Scarify in September or October to remove moss and thatch.
3. Can I use the same fertiliser all year?
No, you’ll need specific fertilisers for each season. For example, spring and summer require nitrogen-rich products, while autumn fertilisers are potassium-based.
4. How can I prevent moss from returning?
Keep your lawn well-aerated, avoid overwatering, and apply a moss killer when needed to prevent from moss.
by Kanimozhi BV | Jan 23, 2025 | Bathroom, Interior, Kitchen
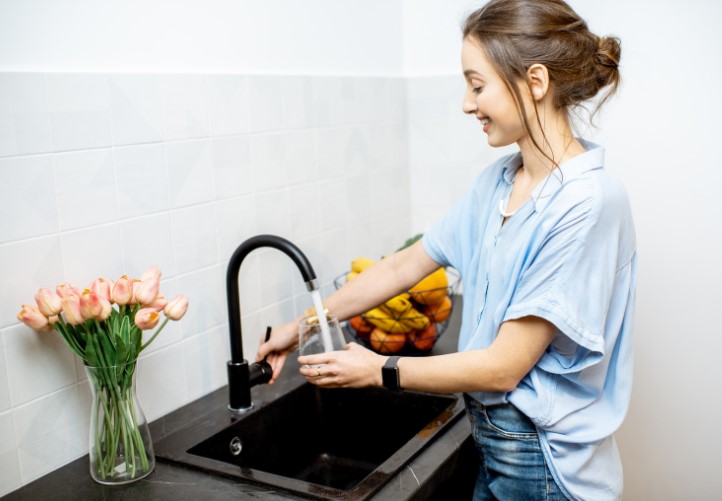
Changing a tap is one of the most common plumbing tasks in households across the UK. Whether it’s a leaking tap, an outdated design, or an upgrade to a modern fixture, hiring a plumber ensures the job is done correctly. But how much should you expect to pay?
In this guide, I’ll break down tap replacement costs, factors affecting the price, and provide a handy tap installation cost calculator by answering how much does it cost for a plumber to change a tap uk.
How Much Does It Cost for a Plumber to Change a Tap UK?
Hiring a plumber to change a tap typically costs between £80 and £150, depending on factors like the type of tap, the plumber’s hourly rate, and the complexity of the job. Here’s a quick breakdown:
| Type of Work |
Average Cost (UK) |
| Replacing a standard kitchen tap |
£100–£150 |
| Replacing a bathroom basin tap |
£80–£120 |
| Installing premium designer taps |
£150–£250 |
| Emergency plumber call-out fees |
£80–£120 |
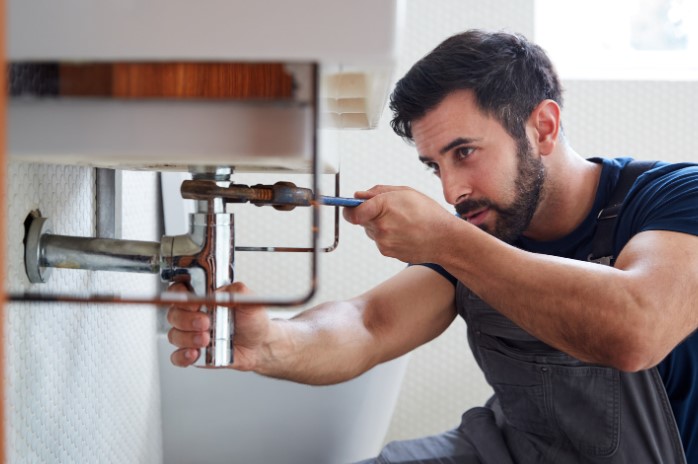
Why Kitchen Taps May Cost More?
Replacing a kitchen tap can cost slightly more due to:
- Hard-to-access pipework under sinks.
- Additional fittings required, especially for modern or pull-out spray taps.
- Larger tap designs compared to bathroom taps.
Tap Installation Cost Calculator
Use the following tap installation cost calculator to estimate how much you’ll need to pay for a plumber to replace your tap. Simply select the options that apply to your situation.
| Factor |
Estimated Cost (£) |
| Plumber’s labour (hourly rate) |
£40–£60 |
| Standard tap replacement |
£80–£150 |
| Premium or designer tap fitting |
+£50–£100 |
| Emergency call-out (evening/weekend) |
+£40–£60 |
| Additional work (e.g., pipe repair) |
+£30–£80 |
Example Calculation:
- Plumber’s labour: £50
- Standard tap replacement: £100
- Emergency call-out: £50
- Total Estimated Cost: £200
What are the Factors That Affect Tap Replacement Costs?
Several factors can influence the final cost of replacing a tap, including:
1. Type of Tap Being Installed
The type of tap you choose will have a significant impact on the cost:
- Basic taps: Mixer or pillar taps cost as little as £20–£30.
- Mid-range taps: Modern taps with swivel spouts range from £50–£100.
- Premium taps: Designer or smart taps with advanced features like touchless controls can cost £150–£300 or more.
2. Plumber’s Hourly Rate
In the UK, plumbers charge £40 to £60 per hour, depending on location and demand. In London or other metropolitan areas, rates can go up to £80 per hour or more.
3. Location of Your Property
- London and South East: Higher labour rates due to demand.
- Northern regions: Generally lower rates for plumbing services.
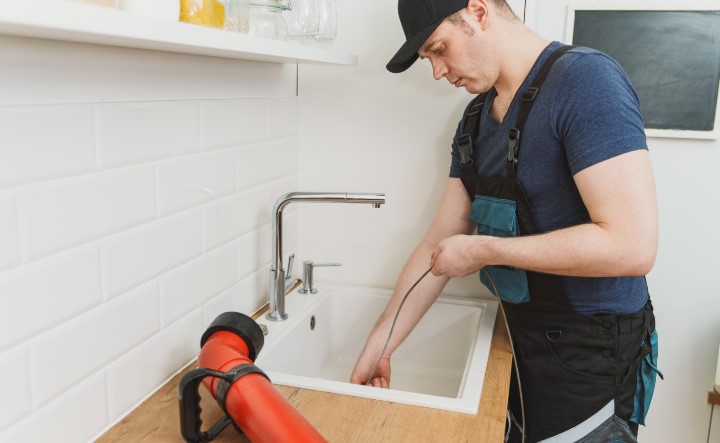
4. Complexity of the Job
If the existing plumbing is old, corroded, or needs adjusting, the plumber will charge extra to fix or replace it. Additionally, certain taps, such as wall-mounted or pull-out spray taps, take more time and effort to install.
5. Time of Service
Plumbers charge extra for:
- Emergency call-outs (evening or weekends): +£40–£60.
- Urgent repairs that require same-day service.
DIY vs. Hiring a Professional Plumber
You may consider replacing the tap yourself to save money. But is it worth the effort?
Pros of DIY Tap Replacement
- Save on labour costs: No need to pay a plumber’s hourly rate.
- Sense of accomplishment: It’s a rewarding skill to learn.
Cons of DIY Tap Replacement
- Specialized tools required: Basin wrench, adjustable spanner, and plumbing tape are necessary.
- Risk of mistakes: Incorrect installation can lead to leaks or damage.
- Time-consuming: A plumber can do the job in 30–60 minutes, while it may take longer if you’re inexperienced.
When Should I Call a Professional?
You should hire a plumber if:
- You’re installing designer or complex taps.
- The plumbing requires adjustments or repairs.
- You’re unsure about the installation process.
Conclusion
Replacing a tap doesn’t have to be a costly or stressful task. By understanding the average costs (£80–£150 for most UK households) and factors that influence pricing, you can make an informed decision that suits your budget.
If you’re confident with tools, a DIY tap replacement might save you money. However, for more complex installations, hiring a professional plumber is worth the investment.
With a little planning, you can ensure your tap replacement is done efficiently and within your budget. And if you’re ever in doubt, use the Tap Installation Cost Calculator to estimate your expenses or consult a trusted plumber in your area!
Related Article: How Much to Renovate a Bedroom in the UK?
FAQs About Tap Replacement Costs
1. What’s the cheapest way to replace a tap?
The cheapest option is a DIY replacement using basic tools. However, if you’re unsure about the process, it’s better to hire a professional to avoid costly mistakes.
2. How long does it take a plumber to replace a tap?
On average, it takes 30–60 minutes for a standard tap replacement.
3. Can replacing a leaking tap save water?
Yes! A leaking tap can waste up to 5,000 litres of water per year, so replacing it can significantly lower your water bills.
4. What additional costs should I expect?
- Additional costs can include:
- Replacing corroded or old pipework.
- Upgrading to premium taps.
- Emergency or after-hours call-outs.
5. Is it worth combining plumbing jobs?
Yes! Combining multiple plumbing tasks in one visit can save you money on call-out fees.
