
by Kanimozhi BV | Jan 22, 2025 | Pest Control
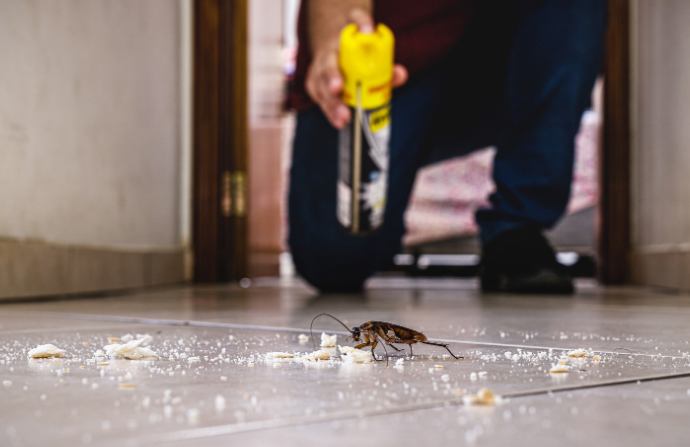
If you’ve ever turned on the lights at night only to find slimy trails or even a slug slowly making its way across your floor, you’re not alone. Many UK homeowners deal with slugs invading their homes, especially at night.
While slugs are harmless to humans, their unwelcome presence can indicate other issues, such as dampness or gaps in your home’s structure.
In this guide, I’ll help you answer why are slugs coming in my house at night, how to get rid of them using natural remedies, and how to stop them from coming back for good.
Why Are Slugs Coming in My House at Night?
Before you can effectively get rid of slugs, it’s important to understand why they’re invading your space. Slugs don’t enter houses randomly—they are drawn to specific environmental conditions and entry points that you may not even notice.
What Attracts Slugs to Your Home?
Slugs are attracted to damp, dark, and cool environments, which makes certain parts of your home perfect for them. Here’s what might be drawing them in:
- Food sources: Leftover crumbs, pet food, or organic matter can attract slugs.
- Moisture: Bathrooms, kitchens, basements, or other damp areas provide the perfect environment for slugs to thrive.
- Entry points: Slugs can squeeze through tiny gaps under doors, around pipes, or through vents.

Is Dampness in the House the Culprit?
Yes, slugs are strongly linked to damp environments, which is why their presence often suggests you may have a moisture issue in your home. Here’s how to identify damp areas:
- Look for condensation on windows or walls.
- Check for mould growth or a musty smell in certain rooms.
- Inspect the walls and floors for water stains or soft spots.
If you spot signs of dampness, addressing this issue can help make your home less appealing to slugs.
Why Do Slugs Appear at Night?
Slugs are nocturnal creatures, which means they are most active at night when the environment is cooler and more humid.
During the day, they hide in dark and damp spaces like under furniture, behind appliances, or even under floorboards. At night, they come out to search for food, leaving behind slimy trails that you might notice the next morning.
How to Get Rid of Slugs in the House Naturally?
If you’re looking for eco-friendly ways to handle the problem, you’re in luck. There are several natural remedies to keep slugs out of your home without resorting to harsh chemicals.
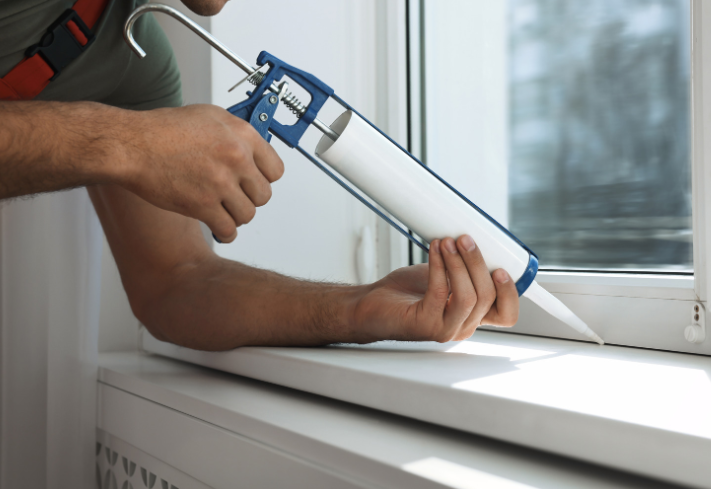
1. Seal Entry Points to Stop Slugs
The first step in getting rid of slugs is to block their access to your home. Slugs can squeeze through the tiniest gaps, so it’s essential to identify and seal these entry points.
Steps to seal entry points:
- Inspect doorways, window frames, and any cracks in walls or skirting boards.
- Use caulk to fill in cracks and gaps.
- Apply weatherstripping under doors to close off larger gaps.
- Install mesh screens on vents and drains to stop slugs from crawling in.
2. Use Natural Slug Deterrents
There are several natural substances that slugs hate. Here are some effective remedies:
- Salt: Create a salt barrier around entry points, but avoid using too much indoors as salt can damage surfaces.
- Copper tape: Slugs dislike copper because it gives them a mild electric shock when they touch it. Stick copper tape around door frames or other entry points.
- Eggshells or coffee grounds: Spread crushed eggshells or used coffee grounds near entry points. The texture is unpleasant for slugs, deterring them from crossing.
3. Create Slug Traps
Another effective way to deal with slugs is to trap them. Here’s how:
- Beer traps: Bury a shallow container (like a jar lid) in the ground and fill it with beer. Slugs are attracted to the smell, fall in, and drown.
- Grapefruit traps: Place an empty grapefruit half upside down in your home. Slugs are drawn to the scent and will gather underneath it overnight. The next morning, you can remove and relocate the slugs.
How to Kill Slugs in the House?
Sometimes, getting rid of slugs may involve killing them. Here are some humane yet effective ways to handle them.
1. Use Salt to Kill Slugs (with Caution)
Salt is one of the most well-known methods for killing slugs, as it dehydrates them upon contact. However, this should only be used as a last resort indoors, as excessive salt can damage your floors or carpets. Sprinkle a small amount directly on the slug or use it sparingly around damp areas.
2. Use Natural Slug Killers
If you don’t want to use salt, there are other natural ways to kill slugs:
- Diatomaceous earth: This natural powder is made from fossilized algae and is abrasive to slugs. Sprinkle it near entry points or on damp surfaces.
- Homemade slug sprays: Mix equal parts water and vinegar in a spray bottle and spray slugs directly. This kills them instantly and is safe to use indoors.
Can Chemicals Be Used Indoors?
While there are slug pellets and chemical solutions available, they’re not ideal for indoor use. These products can be toxic to pets and children. If you choose to use them, ensure they are placed in areas inaccessible to others.
How to Prevent Slugs from Coming Back?
Prevention is key to ensuring that slugs don’t return. Here are some practical tips:
Keep Your Home Dry and Ventilated
Slugs thrive in damp environments, so reducing moisture levels in your home is essential.
- Use dehumidifiers to keep the air dry.
- Fix leaks in pipes, taps, or roofs.
- Improve ventilation in areas prone to dampness, like bathrooms and basements.
Regular Cleaning and Maintenance
Slugs are often drawn to food and organic matter. Keep your home clean by:
- Sweeping or vacuuming floors daily.
- Storing food in sealed containers.
- Cleaning pet food dishes and spills immediately.
Use Physical Barriers Outside Your Home
To stop slugs from even reaching your house, consider setting up physical barriers:
- Spread gravel, sharp sand, or diatomaceous earth around the perimeter of your home.
- Place copper tape or mesh around outdoor pipes and garden areas.
Do Slugs in the House Mean Damp?
Yes, finding slugs in your house is often a sign of damp problems. Slugs are attracted to moisture, so their presence could indicate condensation, leaking pipes, or poor ventilation.
Fixing dampness not only helps prevent slugs but also protects your home from further damage, such as mould or structural decay.
Conclusion
Slugs coming into your house at night can be frustrating, but the good news is that it’s a fixable problem. By understanding why slugs are attracted to your home, addressing dampness, sealing entry points, and using natural remedies, you can effectively keep slugs out.
Remember, prevention is just as important as removal—take proactive steps to create an environment that slugs simply can’t tolerate.
FAQs About Slugs in the House
1. How do slugs get inside my house?
Slugs can enter through tiny gaps, cracks, or under doors. They’re especially drawn to damp areas and food.
2. Are slugs dangerous to humans or pets?
No, slugs are not dangerous. However, they can carry parasites, so avoid direct contact.
3. Why do slugs leave slime trails, and how can I clean them?
Slime trails help slugs move and protect their bodies. Clean them using a mix of warm water and vinegar.
4. Can slugs damage furniture or walls?
While they don’t chew through furniture or walls, their slime can stain surfaces if not cleaned promptly.
5. What should I do if I find slugs in my kitchen or bathroom?
Follow the steps to seal entry points, reduce moisture, and use natural deterrents to remove them.
by Kanimozhi BV | Jan 22, 2025 | Washing Machine, Appliances
An Indesit washing machine is an efficient and reliable appliance that many households in the UK rely on. However, if your machine starts beeping unexpectedly, it can quickly disrupt your laundry routine. Beeping is usually a signal that the machine has detected a problem, such as a blocked filter, a door issue, or a specific error code.
In this guide, I’ll walk you through why your Indesit washing machine is beeping, the meaning behind the beeps, and how you can fix it. Let’s get started!
Why Is My Indesit Washing Machine Beeping?
Indesit washing machines beep to alert you of an issue that requires attention. It’s the machine’s way of communicating that something has gone wrong during the cycle or that there’s an operational error.
Here are the most common reasons Indesit washing machines beep:
- Error codes are displayed on the control panel.
- The door isn’t closing or locking properly.
- The drainage system is blocked (clogged filters or hoses).
- Overloading the drum causes imbalance.
- Water supply issues (low pressure or kinked hoses).
Each of these issues can be resolved by following the steps below.
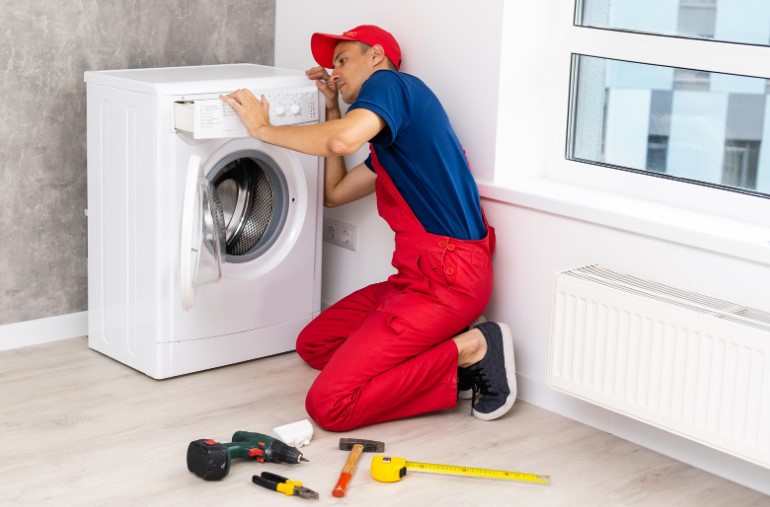
Step-by-Step Guide to Fix an Indesit Washing Machine Beeping
Here’s exactly how to troubleshoot and resolve the beeping on an Indesit washing machine.
Step 1: Check for Error Codes
Indesit washing machines typically display an error code on the control panel when they beep. These codes help identify the specific problem. Below are some common Indesit error codes and their meanings:
| Error Code |
Meaning |
Solution |
| F01 |
Motor failure |
Contact a technician for motor repair. |
| F05 |
Blocked drain or filter |
Clean the drain pump filter and hose. |
| F08 |
Heater fault |
Inspect or replace the heating element. |
| F11 |
Drain pump failure |
Check for clogs in the drain pump or replace it. |
| F13/F21 |
Temperature sensor issue |
Replace the faulty temperature sensor. |
What to Do?
- Look for the error code displayed on the control panel.
- Refer to the Indesit user manual to interpret the code or use the table above.
- Follow the recommended solution for the specific error.

Step 2: Check the Door and Lock Mechanism
A common cause of beeping in Indesit washing machines is an improperly closed door. If the machine detects that the door isn’t securely locked, it won’t start or continue the cycle.
How to Fix?
- Ensure the door is closed firmly. Push it until you hear a click.
- Check for obstructions like clothing, dirt, or detergent residue on the door seal.
- Inspect the door lock mechanism:
- If the door lock is faulty, you may need to replace it. Door lock replacements for Indesit machines are available online and can be installed following the user manual.
- Reset the machine (see Step 6) to clear any lingering door lock errors.
Step 3: Inspect the Drum for Overloading
Indesit washing machines are designed to handle specific load capacities, typically ranging from 7kg to 10kg. Overloading the drum can cause imbalance, triggering a beeping alert.
How to Fix?
- Turn off the machine and unload some items if the drum feels overpacked.
- Distribute the load evenly in the drum.
- Restart the cycle.
Tip: Always check the user manual for your specific model’s load capacity to avoid future overloading.
Step 4: Clean the Filter and Drainage System
One of the most common reasons for beeping in Indesit washing machines is a blocked filter or drain system. If the machine struggles to drain water, it will beep to alert you.
How to Fix?
- Locate the drain pump filter (usually at the bottom front panel of the machine).
- Place a towel or shallow tray underneath to catch water.
- Unscrew the filter and remove any lint, hair, or debris blocking it.
- Check the drain hose for kinks or blockages. Clear any obstructions.
- Reattach the filter and hose, ensuring they’re secured tightly.
Step 5: Check the Water Supply
An Indesit washing machine may beep if it isn’t receiving enough water to function properly. This could be due to a low-pressure issue or a kinked water inlet hose.
How to Fix?
- Make sure the water tap connected to the washing machine is completely open.
- Inspect the water inlet hose for kinks or damage. Straighten or replace it as necessary.
- Check your home’s water pressure. If it’s too low, you may need to consult a plumber.
Step 6: Reset the Washing Machine
Sometimes, the beeping is caused by a temporary glitch in the machine’s control system. Resetting your Indesit washing machine can clear these errors.
How to Reset Your Indesit Washing Machine?
- Switch off the washing machine & unplug it from the power socket.
- Wait for a period of 5 minutes to make the system reset.
- Plug the machine back in and then switch it on.
- Select a short cycle to see if the beeping persists.
Step 7: When to Call a Technician
If the beeping continues even after troubleshooting, the problem may be more serious, such as a motor fault, electronic control board issue, or a defective heating element.
When to Call for Help?
- If error codes like F01, F08, or F11 persist despite resetting and cleaning.
- If you hear unusual noises along with the beeping.
- If the machine won’t start or complete cycles.
Estimated Repair Costs in the UK
- Door lock replacement: £50–£80
- Drain pump repair: £80–£120
- Heating element replacement: £100–£150
Preventing Beeping Issues in Indesit Washing Machines
To avoid future beeping issues, follow these maintenance tips:
- Clean the filter monthly: Remove lint and debris regularly to keep the drainage system clear.
- Avoid overloading the drum: Stick to the manufacturer’s load recommendations.
- Check for leaks or dampness: Fix any water-related issues promptly to prevent further damage.
- Inspect hoses and seals: Replace damaged parts to avoid operational problems.
Conclusion
If your Indesit washing machine is beeping, it’s usually a sign of an error or operational issue that needs your attention. By following the step-by-step guide above, you can resolve most common problems, from blocked filters to door lock errors. Regular maintenance, such as cleaning the filter and avoiding overloading, can prevent these issues in the future.
If the problem persists or error codes indicate a more serious fault, don’t hesitate to contact a professional technician. With proper care and timely repairs, your Indesit washing machine will continue to serve you well.
Related Article: Why Is My Indesit Tumble Dryer Not Heating?
FAQs About Indesit Washing Machine Beeping
1. Why is my Indesit washing machine beeping during the cycle?
This usually indicates an imbalance in the load or a blocked drainage system. Stop the machine, balance the load, and check for blockages.
2. How do I know if the beeping is due to an error code?
Look at the control panel display. Indesit machines usually display an error code along with the beeping.
3. Can I reset my Indesit washing machine to stop the beeping?
Yes. Turn off the machine, unplug it for 5 minutes, and restart it.
4. Why is my washing machine beeping and not draining?
A clogged filter or drain hose is likely causing the issue. Clean both components thoroughly.

by Kanimozhi BV | Jan 21, 2025 | Tumble Dryer, Appliances
When your Indesit tumble dryer stops heating, it disrupts your daily routine. Dryers are essential household appliances, and a sudden malfunction can leave you frustrated with damp clothes piling up. This guide will help you identify the common reasons why your dryer might not be heating and show you step-by-step solutions to fix it. Let’s dive in!
What Are the Common Reasons for an Indesit Tumble Dryer Not Heating?
If your Indesit dryer isn’t heating, it could be caused by a variety of mechanical or maintenance-related issues. Let’s explore the potential causes one by one.

Is the Heating Element Faulty?
The heating element is the core component responsible for producing the heat necessary to dry your clothes. Over time, wear & tear can make it to fail. Here’s how to identify this issue:
What are the Signs of a Faulty Heating Element?
- Dryer runs but produces cold air.
- Clothes remain damp even after a full cycle.
- Visible cracks or breaks in the heating coil when inspected.
What is the Solution To Fix Heating Element?
Check the heating element using a multimeter to test for continuity. If it’s damaged or shows no continuity, you’ll need to replace it. Consult your dryer’s manual to locate the element.
Could the Thermostat Be Malfunctioning?
The thermostat controls the temperature inside your dryer, ensuring that it doesn’t overheat or stay too cold. A faulty thermostat could protect the dryer from heating properly.
How to Identify the Issue in Thermostat?
- Dryer overheats and shuts off prematurely.
- Clothes feel warm but aren’t dry.
What is the Solution To Fix Thermostat?
Test the thermostat with a multimeter. If it’s defective, replace it with a compatible one, as per the manufacturer’s recommendations.
Is the Thermal Fuse Blown?
The thermal fuse is a safety feature designed to prevent overheating. If the dryer becomes too hot, the fuse will blow, cutting off power to the heating system.
What are the Common Signs?
- Dryer doesn’t heat up at all.
- The machine might start but doesn’t complete the drying cycle.
What is the Solution To Fix the Issue?
Locate the thermal fuse (typically near the heating element) and test it for continuity. Replace it if necessary, as blown fuses cannot be repaired.
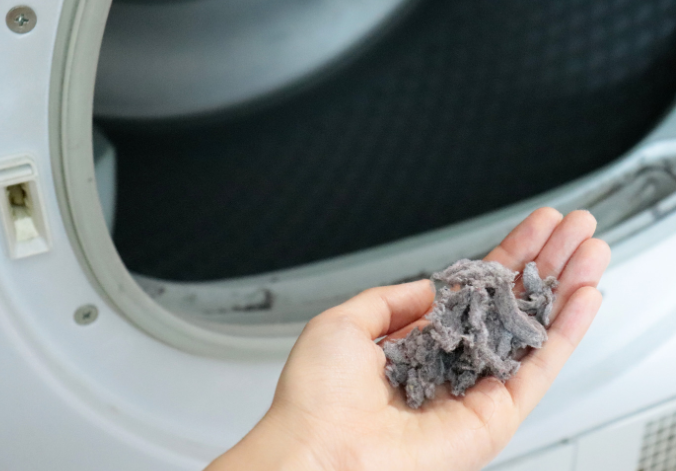
Are the Filters or Vents Clogged?
Lint and debris can easily accumulate in your dryer’s filters and vents, reducing airflow and preventing the dryer from heating properly.
What are the Signs of a Blockage?
- Longer drying times.
- The outer side of the dryer feels hotter than usual.
- A burning smell during operation.
What is the Solution to fix blockage in filters or vents?
Clean the lint filter after every cycle and regularly inspect the exhaust vents for blockages. Use a vacuum or a vent cleaning kit to clear out any debris.
Could Overloading Be the Issue?
Overloading your dryer can strain its components and make it harder for heat to circulate evenly.
How to Identify Overloading?
- Clothes come out damp and tangled.
- The dryer struggles to spin properly.
What is the Solution To Fix Overloading?
Follow the manufacturer’s load capacity guidelines. Break larger loads into smaller batches to allow better airflow and heating.
How to Diagnose and Fix an Indesit Tumble Dryer Not Heating?
Now that you understand the possible causes, let’s go through a step-by-step guide to diagnose and fix the issue.
Step 1: Check the Power Supply
Before diving into complicated repairs, ensure that your dryer is receiving enough power to function.
- Verify the power outlet by testing it with another appliance.
- Make sure the plug is safely inserted & there are no loose connections.
- Check for tripped circuit breakers or blown fuses in your home’s electrical system.
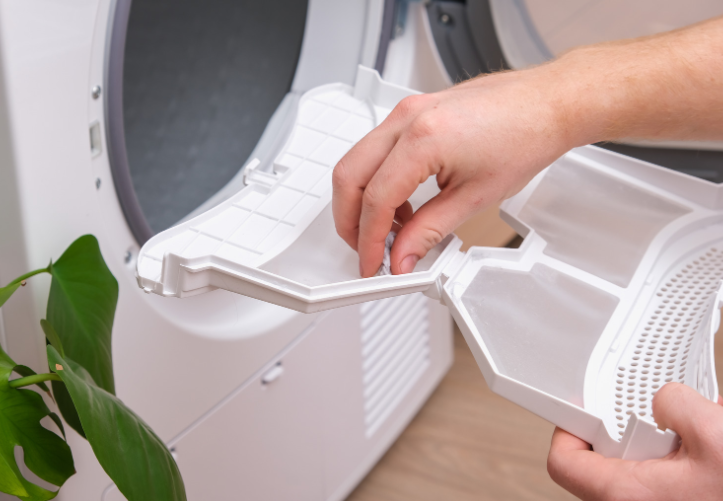
Step 2: Inspect and Clean the Filters
A clogged lint filter or vent can restrict airflow and reduce heating efficiency.
How to Clean the Filter?
- Remove the lint filter from the dryer.
- Brush off lint and rinse the filter under warm water.
- Let it dry completely before reinserting it.
How to Clean the Ventilation System?
- Disconnect the vent hose and remove any debris or lint buildup.
- Reconnect the hose securely.
Step 3: Test the Heating Element
If basic cleaning doesn’t resolve the issue, the heating element might need to be inspected.
How to Test the Heating Element?
- Make use of a multimeter to test the heating element for continuity.
- If it’s broken, replace it with a compatible heating element as recommended by the manufacturer.
Step 4: Examine the Thermostat and Thermal Fuse
Testing the Thermostat:
- Disconnect the wires from the thermostat and test for continuity using a multimeter.
- Replace if it shows no continuity.
Testing the Thermal Fuse:
- Locate the fuse and test it similarly with a multimeter.
- Replace if it’s blown, as a thermal fuse cannot be reset.
Step 5: Seek Professional Help If Needed
If the problem persists despite your efforts, it may be time to contact a professional technician. They can diagnose deeper issues like wiring faults or motor problems. Repair costs for common issues:
- Replacing a heating element: £50–£100.
- Replacing a thermostat: £40–£80.
- Labor charges: £50–£70 per hour.
How Can You Prevent Heating Problems in Your Indesit Dryer?
Prevention is always better than repair. Follow these simple tips to avoid heating problems in the future:
Regular Cleaning and Maintenance
- Clean the lint filter after every use.
- Deep-clean the dryer vents at least twice a year to prevent lint buildup.
Avoid Overloading Your Dryer
Stick to the recommended load sizes. Overloading not only affects performance but also shortens the dryer’s lifespan.
Inspect Your Dryer’s Components Periodically
Schedule routine checks for the heating element, thermostat, and other critical parts. Early detection can save you costly repairs.
Conclusion
If your Indesit tumble dryer not heating, it’s usually caused by a faulty heating element, thermostat, or clogged filters. Fortunately, most of these issues can be resolved with a little troubleshooting and regular maintenance. By following the steps outlined in this guide, you can save both time and money while keeping your dryer in top condition.
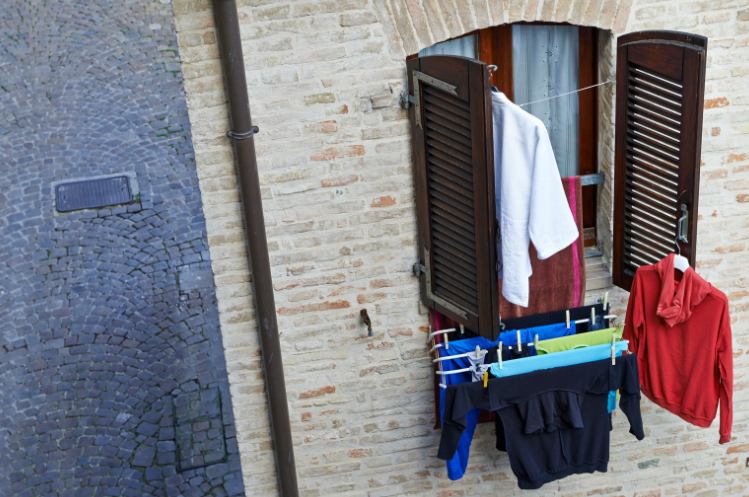
Related Article: How to Dry Clothes Quickly Without a Tumble Dryer?
Remember, routine maintenance and care go a long way in preventing future problems. If the issue persists, don’t hesitate to consult a professional. Keep your dryer running efficiently to enjoy hassle-free laundry days!
FAQs About Indesit Tumble Dryer Heating Problems
1. Why is my dryer running but not heating?
This could be due to a faulty heating element, thermostat, or a blown thermal fuse.
2. How much does it cost to replace a dryer’s heating element?
On average, replacing a heating element costs between £50–£100, excluding labor.
3. Can I use my tumble dryer if it’s not heating?
While you can run it, it won’t dry clothes effectively. It’s best to fix the issue first.
4. How do I reset the thermostat on my Indesit tumble dryer?
Some Indesit models have a reset button near the thermostat. Refer to your user manual for exact instructions.
5. What should I do if my dryer stops mid-cycle?
This could be due to overheating or a tripped thermal fuse. Let the dryer cool down and inspect the components.

by Kanimozhi BV | Jan 9, 2025 | Bedroom, Interior
Are you searching for how much to renovate a bedroom in the UK? Renovating a bedroom can transform your home and increase its value, but understanding the costs involved is crucial to avoid overspending.
Whether you’re planning a simple refresh or a complete overhaul, this guide will walk you through the factors affecting costs, practical budgeting tips, and creative ideas to make your bedroom renovation a success.
What Are The Factors Influencing Bedroom Renovation Costs?
1. Scope of the Renovation
The extent of your renovation plays a significant role in determining the overall cost:
- Basic Renovation (£300–£500 per m²): Includes painting over stairwell and walls, minor repairs, and inexpensive flooring options like laminate or carpet.
- Mid-Range Renovation (£700–£1,000 per m²): Covers upgraded flooring like linoleum in bathroom, built-in wardrobes, and improved lighting.
- High-End Renovation (£1,500+ per m²): Features luxury materials, en-suite additions, and smart home technology.
2. Size of the Bedroom
The larger the bedroom, the higher the renovation costs due to increased material and labour requirements. Renovations are typically priced per square metre, making accurate measurements essential during planning.
3. Regional Variations
Costs differ significantly across the UK. For example:
- Renovation expenses are generally higher in London and the South East.
- Labour and material costs are more affordable in Northern regions.
4. Labour and Professional Services
Hiring professionals like decorators, carpenters, and electricians adds to the cost:
- Decorator fees average £150–£200 per day.
- Electricians charge around £40–£60 per hour for rewiring or lighting installations.
- Custom carpentry for built-in wardrobes can range from £1,000 to £5,000.

How Much to Renovate a Bedroom in the UK?
How Much Does It Cost to Convert a Loft into a Bedroom?
Converting a loft into a bedroom is a popular way to add space and value to your home.
1. Average Cost
Loft conversions typically cost between £20,000 and £50,000, depending on:
- Room size and design complexity.
- Structural modifications, such as adding staircases or reinforcing the roof.
2. Key Expenses
- Insulation: Ensuring proper temperature control costs around £1,000–£2,000.
- Flooring: Laminate or carpet installation ranges from £20–£50 per square metre.
- Lighting: Installing recessed or feature lighting costs £100–£500 per fixture.
3. Planning Permission
Most loft conversions don’t require planning permission if they meet building regulations. However, consult your local council for confirmation to avoid unexpected legal costs.
Cost Breakdown of Common Renovation Elements
1. Painting and Decorating
- Painting or wallpapering walls and ceilings typically costs £10–£20 per square metre, depending on the paint quality and labour charges.
2. Flooring
- Carpet: Budget-friendly and warm, costing £5–£30 per square metre.
- Laminate: Durable and modern, priced at £10–£40 per square metre.
- Hardwood: A premium option costing £30–£100 per square metre.
3. Lighting
- Basic lighting fixtures cost £50–£150 each.
- Decorative or smart lighting solutions can cost £200–£500 per fixture.
4. Furniture and Storage
- Standalone furniture is more affordable, starting at £200 per piece.
- Built-in wardrobes are a bigger investment, ranging from £1,000 to £5,000 depending on customisation.

How to Renovate Your Bedroom on a Tight Budget?
1. DIY Solutions
- Painting: A fresh coat of paint can dramatically transform your space without breaking the bank.
- Furniture Assembly: Assemble flat-pack furniture from stores like IKEA to save on labour costs.
2. Affordable Decor
- Use second-hand stores or online marketplaces to find stylish furniture and decor at a fraction of the price.
- Add throw pillows, curtains, or rugs for an instant update.
3. Cost-Effective Upgrades
4. Shop Smart
- Look for sales at budget-friendly UK retailers like B&M, The Range, and Dunelm.
Additional Expenses to Consider
1. Permits and Regulations
Structural changes or loft conversions may require building permits. Factor in these costs, which can range from £200–£500.
2. Waste Disposal
Removing old materials and renovation debris like wallpaper paste disposal can add £100–£300 to your budget for skip hire or disposal services.
3. Unexpected Repairs
Issues like damp, leaks, or faulty wiring often arise during renovations. Set aside 10–15% of your budget for contingencies.

What Are The Financing Options for Your Renovation?
1. Personal Loans
Personal loans are a popular choice for financing renovations, offering fixed monthly payments and competitive interest rates.
2. Savings Plans
If time allows, save for your project incrementally to avoid debt.
3. Phased Renovations
Spread your renovation over several months or years to manage costs without compromising on quality.
What Are The Affordable Bedroom Renovation Ideas?
- Upcycle Furniture: Sand and repaint old furniture for a fresh, modern look.
- Statement Lighting: Install a stylish chandelier or unique pendant light as a focal point.
- Feature Walls: Add bold wallpaper or a mural to one wall for an affordable, dramatic effect.
- Organised Storage: Use under-bed storage or floating shelves to maximise space without clutter.
Conclusion
Renovating a bedroom in the UK can range from a modest refresh to a complete transformation.
By understanding the factors influencing costs, budgeting carefully, and exploring creative options on how much to renovate a bedroom in the UK, you can achieve the bedroom of your dreams within your budget.
Whether you opt for DIY solutions or hire professionals, thorough planning is the key to success. Start your renovation journey today and enjoy a stylish, comfortable space that reflects your personality.

by Kanimozhi BV | Jan 6, 2025 | Garden, Exterior
A lush, green lawn is a source of pride for any homeowner, but weeds can quickly take over and turn it into an unsightly mess. Whether you’re dealing with dandelions, clover, or creeping buttercups, getting rid of weeds requires the right strategy. This comprehensive guide on how to get rid of a lawn full of weeds uk will walk you through everything you need to know to reclaim your lawn in the UK.
Why Are Weeds Invading Your Lawn?
Weeds are opportunistic plants that thrive when lawns are stressed or poorly maintained. Here are common reasons weeds might overtake your lawn:
- Compacted Soil: Poor soil drainage can create conditions that encourage weed growth.
- Low Grass Density: Thin or patchy grass provides open spaces where weeds can germinate.
- Incorrect Mowing: Cutting grass with lawn mower too short weakens it and allows weeds to take hold.
- Nutrient Deficiency: A lack of nutrients in the soil can give weeds a competitive edge.
Understanding why weeds have taken over helps in selecting the most effective removal and prevention methods.
How to Get Rid of a Lawn Full of Weeds UK? – Techniques To Remove
1. Manual Weed Removal
Manually pulling out weeds is an effective method for smaller infestations.
- Use a weeding tool to extract the entire weed, including its root.
- Best performed after rain or watering, as moist soil makes weed removal easier.

2. Apply Selective Weed Killers
For widespread weed problems, selective weed killers can be highly effective.
- Broadleaf Weed Killers: Target weeds like dandelions and plantains while sparing the grass.
- Granular or Liquid Options: Choose granular weed killers for larger areas and liquid ones for targeted applications.
3. Use Organic Methods
If you prefer natural weed control, consider these eco-friendly solutions:
- Vinegar Spray: Mix vinegar with a few drops of dish soap and apply it directly to the weeds.
- Boiling Water: Pour boiling water over small weeds to kill them instantly.
- Mulching: Cover bare areas with mulch to block sunlight and prevent weed germination.
4. Aerate Your Lawn
Compacted soil often leads to weed growth. Aerating helps loosen the soil and improves nutrient absorption.
- Use a garden fork otherwise an aerator to create tiny holes across the lawn.
- Aeration is best done in spring or autumn for optimal results.
5. Reseed Bare Spots
After removing weeds, reseed bare patches to create a thick turf that prevents weeds from returning.
- Choose grass seed varieties suited to the UK climate.
- Water the reseeded areas regularly to ensure strong growth.
Strongest Weed Killers for UK Lawns
When weeds are persistent, stronger weed killers may be necessary.
- Glyphosate-Based Herbicides: Effective against deep-rooted weeds but must be applied carefully to avoid harming surrounding grass.
- UK-Specific Lawn Weed Killers: Products like Weedol or Resolva are formulated for British lawns and target common broadleaf weeds.

Tip: Always follow the instructions on weed killer packaging and avoid overapplication to protect your lawn.
Get to know more on strongest weed killer that kills everything with our article.
How to Maintain a Weed-Free Lawn
Prevention is the best way to keep your lawn weed-free after treatment.
1. Fertilize Regularly
Healthy grass competes better against weeds. Apply a balanced fertilizer in spring and autumn to nourish your lawn.
2. Mow at the Right Height
Keep your grass at a height of 3.5–4 inches with the right techniques on how to cut grass. This shades the soil, preventing weed seeds from germinating.
3. Water Wisely
Water your lawn completely but infrequently to support the strong root growth. Also to avoid overwatering, as it might create conditions ideal for weeds.
4. Test Your Soil
Check your soil’s pH regularly. A slightly acidic to neutral pH (6.0–7.0) is ideal for grass growth and prevents weed dominance.
5. Apply Pre-Emergent Herbicides
Pre-emergent herbicides prevent weed seeds from sprouting. Use them in early spring to stop weeds before they emerge.

Common Myths About Weed Control
1. Cutting Grass Short Prevents Weeds
Mowing too short weakens the grass and exposes soil to sunlight, encouraging weed growth.
2. All Weeds Should Be Eliminated
Not all weeds are harmful. Some, like clover, can improve soil health by fixing nitrogen. Focus on removing invasive weeds.
3. One Treatment Is Enough
Weed control is an ongoing process. Regular maintenance and follow-up treatments are necessary for long-term success.
Conclusion
Achieving a lush, weed-free lawn in the UK is possible with the right approach. By removing existing weeds, improving soil health, and maintaining a consistent lawn care routine by knowing when to mow grass, you can enjoy a beautiful, green space all year round. Whether you choose manual methods, chemical treatments, or organic solutions, persistence is key. Start today, and your lawn will soon be the pride of the neighborhood!
Frequently Asked Questions
1. What is the fastest way to remove weeds?
The fastest method is to use a selective weed killer during the growing season. For smaller areas, hand-pulling weeds after rainfall is effective.
2. How do I kill weeds without damaging grass?
Use a selective lawn weed killer that targets weeds but spares grass. Alternatively, pull weeds manually to avoid chemical use.
3. Can I reseed after applying weed killer?
Yes, but wait at least 3 weeks after applying weed killer to ensure the chemicals have broken down. This protects new seeds from harm.
4. Are there organic alternatives to chemical weed killers?
Yes, natural options include vinegar sprays, boiling water, and mulching. These methods require consistent application but are eco-friendly.
5. How often should I treat my lawn for weeds?
Treat your lawn at least once a season, depending on the severity of the infestation. Regular inspections help catch weeds early.
