by Kanimozhi BV | Nov 13, 2024 | Garden, DIY Ideas, Exterior
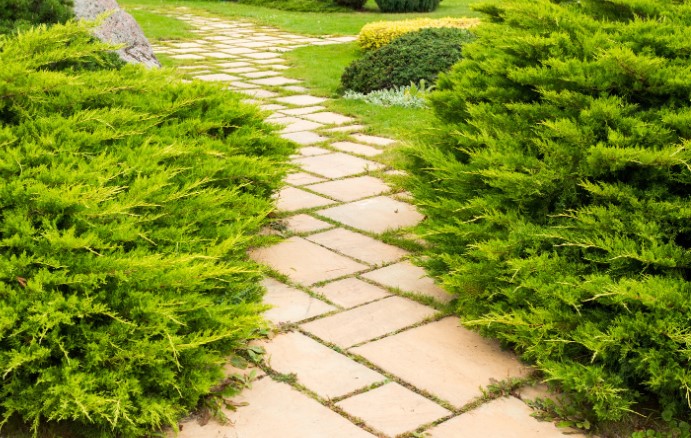
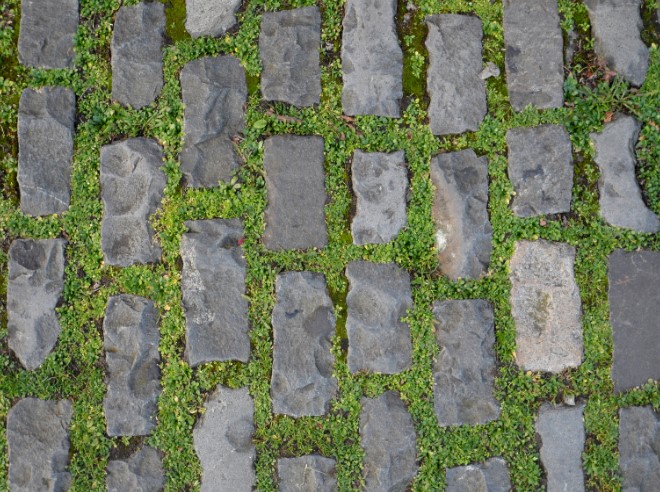
Need tips on how to get rid of grass between paving stones? Keeping a patio or pathway clear of grass growing between paving stones not only enhances the area’s appearance but also reduces maintenance.
Persistent grass can shift pavers, create uneven surfaces, and contribute to a less tidy look. Here’s a comprehensive guide on effective methods to remove and prevent grass between paving stones.
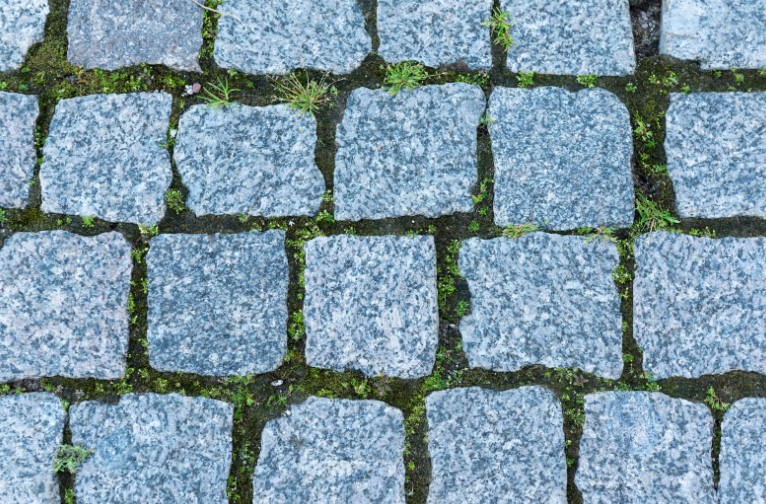
Why Does Grass Grow Between Paving Stones?
Grass often thrives in the spaces between paving stones due to several factors:
- Moisture Accumulation: Moisture trapped in gaps provides an ideal environment for growth.
- Soil and Organic Debris: Soil and decomposed organic matter in these crevices can act as a nutrient base.
- Sunlight and Air Exposure: Paving stones on pathways and patios often receive ample sunlight and air, encouraging grass and weeds to grow.
Controlling this growth not only keeps your patio visually appealing but also extends the longevity of your paving stones by preventing root intrusion.
Various Methods on How To Get Rid of Grass Between Paving Stones
What Are the Best Methods to Remove Grass Between Paving Stones?
Removing grass effectively requires the right approach for your specific setup. Here are four methods to get rid of grass between paving stones, including pros and cons and cost estimates for each.
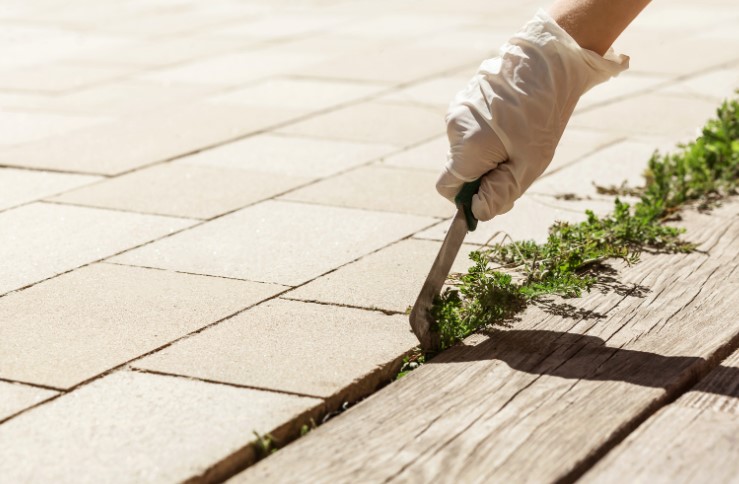
Manual removal is a straightforward way to tackle grass and weeds. Using tools like a weeding knife, joint scraper, or even a narrow screwdriver helps target roots directly for effective extraction.
- Pros: Cost-effective, eco-friendly, and allows precise removal.
- Cons: Time-consuming and physically demanding.
- Estimated Cost: £10–£20 for basic tools.
- Moisten the area to soften soil, making it easier to remove grass from the roots.
- Use the weeding tool to dig and pull out the grass, ensuring you remove as much of the root as possible.
- For persistent roots, scrape along each joint to remove any remaining fragments.
Method 2: Boiling Water Solution
Using boiling water is a simple, eco-friendly way to kill grass. The heat destroys plant cells, effectively killing the grass and its roots.
- Pros: Eco-friendly, very affordable, and free from chemicals.
- Cons: Short-term solution, may need regular application.
- Estimated Cost: Free if you have access to boiling water.
Steps For Boiling Water Solution
- Carefully pour boiling water directly over the grass between the stones.
- Allow the water to seep down to reach the roots.
- Repeat as necessary, especially for persistent growth.
Method 3: Vinegar and Salt Mixture
A homemade vinegar-salt solution is a natural yet effective way to kill grass and weeds between paving stones. Be cautious, though, as it can harm other nearby plants.
- Pros: Affordable, eco-friendly, and quick to prepare.
- Cons: May harm surrounding plants; effectiveness can vary with regrowth.
- Estimated Cost: Around £5–£10.
Steps To Apply Vinegar and Salt Mixture
- Mix one part white vinegar with one part salt in a spray bottle, adding a few drops of dish soap to enhance effectiveness.
- Spray the solution directly on the grass and roots, avoiding contact with other plants.
- Let the solution sit for a day or two and monitor results.
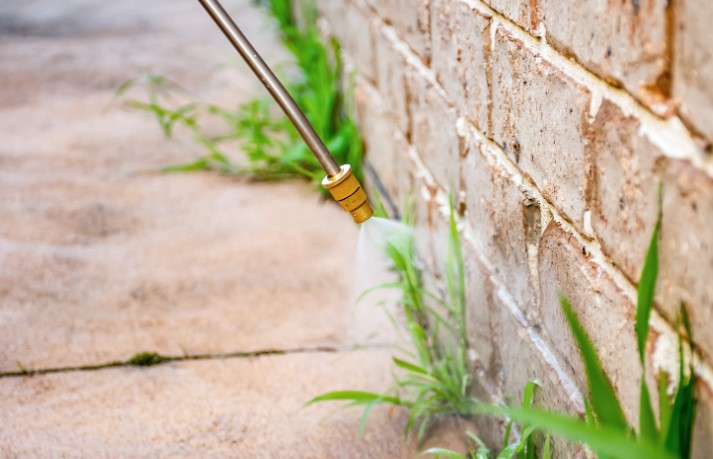
Method 4: Chemical Weed Killers for Paving Stones
Chemical herbicides are powerful solutions as there are strongest weed killers, especially for tough or recurring growth. While effective, this option has environmental considerations.
- Pros: Long-lasting and powerful; useful for extensive or established growth.
- Cons: Potential environmental impact; health risks if not handled carefully.
- Estimated Cost: £10–£30, depending on product and size.
Steps To Apply Chemical Weed Killer For Paving Stones
- Choose a herbicide designed for patio and pathway use.
- Apply carefully to avoid overspray on desirable plants.
- Follow the manufacturer’s safety guidelines closely for best results.
What Tools Are Best for Maintaining Grass-Free Paving Stones?
Equipping yourself with the right tools can simplify paving stone maintenance.
Essential Tools for Patio Maintenance
- Pressure Washer: Removes built-up dirt, moss, and grass.
- Weeding Knife: Helps get into narrow crevices.
- Joint Scraper: Ideal for scraping persistent grass or moss from joints.
- Stiff Broom: Sweeps away soil and organic debris that could promote grass growth.
Using a Pressure Washer for Thorough Cleaning
Pressure washing is an effective way to remove built-up dirt, grass, and other debris.
Tips for effective pressure washing:
- Choose a low to moderate setting to avoid damaging pavers.
- Sweep away loose debris before washing to avoid clogging the pressure washer.
- Move the nozzle evenly over the surface for consistent cleaning.
How Can You Prevent Grass from Growing Between Paving Stones?
Prevention is the best way to minimize maintenance and keep your pavers looking pristine.
Top Prevention Mechanisms for Long-Lasting Results
- Installing a Weed Barrier Under Paving Stones: Placing a weed membrane under pavers blocks grass growth from the roots up. This is most effective for new patios but can be installed under lifted stones in existing patios.
- Filling Gaps with Polymeric Sand or Gravel: Polymeric sand hardens in place after being moistened, creating a strong barrier against weed and grass growth.
Best Solution for Preventing Grass Growth
The best long-term solution combines weed barrier installation with polymeric sand to fill gaps. This approach prevents grass from taking root and stabilizes the stones. For an added layer of protection, consider sealing pavers, which can reduce moisture absorption and further inhibit weed growth.
Summary: Each method offers unique benefits and drawbacks. Manual removal and boiling water are great for quick fixes, while chemical weed killers provide more lasting solutions for persistent growth. For those looking for balance, the vinegar and salt solution offers effectiveness without chemicals.
Conclusion
Keeping paving stones free of grass not only improves aesthetics but also enhances the lifespan of your patio or pathway. Combining manual or chemical removal methods with preventive measures like a weed barrier and polymeric sand filling mentioned in this guide on how to get rid of grass between paving stones, can offer long-term solutions.
With regular maintenance and eco-friendly approaches, you can keep your outdoor spaces clean and welcoming.
Frequently Asked Questions (FAQs)
1. How often should I remove grass between paving stones?
It’s best to remove grass and weeds seasonally or as they appear. Regular maintenance every few months helps prevent regrowth and keeps the area clean.
2. Can I use household bleach to kill grass between pavers?
While bleach can kill grass, it’s generally not recommended due to potential environmental impact and toxicity. Vinegar is a safer alternative.
3. Will polymeric sand completely prevent grass from growing?
Polymeric sand is highly effective at blocking grass, though it may need reapplication in high-traffic areas every couple of years.
4. Is it safe to use a pressure washer on all types of paving stones?
Yes, but it’s advisable to use a moderate pressure setting to avoid damage, especially on softer stone or older pavers.

by Kanimozhi BV | Nov 11, 2024 | DIY Ideas, Interior, Interior Painting, Kitchen
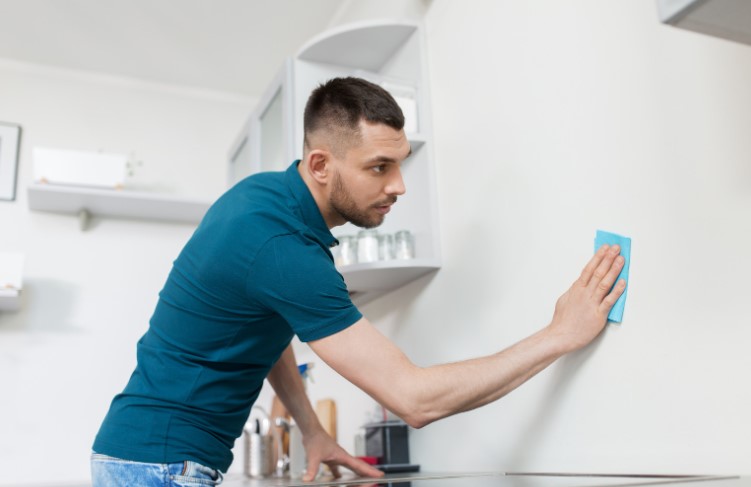
Are you searching for how to remove grease from walls without removing paint? Grease buildup on painted walls, especially in the kitchen, can be difficult to clean without risking damage to the paint. Kitchens are prone to airborne grease that sticks to walls, particularly near stoves and counters.
This guide will walk you through the best methods for removing grease safely, using gentle cleaning solutions that protect your painted surfaces.
Why Does Grease Build Up on Painted Walls?
Grease accumulates on walls mostly due to cooking, as oils and food particles mix with air and settle on nearby surfaces. Without regular cleaning, these layers of grease become sticky, attract dust, and are more challenging to remove.
But using the right techniques and mild cleaning products is key to safely removing these stains and preserving the paint.
How To Remove Grease From Walls Without Removing Paint? – Step by Step Guide
Prepare the Right Supplies for Safe Grease Removal
To effectively remove grease without harming painted walls, gather these gentle cleaning supplies:
- Mild Dish Soap: Excellent for cutting through light grease without leaving residue.
- White Vinegar: Natural and effective at breaking down grease.
- Baking Soda: Adds mild abrasiveness for tackling tough stains.
- Microfiber Cloths: Soft and absorbent, ideal for delicate surfaces.
- Soft Sponge: Great for applying solutions without scratching the paint.
- Optional: A wall-safe degreaser for very stubborn spots.
Using these items helps ensure that you can lift grease without damaging the paint or finish on your walls.
Method 1: Using Dish Soap and Warm Water for Light Grease
Dish soap is effective for cutting through everyday grease, making it ideal for light grease buildup. This method is gentle enough for frequent use on painted walls without affecting the finish.
Instructions:
- Mix 2 – 3 drops of dish soap with warm water.
- Dampen a soft sponge or microfiber cloth with the soapy solution and wring it out so it’s not too wet.
- Gently wipe the greasy spots on the wall, focusing on smaller areas at a time to prevent soaking the paint.
- Rinse with a damp cloth: Use a clean, damp cloth to remove any soap residue.
- Dry with a microfiber cloth to prevent streaks or water spots on the paint.
Using dish soap regularly can help keep grease from building up, preserving the appearance of your walls.
Method 2: White Vinegar Solution for Moderate Grease
White vinegar is a natural degreaser with acidic properties that break down grease while being safe for most painted surfaces. This method works best for moderate grease buildup.
Instructions:
- Dilute vinegar with water: Mix equal parts of white vinegar and water in a spray bottle.
- Spray onto a cloth: Spray the solution directly onto a microfiber cloth instead of the wall to avoid drips.
- Wipe the greasy areas: Use the cloth to gently wipe the greasy spots, applying light pressure on tougher stains.
- Rinse with a damp cloth: Dampen a fresh cloth with water and wipe down the area to remove any vinegar residue.
- Dry with a microfiber cloth to ensure a streak-free finish.
White vinegar is both eco-friendly and effective, making it a good choice for tackling grease safely without damaging painted surfaces.
Method 3: Baking Soda Paste for Tough Grease Stains
For tougher, sticky grease that may be harder to lift, baking soda provides a mild abrasive quality that can break down grease while being gentle on paint.
Instructions:
- Make a paste by combining baking soda with a small amount of water until it’s thick.
- Apply the paste: Use a soft cloth or sponge to spread the paste over the grease spot.
- Scrub gently: Rub in circular motions to loosen the grease, being careful not to scrub too hard.
- Wipe away with a damp cloth: Rinse a cloth with warm water, then wipe away the paste and any grease residue.
- Dry the area with a microfiber cloth to restore the paint’s finish.
Baking soda is excellent for stubborn grease that dish soap and vinegar might not remove, making it a valuable option for deep cleaning.
Additional Tips to Protect Paint While Cleaning Grease
Keeping your paint intact while removing grease requires a gentle approach. Here are a few tips to help protect painted surfaces during cleaning:
- Test on a Small Area First: Try any cleaning solution on a hidden part of the wall to ensure it won’t affect the paint color or finish.
- Use Soft Materials: Microfiber cloths and sponges are less likely to scratch or damage paint compared to rougher materials.
- Avoid Excessive Moisture: Too much water can damage the paint and cause bubbling or peeling, so use minimal water and dry the wall promptly.
Following these tips will help you keep walls grease-free and maintain a smooth, intact paint finish.
Preventing Future Grease Buildup on Walls
Preventing grease from accumulating can save time and effort in future cleanings. Here are a few easy ways to keep grease from settling on your walls:
- Regular Wipe-Downs: After cooking, use a damp microfiber cloth to quickly wipe down walls near cooking areas. This stops grease from hardening.
- Improve Ventilation: Use a range hood or exhaust fan to reduce airborne grease particles, helping minimize the amount that settles on walls.
Regular maintenance goes a long way in keeping walls clean and preventing sticky grease buildup.
Conclusion
Removing grease from painted walls doesn’t have to be a hassle if you use the right methods and gentle cleaning supplies. Dish soap, vinegar, and baking soda are effective solutions that lift grease without harming the paint, and regular maintenance helps prevent buildup.
By following these safe cleaning methods, you can keep your kitchen walls looking clean and fresh without damaging the finish.
FAQs About Grease Removal for Painted Walls
1. Can I use a magic eraser on painted walls?
Magic erasers can be too abrasive and may dull or damage the paint. For best results, use a soft cloth or sponge to protect the paint finish.
2. Is vinegar safe for all types of wall paint?
Diluted vinegar is generally safe, but it’s best to avoid it on untreated or waxed wood. Always test on a small area first to ensure compatibility with your wall’s finish.
3. What should I avoid when cleaning grease off walls?
Avoid using harsh scrubbers or abrasive tools, as these can damage the paint. Also, avoid over-wetting the wall, which can lead to peeling paint.
4. How often should I clean grease from kitchen walls?
A quick weekly wipe-down prevents heavy grease buildup, while a monthly deep clean can help keep walls looking fresh and free of grime.

by Kanimozhi BV | Nov 9, 2024 | Kitchen, Interior
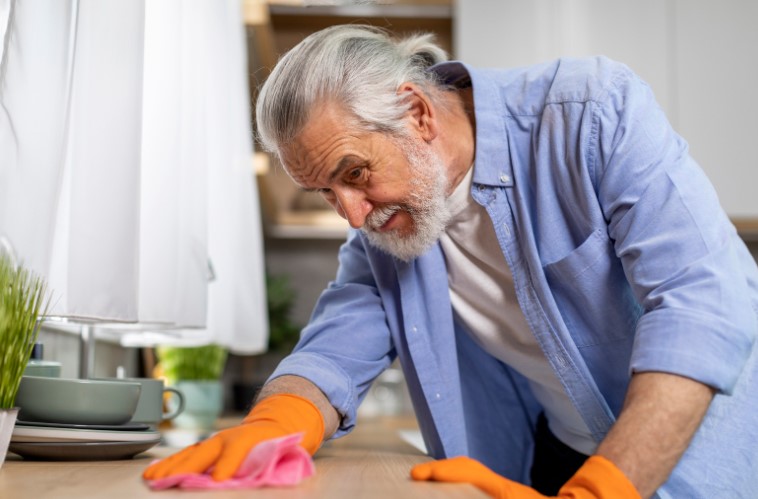
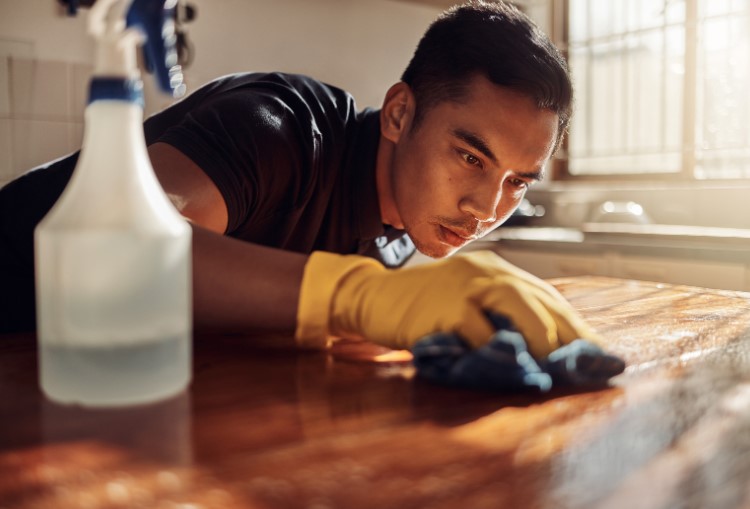
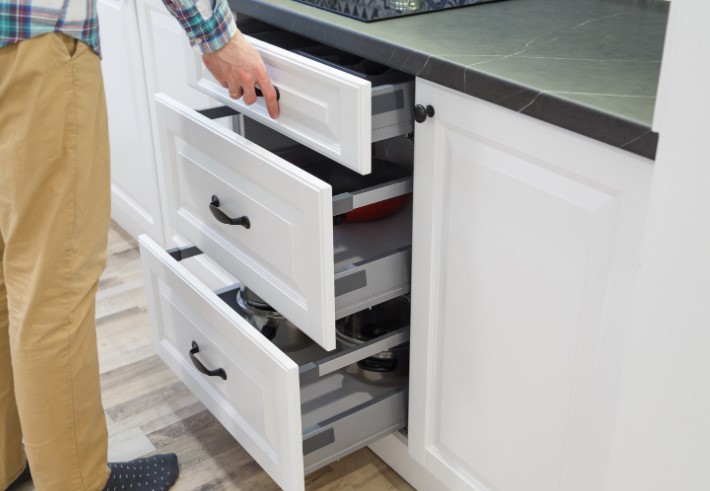
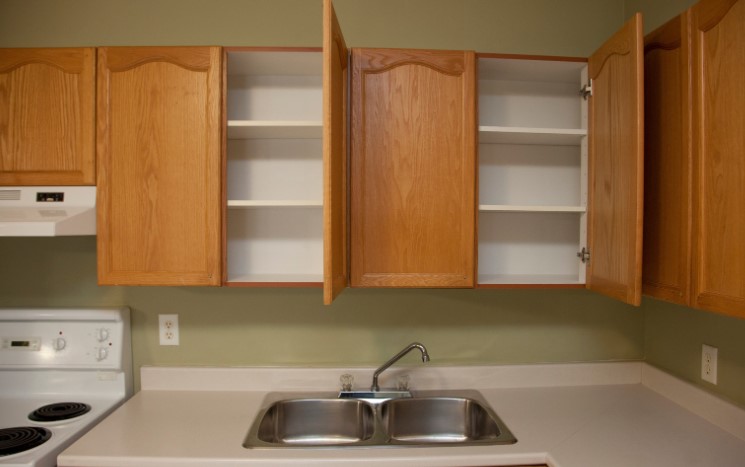
Are you looking for how to remove grease from kitchen cupboards? Grease buildup on kitchen cupboards is a common issue, especially near cooking areas where oils, steam, and food particles settle on surfaces over time.
High-gloss cabinets can be particularly challenging, as they tend to highlight smudges and grease marks.
To keep your cupboards looking their best and ensure a spotless kitchen, here’s a complete guide on safely removing grease from cabinets, including tips for different types of surfaces like wood and high gloss.
Why Do Kitchen Cupboards Accumulate Grease?
In a busy kitchen, grease, steam, and food particles mix and settle onto surfaces like kitchen wall tiles or making cupboards prone to a sticky buildup.
Glossy finishes are especially susceptible because their smooth surface shows every fingerprint, smudge, and grease mark. Regular cleaning is essential for both hygiene and the aesthetics of your kitchen.
Essential Supplies for Grease Removal on High-Gloss Kitchen Cupboards
For safe and effective cleaning of high-gloss cupboards, gather these supplies:
- Dish Soap: Cuts through light grease without leaving residue.
- White Vinegar: A natural degreaser that dissolves grease buildup.
- Baking Soda: Great for scrubbing away stubborn, sticky residue.
- Microfiber Cloth: Helps lift grease without scratching the surface.
- Soft Sponge: Ideal for gentle scrubbing.
- Optional: A non-abrasive, non-corrosive store-bought degreaser for tougher jobs.
These items are safe to use on high-gloss finishes while effectively removing grease and grime.
What Is the Best Grease Remover for Kitchen Cabinets?
There are several effective methods for removing grease from kitchen cabinets, each suited to a specific level of grease buildup.
- Dish Soap and Water: Ideal for light grease and everyday maintenance.
- White Vinegar Solution: Effective for moderate grease and a natural alternative to commercial cleaners.
- Baking Soda Paste: Great for stubborn, sticky residue.
- Store-Bought Degreasers: Useful for heavy buildup; choose non-abrasive options for high gloss.
The best grease remover often depends on the level of buildup. Start with gentle solutions, like dish soap or vinegar, and use stronger cleaners as needed for tougher grease.
How To Remove Grease From Kitchen Cupboards?
Method 1: Dish Soap and Warm Water for Light Grease
Dish soap is excellent for cutting through everyday grease without damaging high-gloss surfaces, making it ideal for routine maintenance.
Instructions:
- Prepare a Solution: Mix a few drops of dish soap into a bowl of warm water.
- Apply to Surface: Dampen a soft sponge or microfiber cloth in the soapy mixture, then wring it out to avoid excess water.
- Wipe Grease Away: Gently clean the greasy areas on the cupboards, moving in light circular motions.
- Rinse: Use a clean, damp cloth to wipe away any soap residue, which helps maintain a clear, streak-free shine.
- Dry the Surface: Dry with a microfiber cloth to prevent streaks.
Using dish soap regularly helps keep cupboards looking fresh and free of grease, maintaining that high-gloss finish over time.
Method 2: White Vinegar as a Natural Degreaser
White vinegar is a great, eco-friendly choice for removing moderate grease buildup. Its acidity breaks down grease quickly without damaging most surfaces.
Instructions:
- Prepare the Solution: Mix equal parts of white vinegar and water in a spray bottle.
- Apply Carefully: Spray the solution onto a microfiber cloth rather than directly onto the cupboard to avoid dripping.
- Wipe the Grease: Use the cloth to wipe greasy spots, focusing on any stubborn patches.
- Rinse with Water: Dampen a fresh cloth with water and wipe down the area to remove any remaining vinegar solution.
Dry Thoroughly: Dry the surface with a microfiber cloth to prevent streaking.
Vinegar’s natural degreasing power makes it an ideal cleaner for glossy finishes, breaking down grease without leaving any residue.
Method 3: Baking Soda Paste for Stubborn, Sticky Grease
For tougher grease that has hardened or become sticky, baking soda’s mild abrasive quality makes it highly effective without scratching surfaces.
Instructions:
- Create a Paste: Mix baking soda with a bit of water until it forms a thick paste.
- Apply to Greasy Areas: Spread the paste over the grease spots using a soft cloth or sponge.
- Scrub Gently: Using circular motions, lightly scrub the area to lift the grease.
- Wipe Clean: Rinse a cloth with warm water and wipe the area to remove any baking soda residue.
- Dry Completely: Finish by drying with a microfiber cloth for a clear, shiny finish.
Baking soda works particularly well on sticky residues that dish soap and vinegar might struggle to remove, making it a valuable tool for deep cleaning.
How Do You Get Tough Grease Off Kitchen Cabinets?
For tough grease, consider combining methods:
- Start with dish soap and water to remove surface grease.
- For tougher spots, apply baking soda paste and let it sit for a few minutes before scrubbing.
- If the grease persists, try a commercial degreaser. Spray onto a cloth and apply carefully, avoiding direct contact with the cabinet to prevent damage.
Avoid abrasive tools to protect your cabinets’ finish.

How Do You Get Greasy Finger Marks Off Kitchen Cupboards?
Finger marks on high-gloss cabinets are common but easy to remove:
- Vinegar solution: Dilute vinegar with water and wipe with a microfiber cloth for streak-free cleaning.
- Dish soap and warm water: A small amount on a damp cloth can remove light grease from fingerprints.
Using a microfiber cloth is key to lifting grease without leaving streaks or smudges.
How Do You Remove Icky Sticky Greasy Gunk from Kitchen Cabinets?
Sticky buildup requires a bit more care. For icky, sticky grease:
- Apply baking soda paste and let it sit for a few minutes.
- Use a damp sponge to scrub gently, loosening the sticky residue.
- Rinse with warm water, then dry with a microfiber cloth to restore shine.
How to Remove Greasy Finger Marks from Wooden Doors?
For wooden surfaces, it’s essential to clean without excess moisture. Here’s how:
- Mix diluted vinegar (equal parts water and vinegar).
- Dampen a cloth lightly with the solution and wipe the finger marks.
- Dry immediately with a soft cloth to maintain the wood’s finish.
This gentle method removes grease without soaking the wood, helping to prevent warping.
Does Mayo Remove White Marks on Wood?
Believe it or not, mayonnaise can sometimes lift white marks from wood caused by moisture. Here’s how to try it:
- Dab a small amount of mayonnaise on the white mark.
- Let it sit for an hour or overnight to allow oils to penetrate the wood.
- Wipe it away with a clean cloth, and buff the area with a dry cloth.
The oils in mayonnaise can help restore the wood’s appearance, though this may not work for all white marks.
Does Vinegar Remove Oil from Wood?
Yes, vinegar can help remove oil from wood, but it should be used carefully. Its natural acidity can break down grease while being gentle on wood when diluted.
How to Use Vinegar Safely?
- Dilute with water to reduce the acidity (1 part vinegar to 1 part water).
- Dampen a soft cloth in the solution and gently wipe the greasy areas.
- Follow up with a dry cloth to restore the wood’s natural shine.
It’s important to dry the wood thoroughly after cleaning to prevent moisture damage.
Preventing Grease Build-Up on Kitchen Cupboards
Preventing grease buildup is key to easier cleaning. Here’s how to keep cabinets grease-free:
- Routine Wipe-Downs: Wipe your cupboards regularly with a damp cloth or vinegar solution to prevent buildup.
- Ventilation: Use a range hood to help capture airborne grease particles.
- Cabinet Liners: Protect shelves and interiors from greasy residue by using cabinet liners.
These habits make it easier to maintain clean and shiny cupboards.
Conclusion
Keeping kitchen cupboards grease-free is simple with the right methods and supplies as similar to removing grease from air fryer basket.
From gentle dish soap to natural solutions like vinegar and baking soda, each method helps maintain your cupboards’ shine and cleanliness.
A regular cleaning routine will keep your kitchen looking spotless, making your cooking space both beautiful and hygienic.
Follow these steps on how to remove grease from kitchen cupboards, to safely removing grease from cabinets.
FAQs About Grease Removal for Kitchen Cupboards
1. Can I use a magic eraser on high-gloss cabinets?
Magic erasers can be too abrasive and may dull high-gloss finishes. For best results, use a soft sponge or microfiber cloth to protect the surface.
2. How often should I clean my kitchen cupboards?
A weekly wipe-down helps prevent grease buildup, and a monthly deep clean can address any tough, sticky spots. Regular cleaning keeps cupboards looking fresh and prolongs their finish.
3. Is vinegar safe for all types of kitchen cabinet finishes?
Diluted vinegar is generally safe for sealed or painted finishes but should be avoided on untreated or waxed wood. Always test on a small area first to ensure compatibility with the surface.
4. What’s the best way to keep cupboards grease-free long term?
Maintaining a grease-free kitchen is easiest with regular cleaning and good ventilation. Keeping a microfiber cloth handy also helps quickly remove any fingerprints or light smudges.

by Kanimozhi BV | Nov 5, 2024 | Interior Painting, Interior, Wall
Need tips on how to treat damp walls before painting? If you’re preparing to paint, dealing with damp walls is essential to ensure a smooth, long-lasting finish.
Ignoring damp can lead to several issues, including peeling paint, mould growth, and even structural damage over time. This guide will walk you through the steps to identify, treat, and prepare damp walls for painting, ensuring a flawless, durable result.
What Causes Damp in Walls?
Understanding what’s causing damp in your walls is the first step toward effective treatment. Dampness can stem from various sources, with each requiring a specific approach for proper treatment.
- Rising Damp: Often due to moisture coming up from the ground, rising damp affects walls close to the floor.
- Penetrating Damp: Caused by water leaking through cracks or gaps, penetrating damp is more common on exterior-facing walls.
- Condensation Damp: Frequently occurs in poorly ventilated rooms like bathrooms and kitchens, where moisture has difficulty escaping.
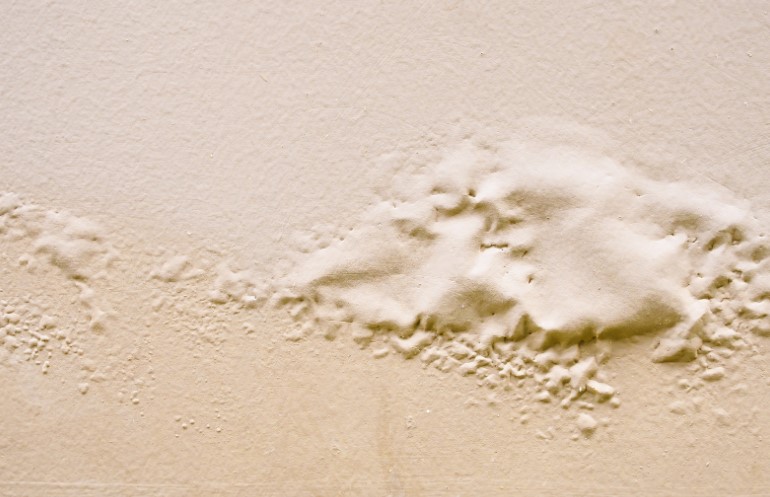
Signs of Damp include discolouration, a musty odour, and peeling paint. You might also notice mould patches or a powdery residue known as efflorescence, both of which are indicators of damp that need to be addressed before painting.

How to Treat Damp Walls Before Painting? – A Step-By-Step Guide
Step 1: Identify the Type of Damp and Source of Moisture
To properly treat damp walls, pinpointing the moisture source is crucial. Here’s how:
Assess the Damp Type:
- Rising Damp: Typically manifests as a horizontal stain line on the wall, usually close to the ground.
- Penetrating Damp: Look for damp patches on external walls or near windows and doors.
- Condensation Damp: Often appears in cold corners of rooms or around windows and mirrors.
Locate the Source of Moisture:
- Use a moisture meter to gauge dampness in the wall.
- Inspect for leaks, such as roof or plumbing leaks, especially in areas near the damp spot.
- Identifying the source will help you determine the right treatment and prevent future damp problems.
Step 2: Drying Out the Damp Wall
Drying out the wall is essential before proceeding with any treatment. Here are a few methods to dry the damp wall effectively:
- Natural Ventilation: Open windows and doors to allow fresh air to circulate, especially on dry days. Using fans can also help air out the room.
- Dehumidifier: Placing a dehumidifier near the damp area can help extract moisture from the walls faster, particularly in closed-off spaces or during damp weather.
Drying Tips:
- Depending on the severity of the damp, drying can take anywhere from a few days to a couple of weeks.
- Check the wall periodically to see if it has fully dried before proceeding to the next step.
Step 3: Treating Damp Walls with Anti-Mould and Anti-Fungal Solutions
Using anti-mould treatments is essential to prevent damp-related issues from returning after painting.
1. Why Use Anti-Mould Treatment?
- Mould and mildew can grow back if not properly treated, affecting both the appearance and durability of your new paint.
2. Applying Anti-Mould Solutions:
- Clean the wall with an anti-mould spray or a solution of diluted bleach (1 part bleach to 3 parts water) to kill any existing mould spores.
- Allow the solution to sit for about 10 minutes, then gently scrub with a sponge or cloth.
Safety Tips: Wear gloves, ensure the room is well-ventilated, and avoid direct contact with bleach or anti-mould products.
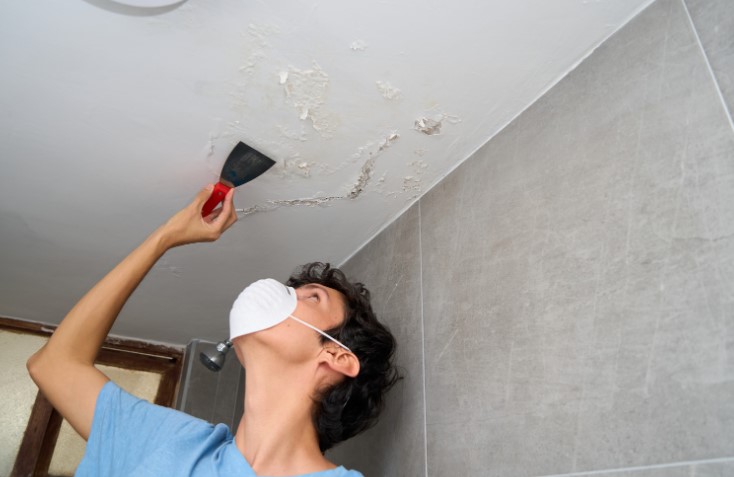
Step 4: Preparing the Damp Wall Surface for Painting
Now that the wall is dry and treated, it’s time to prepare it for painting to ensure a smooth and even finish.
Remove Flaking Paint and Debris
- Initialize by scraping off any loose or peeling paint using a paint scraper. Sand down rough patches and smooth out any uneven areas. This will create a stable base for your primer and paint.
Repairing Cracks and Holes
- If you notice cracks or holes in the wall, fill them with a wall filler or plaster compound. Allow it to dry and sand it down until the surface is even with the wall. Proper repair is crucial as it prevents water from seeping back in.
Applying a Damp-Resistant Primer or Sealer
Using a damp-resistant primer is essential in creating a barrier against moisture, protecting both the wall and the paint. Here’s how to apply it:
- Apply a Thin Coat: Use a brush or roller to apply a coat of moisture-resistant primer to the wall.
- Allow to Dry: Follow the manufacturer’s drying instructions, typically 4–6 hours.
- Inspect for Coverage: Ensure the entire wall is coated evenly to prevent any moisture infiltration.
This step seals the wall, ensuring your paint will adhere smoothly and stay vibrant over time.
Best Paint Options for Previously Damp Walls
Choosing the right paint can further protect against damp issues. Here are a few options:
- Moisture-Resistant Paint: Formulated to resist water penetration, making it ideal for damp-prone areas like kitchens and bathrooms.
- Anti-Mould Paint: Contains fungicides that prevent mould growth and help maintain a fresh look over time.
- Anti-Condensation Paint: This paint can reduce moisture buildup and help prevent condensation damp in humid areas.
Each of these paints offers added protection and is ideal for treating walls that have had past moisture problems.
Summary of Wall Treatment Steps and Recommended Products
| Treatment Step |
Purpose |
Recommended Products |
| Identify and Dry Damp |
Locate and remove moisture source |
Dehumidifier, moisture meter |
| Anti-Mould Treatment |
Prevents mould and mildew |
Anti-mould spray, diluted bleach |
| Surface Preparation |
Smooths surface for even paint |
Sandpaper, wall filler |
| Damp-Resistant Primer Application |
Protects paint from future moisture |
Moisture-resistant primer |
Conclusion
Treating damp walls before painting may require a bit of extra time, but it’s essential for a professional-looking, long-lasting paint job.
By following the guidelines on how to treat damp walls before painting and by identifying the cause, drying the wall thoroughly, and using anti-mould treatments and a good primer, you’ll ensure that your freshly painted walls stay smooth, vibrant, and damp-free.
Remember to check walls periodically, especially in moisture-prone areas, to keep them in top condition.
FAQs About Treating Damp Walls
1. How long should I wait to paint after treating damp walls?
Allow walls to dry completely before painting, which can take a few days to weeks, depending on the level of dampness. Make sure all primer and treatments are fully set before painting.
2. What’s the best way to tell if my wall is still damp?
You can use a moisture meter to check for dampness or touch the wall to see if it feels cold or moist. If there are any signs of lingering moisture, wait longer to avoid compromising the paint finish.
3. Can I use regular paint after treating a damp wall?
While you can use regular paint, choosing a moisture-resistant or anti-mould paint will provide better long-term results and prevent future damp-related issues.
4. How can I prevent dampness from returning after painting?
Ensure that you have identified and resolved the source of moisture, whether it’s leaks or poor ventilation. Additionally, using damp-resistant paint or anti-mould treatments will help protect the wall in the future.
by Kanimozhi BV | Nov 4, 2024 | Kitchen, DIY Ideas, Interior
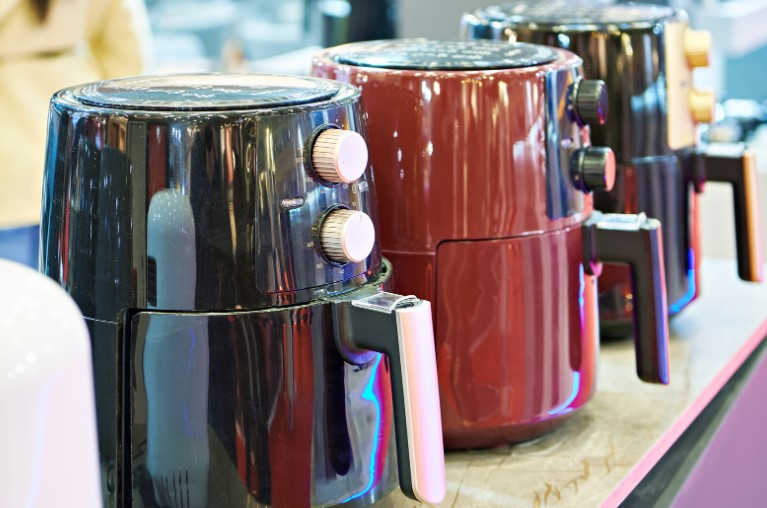
Are you looking for how to clean grease from air fryer basket? Keeping your air fryer in good condition is key to enjoying healthier and tastier meals while also maintaining its performance.
Over time, grease and food residues can build up on the basket and even grease build up on the kitchen cabinets & gas grill, which can lead to unwanted odours similar to burnt smells in rooms, affect cooking efficiency, and even leave residue in your meals.
In this guide, I’ll show you how to remove stubborn grease step-by-step and share tips on maintaining a spotless air fryer basket for longer-lasting results.
How Often Should You Clean Your Air Fryer Basket?
The frequency of cleaning depends on how often you use your air fryer and the types of food you cook. For good hygiene and best performance:
- Light Clean After Every Use: Wipe down or do a quick wash of the basket and pan after each use to remove any leftover food particles or oils.
- Deep Clean Weekly: If you use your air fryer several times a week, consider doing a more thorough clean at least once weekly to avoid any baked-on grease or food residues.
Cleaning regularly can save you from dealing with difficult grease later on, keeping your air fryer running smoothly and enhancing the flavours in your food.
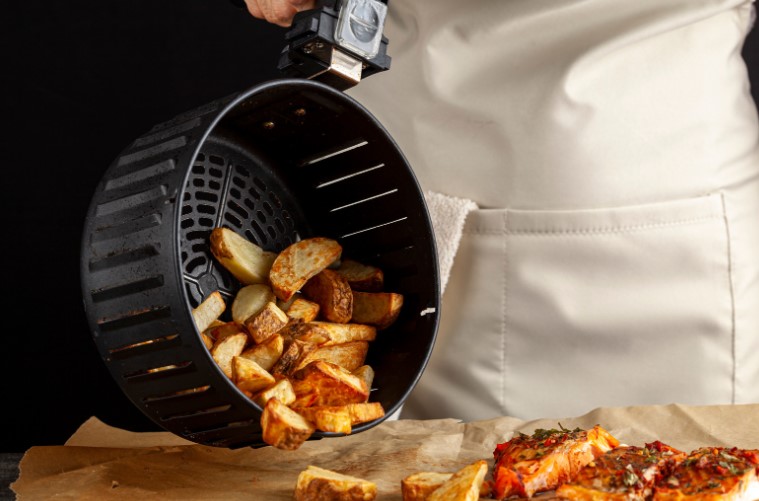
Why Does Grease Buildup in the Air Fryer Basket?
Air fryers work by circulating hot air, which can cause grease, oils, and small food particles to stick to the basket, especially at high temperatures. With repeated use, grease can harden on surfaces, making it challenging to remove with just a quick rinse.
This buildup not only makes cleaning harder over time but can also affect the quality of your food and the efficiency of your air fryer.
Step By Step Guide On How to Clean Grease from Air Fryer Basket
Step 1: Gather Your Cleaning Supplies
Before you start cleaning, gather these essential supplies to make the process quick and effective:
- Mild Dish Soap: Helps to break down light grease without damaging the basket’s surface.
- Baking Soda: Naturally abrasive, perfect for tackling stubborn, baked-on grease.
- White Vinegar: A powerful, natural degreaser that also eliminates odours.
- Soft-Bristle Brush or Sponge: Ideal for scrubbing without scratching non-stick surfaces.
- Microfiber Cloth: For drying and polishing to avoid water spots and streaks.
Having these items on hand will ensure that you can tackle any level of grease buildup without damaging your air fryer.
Step 2: Pre-Soak the Air Fryer Basket
To start, remove the basket from the air fryer and give it a quick rinse to remove loose crumbs. Next:
- Fill a Sink with Hot, Soapy Water: Use mild dish soap and hot water to help break down oils.
- Submerge the Basket and Pan: Allow them to soak for 10–15 minutes. This will soften any hardened grease and make scrubbing easier.
- Rinse Lightly: After soaking, give them a quick rinse to remove any loose grease.
Soaking is a simple way to reduce scrubbing time and ensure a cleaner basket.
Step 3: Apply Baking Soda and Vinegar for Stubborn Grease
For areas with heavy grease buildup, baking soda and vinegar work wonders. Here’s how to use them effectively:
- Sprinkle Baking Soda Over Greasy Areas: After soaking, sprinkle baking soda on the areas with the most stubborn grease.
- Spray or Dab with Vinegar: Add white vinegar to the baking soda, letting it bubble. This reaction helps break down tough, baked-on grease.
- Let it Sit: Allow the mixture to sit for 5–10 minutes to work on the grease.
- Gently Scrub: Using a soft-bristle brush or non-abrasive sponge, scrub the basket. Avoid using steel wool or any abrasive scrubbing pads, as they can scratch and damage the basket’s surface.
Baking soda and vinegar are excellent natural cleaners that make grease removal easy without needing harsh chemicals.
Step 4: Scrub and Remove Remaining Grease Residue
If there’s still residual grease, a gentle but thorough scrubbing is essential. Here’s how to finish off any remaining residue:
- Focus on Stubborn Spots: For any areas with hardened grease, continue scrubbing with the baking soda and vinegar mixture.
- Avoid Abrasive Tools: Avoid steel wool or harsh scrubbing tools, which can scratch or strip the basket’s coating.
- Rinse with Warm Water: Once you’re satisfied, rinse the basket thoroughly with warm water to remove any cleaning residues.
If grease persists after multiple cleanings, it may be a sign of neglect, and more frequent maintenance will help prevent it in the future.
Step 5: Rinse and Dry the Basket Properly
Once the grease has been removed, it’s important to rinse and dry the basket thoroughly:
- Rinse with Clean, Warm Water: Ensure all soap, baking soda, and vinegar are rinsed away to avoid leaving residues on the basket.
- Dry Completely: Use a microfiber cloth to dry the basket, or place it on a rack to air dry. Microfiber cloths help prevent water spots and leave the basket shiny.
Leaving your air fryer basket to dry completely is essential, as residual moisture can encourage rust or streaks, especially on stainless steel parts.
Tips for Keeping Your Air Fryer Basket Clean Longer
To make cleaning easier and prevent grease buildup, consider adopting a few maintenance habits:
- Quick Clean After Each Use: A quick rinse or wipe-down prevents grease from hardening.
- Use Baking Paper or Liners: These can reduce the amount of food and grease that comes in contact with the basket, making it easier to clean.
- Avoid Overloading: Cooking too much at once can increase splattering, so try to avoid overfilling the basket.
Incorporating these habits will keep your air fryer in top condition and make regular cleaning a breeze.
Common Cleaning Mistakes to Avoid
When cleaning your air fryer, avoid these common pitfalls:
- Using Abrasive Tools: Avoid steel wool or rough scouring pads that can scratch the non-stick coating.
- Skipping Regular Cleaning: Regular cleaning makes deep cleaning quicker and prevents stubborn buildup.
- Soaking Too Long: Prolonged soaking, especially with vinegar, can cause wear on certain parts, so stick to recommended soak times.
Following these tips will help maintain the quality and functionality of your air fryer basket over time.
Essential Cleaning Supplies for Air Fryer Basket
| Cleaning Item |
Purpose |
Benefit |
| Mild dish soap |
General grease removal |
Gentle on surfaces |
| Baking soda |
Tackles stubborn grease |
Non-abrasive |
| White vinegar |
Dissolves grease and odours |
Natural and effective degreaser |
| Soft-bristle brush |
Scrubbing without scratching |
Safe for non-stick surfaces |
| Microfiber cloth |
Drying and polishing |
Prevents water spots |
Conclusion
Keeping your air fryer basket clean is straightforward with the right tools and routine. By following these steps and tips on how to clean grease from air fryer basket, you’ll ensure your air fryer remains efficient and safe to use, delivering delicious, healthy meals every time.
Regular maintenance can go a long way toward preventing stubborn grease buildup and preserving the appliance’s quality over time.
FAQs About Air Fryer Basket Cleaning
1. Can I put my air fryer basket in the dishwasher?
Many air fryer baskets are dishwasher safe, but it’s best to check the manufacturer’s instructions to avoid damaging the coating.
2. What if my air fryer basket has burnt-on residue?
Use the baking soda and vinegar method for burnt-on residue, and soak it longer if needed to loosen the burn marks.
3. How often should I clean my air fryer basket?
Ideally, after every use with a deep clean once a week, depending on frequency and type of use.
4. Are there any cleaners to avoid for my air fryer?
Avoid using harsh chemicals, bleach, or abrasive powders as they can damage the coating on your basket.
