
by Kanimozhi BV | Oct 26, 2024 | Pest Control, Bedroom, DIY Ideas, Interior
Are you looking for how to get rid of bed bugs in a mattress? Bed bugs are persistent and unwelcome pests that commonly hide in mattresses, bedding, and surrounding furniture.
They spread easily and can be challenging to remove, especially as they can hide in even the smallest crevices. If you’re facing an infestation, a thorough, step-by-step approach can help manage and eventually eliminate bed bugs.
This guide provides effective DIY strategies for removing bed bugs from a mattress and preventing future infestations and avoiding to take the mattress to the tip, helping you reclaim your bed for a good night’s sleep.
How Can You Tell If There Are Bed Bugs in Your Mattress?
The first step is identifying the problem accurately to ensure the right approach.
Signs of Infestation
Common signs of bed bugs include small, red bites on exposed skin that often appear in clusters or lines, usually in the morning.
You may also notice small brown or black stains on your bedding, which could be from their droppings or blood spots left after feeding.
Additionally, bed bugs release a musty, distinctive odor from their scent glands that may become noticeable in an infested area.
Inspecting a Mattress Thoroughly
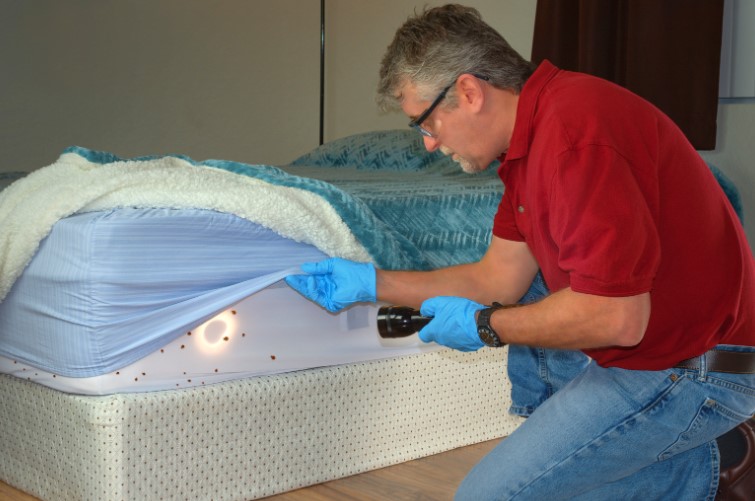
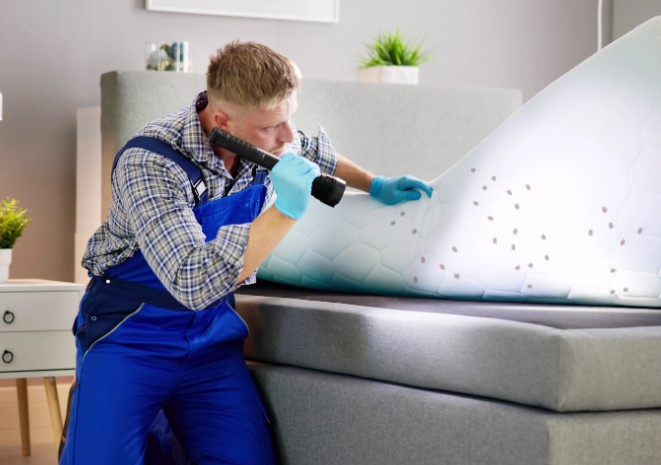
For a complete inspection, use a flashlight to examine the seams, folds, and crevices of your mattress, bed frame, and nearby furniture.
Check carefully in these areas, as bed bugs tend to hide in narrow gaps. Use a flat tool, like a credit card, to reach into tight spots, and make note of any signs of bed bugs or eggs in these locations.
Best DIY Methods to Get Rid of Bed Bugs in a Mattress
Once you’ve identified bed bugs, it’s time to apply these DIY methods to remove them effectively.
Strip and Wash All Bedding and Linens
Start by removing all bedding, including pillowcases, sheets, mattress protectors, and any nearby soft items. Wash everything in hot water (60°C or higher), as the high temperature kills bed bugs and their eggs.
Then tumble dry the items on the highest heat setting for at least 30 minutes to ensure any remaining pests are eliminated.
Vacuum the Mattress and Surroundings
Use a vacuum cleaner with a crevice attachment to clean your entire mattress thoroughly, focusing on seams, folds, and edges. Vacuum the bed frame, headboard, and surrounding areas, as bed bugs often spread beyond the mattress.
After vacuuming, dispose of the vacuum bag by sealing it in a plastic bag and placing it in an outdoor bin, as bed bugs can survive in the bag.
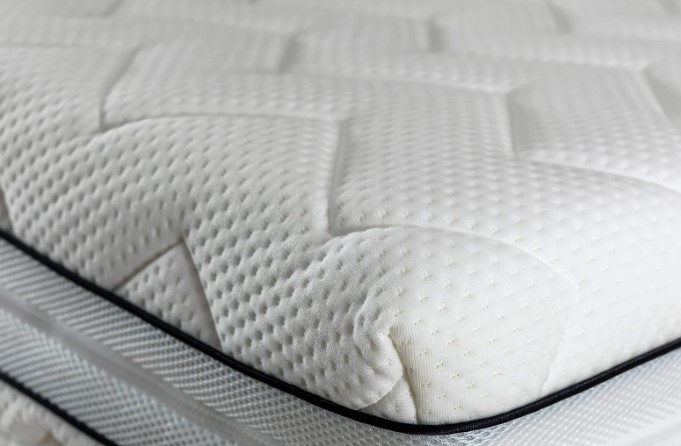
Using a steam cleaner is highly effective for killing bed bugs and their eggs, as they cannot survive at temperatures above 130°F (55°C).
Focus the steam nozzle on mattress seams, edges, and crevices to reach deep into areas where bed bugs may hide. Be mindful not to oversaturate the mattress, especially with foam materials, as too much moisture can lead to mold.
Use Mattress Encasements
After treatment, encase the mattress in a specially designed bed bug-proof cover. These encasements trap any remaining bed bugs inside, eventually starving them, while preventing new infestations.
They also simplify future inspections and cleaning efforts, reducing potential hiding places for bed bugs.
Place Items in Freezer or Use Heat Treatments
For smaller items that can’t be machine-washed, freezing can be a safe and effective option. Place these items in a freezer set to -17°C for at least four days to kill any bed bugs present.
For items that can handle high temperatures, you can also use portable heating devices. Both freezing and heating are effective but require the items to stay at these temperatures long enough to ensure complete elimination.
What Are The Additional Tips to Keep Bed Bugs Away?
Preventing a recurrence is essential to maintaining a bed bug-free home.
Regular Cleaning and Vacuuming Routine
Implement a routine of vacuuming your mattress, bed frame, and surrounding furniture once a week. Regular cleaning helps remove stray bed bugs and eggs, preventing them from establishing a larger infestation.
Declutter and Seal Cracks Around the Bed Area
Minimize clutter around the bed to reduce hiding spots for bed bugs. Additionally, check for cracks in the bed frame, baseboards, and nearby walls, sealing any gaps you find.
This reduces pathways for bed bugs to spread around your home and lowers the chances of a larger infestation.
Avoid Bringing Bed Bugs Back from Travel
To reduce the risk of bringing bed bugs into your home, inspect your luggage and clothing after returning from travel, especially if you’ve stayed in a hotel.
Keep luggage off the bed, using luggage racks instead, and wash clothes immediately upon returning home to eliminate any potential hitchhikers.
When Should You Consider Professional Help To Remove Bed Bugs?
While these DIY methods can be effective for small infestations, larger or persistent infestations often require professional assistance.
Signs of a severe infestation include extensive staining, bites across multiple areas of the body, or bugs appearing in other rooms.
Professional pest control services can employ heat treatments and specialized insecticides to fully eradicate bed bugs, which may be necessary in more established cases.
Conclusion
Removing bed bugs from your mattress requires a diligent, step-by-step approach. By following these DIY methods—stripping bedding, vacuuming, steam cleaning, using encasements, and controlling clutter—you can effectively manage and eliminate a bed bug infestation.
With these strategies on how to get rid of bed bugs in a mattress, you’ll be better equipped to restore your bed and ensure a good night’s sleep.
FAQs On How To Get Rid Of Bed Bugs In a Mattress – Smart DIY Ideas
1. Can I get rid of bed bugs without professional help?
Yes, small infestations can often be managed with diligent DIY treatments like washing bedding in hot water, vacuuming the mattress and surrounding area, using steam, and applying mattress encasements.
However, for extensive infestations, professional assistance may be more effective.
2. How do I know if my bed bugs are gone?
To confirm bed bugs are eliminated, monitor for signs over several weeks. Check for bites, inspect bedding for stains, and observe mattress seams for any live bugs or eggs.
If no signs reappear, the infestation is likely resolved.
3. Will bed bugs come back after treatment?
If all eggs and bugs are removed during treatment, bed bugs shouldn’t return. To prevent reinfestation, keep up with regular cleaning, reduce clutter, and inspect luggage and clothing after travel.

by Kanimozhi BV | Oct 25, 2024 | Garden, Exterior
Hebe plants are popular in UK gardens for their year-round evergreen foliage and bright flowers, which range from purple and pink to white. Although Hebes are generally hardy, the UK’s winters can bring frost and low temperatures that may challenge these plants.
Hebes, particularly the less hardy varieties, can suffer from winter damage and may even appear dead as they undergo dormancy or dieback due to frost exposure.
This guide will answer on do hebes die back in winter and help you understand how Hebes respond to winter and offers practical advice on protecting and reviving them if frost damage occurs.
Do Hebes Die Back in Winter?
Hebes are native to New Zealand and thrive in milder climates. Although many varieties have adapted well to the UK’s climate, harsh winter conditions can sometimes result in frost damage or dieback.
When temperatures drop significantly, Hebes often go dormant, appearing brown and lifeless on the surface. In severe cases, however, frost damage can actually kill off parts of the plant as well as it can kill the grass, particularly new shoots and tender stems.
While hardy varieties like Hebe rakaiensis and Hebe albicans are generally more resilient, even they may experience partial dieback during extremely cold spells.
Most of the time, Hebes will recover come spring, but severe frost can cause extensive damage that requires careful attention to promote full recovery.
How to Identify Frost Damage on Hebes?
Distinguishing between dormancy and frost damage is essential to know whether your Hebe needs immediate care or simple patience.
Signs of Frost Damage vs. Dormancy
- Frost-damaged Hebes exhibit specific symptoms, including discolored leaves that turn brown or black, mushy or soggy stems, wilting, and sometimes bark splitting on the main stems.
- These symptoms indicate more severe damage than simple winter dormancy, where leaves may just lose color slightly or drop but the stems remain firm.
Checking for Life Signs
- To check if your Hebe is still alive, scratch the bark with a small knife or your fingernail to reveal the underlying wood.
- If you find green tissue underneath, your Hebe is still alive. Brown tissue, however, indicates dead wood, meaning that part of the stem may not regrow and might need pruning in spring.

Can Hebes Survive UK Winters?
Hebes can survive most UK winters, but their hardiness varies by variety and environmental factors.
Hardy vs. Tender Varieties
- Some varieties like Hebe ‘Midsummer Beauty’ and Hebe Pagei are known for their hardiness and can withstand moderate frost.
- However, tender varieties or those grown in colder inland areas may be at higher risk of frost damage and will benefit from extra protection.
Regional Impact
- Hebes in coastal or southern UK regions typically fare better in winter than those in colder inland areas.
- Coastal areas, buffered by the sea, usually have milder winters, making it easier for Hebes to survive.
Protecting Hebes from Winter Frosts
Preventing frost damage is often easier than attempting to repair it. Here are some effective methods:
Where to Plant Hebes for Winter Protection?
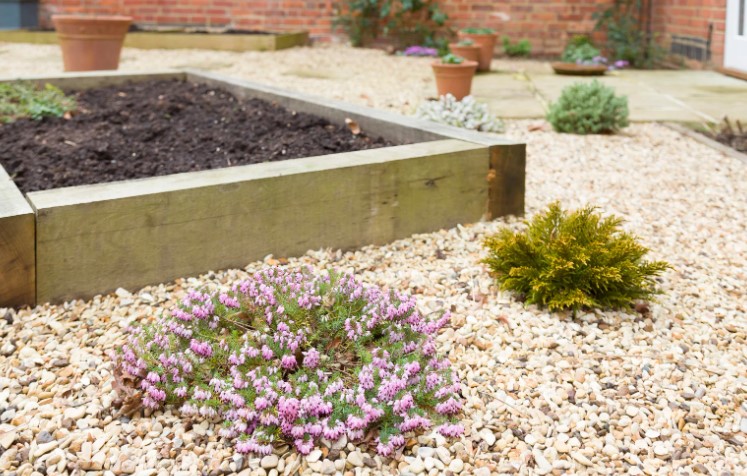
Planting your Hebes in a sheltered spot, away from direct wind and frost pockets, provides natural protection against winter stress.
Choose a location with partial shade, as full sun in winter isn’t necessary and can even worsen frost damage by causing temperature fluctuations. Growing Hebes near walls or in areas with other foliage around can create a natural windbreak.
Mulching and Covering for Extra Insulation
Adding a layer of mulch around the roots of your Hebe will protect the root zone from frost penetration. Use organic mulch like bark, straw, or compost to insulate the soil and retain warmth.
On extremely cold nights, covering the plant with a frost blanket or horticultural fleece will further protect the stems and leaves. Be sure to remove the cover in the morning to allow air circulation.
Moving Potted Hebes Indoors
If your Hebe is potted, consider relocating it indoors or into an unheated greenhouse where it’s shielded from harsh weather. Placing pots against the south-facing side of a building provides additional warmth and helps minimize frost exposure.
If bringing pots indoors isn’t feasible, grouping them together and insulating them with bubble wrap or fleece around the containers can help retain heat.
What to Do If Your Hebe Suffers Frost Damage?
When frost damage is unavoidable, taking the right steps to recover your Hebe is crucial.
Wait Until Spring to Prune
Winter-damaged Hebes should not be pruned until after the last frost. Premature pruning can expose healthy tissue to further frost, worsening the damage.
Waiting until spring gives the plant a chance to naturally recover and minimizes the risk of cutting into live tissue.
Pruning Damaged Stems Safely
Once warmer weather arrives and new growth starts appearing, prune back dead or frost-damaged stems to just above a healthy bud or green tissue.
Avoid cutting into old, woody sections, as this may hinder regrowth. For more significant damage, consider reshaping the plant by removing a few inches of growth evenly across the shrub to maintain its natural shape.
Supporting Recovery with Nutrients
As your Hebe begins to recover, supporting it with nutrients can stimulate new growth.
- Slow-Release Fertilizers: Apply a slow-release, balanced fertilizer around the plant base in early spring, or use a general-purpose feed that encourages steady, healthy growth.
- Avoid High-Nitrogen Products: Too much nitrogen can promote soft, frost-sensitive growth that’s vulnerable in the next winter. Instead, focus on balanced or slightly phosphorus-rich fertilizers to strengthen root development and support flower production.
How Long Does Hebe Recovery Take?
The time needed for your Hebe to fully recover depends on the extent of frost damage, the variety, and the care it receives. In most cases, new shoots and leaves should start appearing by late spring.
Mildly damaged Hebes will likely make a full comeback within one season, but more severely damaged plants may take up to a year to fully regrow.
Regular inspection and care are crucial; removing weeds, watering during dry spells, and checking for pests will further support your Hebe’s health as it recuperates.
Recovery may be slower for older plants or those that have been subjected to multiple years of frost damage.

Conclusion
While Hebes can experience dieback during harsh UK winters, understanding their natural behavior and knowing how to protect and revive them can keep these plants healthy year-round.
With preventive care like mulching, covering, and strategic pruning, most Hebes can survive frost and even bounce back stronger in spring.
By applying the tips in this guide, you’ll be well-equipped to care for your Hebes through winter’s chill and enjoy their vibrant blooms come the warmer months.
Frequently Asked Questions
1. Can Hebes grow back after severe frost damage?
Yes, many Hebes can recover from frost damage, especially if new shoots remain viable below the frost-damaged area. After the last frost, prune back dead stems to encourage fresh growth. However, heavily damaged stems or branches may not regrow if the plant’s base is affected.
2. What is the best time to prune Hebes after winter damage?
It’s best to wait until spring, after the last frost, before pruning frost-damaged Hebes. Pruning earlier can expose new growth to further frost, which can worsen the damage. Spring pruning also allows you to remove dead wood without impacting live tissue.
3. Are there specific Hebe varieties more resilient to UK winters?
Yes, some Hebe varieties are naturally more hardy, including Hebe rakaiensis, Hebe albicans, and Hebe Red Edge. These varieties are generally better suited to withstand UK winters, especially in coastal or southern regions where winters are milder.

by Kanimozhi BV | Oct 24, 2024 | Garden, DIY Ideas, Exterior
Are you looking for how to get council to cut trees in UK? Trees play a vital role in enhancing the beauty of public spaces, improving air quality, and providing habitats for wildlife.
However, there are times when trees can become a nuisance or even a danger, which raises the need for them to be cut or trimmed. If you’re dealing with a tree that’s causing issues in your area, you might be wondering how to get the local council to take action.
In this guide, I’ll walk you through the reasons for requesting tree maintenance, the steps to submit your request, and what to expect from the council in the UK.
Why Might You Need the Council To Cut Trees?
There are several common reasons to ask the council to cut or trim trees:
- Safety Concerns: Trees that are damaged, diseased, or at risk of falling.
- Blocking Light: Overgrown trees may block natural sunlight from entering homes or gardens.
- Property Damage: Tree roots or branches causing damage to buildings, fences, or utility lines.
- Obstructing Roads or Pavements: Trees that block walkways or roads, creating hazards for pedestrians and vehicles.

Step-by-Step Guide: How To Request the Council to Cut or Trim Trees?
If you’ve determined that a tree needs to be cut or trimmed, it’s time to submit a formal request to the council. Here’s how to go about it.
Step 1: Identify If the Tree Is Council-Owned
The first step is to check whether the tree in question is located on council property. In the UK, councils are responsible for trees on public land, such as parks, streets, and communal areas.
However, they won’t take action on trees located on private property.
- Check Council Websites: Many local councils provide maps or information on public lands that they manage. If the tree is located on or near a public space, it’s likely council-owned.
- Verify with the Council: If you’re unsure, contact your local council directly and provide the location of the tree. They can confirm if the tree falls under their jurisdiction.
Step 2: Submit a Tree Maintenance Request
Once you’ve confirmed that the tree is on council land, the next step is to submit a formal request for tree maintenance.
Most councils provide online forms to make this process simple and straightforward.
- Locate the Form: Visit your local council’s website and find the relevant page for tree maintenance or reporting a problem with a tree.
- Provide Details: Be specific about the issue. Include the location of the tree, the nature of the problem (e.g., to clear overgrown branches, blocking sunlight, posing a safety hazard), and any supporting evidence such as photos.
- State the Reason for the Request: Explain why the tree needs to be cut or trimmed. Use clear reasons such as safety concerns, property damage, or obstruction.
Some local councils provide additional tools, such as apps or interactive maps, to make the process even easier.
- Upload Photos: If the reporting tool allows it, upload pictures of the tree and the issue you’re facing. This visual evidence can help the council assess the urgency of the situation.
- Provide GPS Location: For larger councils, using GPS coordinates or specific addresses can ensure they locate the tree quickly.
Step 4: Follow Up on Your Request
After submitting your request, it’s important to keep track of the status.
- Wait for a Response: Councils typically acknowledge receipt of your request within a few days, but the actual response time can vary depending on the urgency of the issue.
- Contact the Council: If you don’t receive a response or update within a reasonable time (usually two weeks), you may want to follow up by calling or emailing the council to check the progress of your request.
What is the Council’s Tree Removal Policy?
Local councils follow specific guidelines when deciding to cut or trim trees:
- Tree Preservation Orders (TPOs): Some trees are protected by law and cannot be cut without special permission unless there’s a safety concern.
- Council Priorities: The council prioritises cutting trees that pose risks to public safety, while trees that benefit the environment or landscape are usually preserved.
- Response Time: For urgent safety issues, councils may respond quickly, but non-urgent requests (like overgrown trees) may take several weeks.
What Happens If the Council Refuses to Cut the Tree?
It’s possible that the council may refuse your request to cut or trim the tree, especially if it’s protected or deemed not to pose a significant risk.
Understanding the Refusal
Common reasons for refusal include:
- TPO Protection: The tree is protected and cannot be removed unless there’s a severe safety risk.
- Minimal Risk: The council might determine that the tree does not pose enough of a risk to warrant cutting or trimming.
Filing an Appeal or Raising Further Concerns
If your request is denied, you may have the option to file an appeal or provide additional evidence. For example, you might need to:
- Document Further Issues: Keep track of any ongoing or worsening problems, such as cracks in your walls caused by tree roots.
- Seek Professional Advice: Sometimes, involving a tree expert or arborist to assess the situation can help build a stronger case.

What If the Tree Is on Private Land?
If the tree that’s causing an issue is located on private property, the council may not be able to intervene directly. However, there are still steps you can take.
Overhanging Trees From Private Property
If branches from a neighbour’s tree are overhanging your property and causing problems, you have the legal right to trim the branches up to the boundary of your property. However, you must return the cut branches to your neighbour, as they remain their property.
Can the Council Help With Private Land Trees?
In some cases, if a tree on private land poses a significant risk to public safety, the council may be able to step in. They can issue notices to the landowner to carry out maintenance or, in extreme cases, enforce action to remove the hazard.
Conclusion
Getting the council to cut or trim trees in UK involves following a clear process that starts with determining whether the tree is council-owned and submitting a formal request.
By understanding the council’s policies, prioritising safety concerns, and keeping track of your request, you can ensure that the issue is handled efficiently and effectively.
Remember, trees play a crucial role in our environment, so it’s essential to balance your concerns with the need to preserve green spaces.
Table: Types of Tree Requests vs. Response Times
| Type of Request |
Expected Response Time |
| Urgent Safety Concern |
2-5 days |
| Overgrown Trees Blocking Light |
2-4 weeks |
| Property Damage |
1-3 weeks |
| Non-Urgent Trimming Request |
4-12 weeks |
FAQs On How To Get Council To Cut Trees
1. How long does it take for the council to respond to a tree cutting request?
The council typically responds within two weeks for non-urgent requests, but urgent safety concerns may receive a response within a few days.
2. What do I do if the tree is blocking sunlight?
You can submit a request to the council, stating how the overgrown tree is affecting your light. The council will assess whether the tree is causing a significant obstruction.
3. Are all trees protected by Tree Preservation Orders (TPOs)?
No, only specific trees or woodlands are protected under TPOs. These are usually trees of particular environmental, historical, or aesthetic value.
4. Can I cut down a council-owned tree myself?
No, it is illegal to cut or trim council-owned trees without permission. Always go through the proper channels by contacting the council.
by Kanimozhi BV | Oct 23, 2024 | Wall, Interior
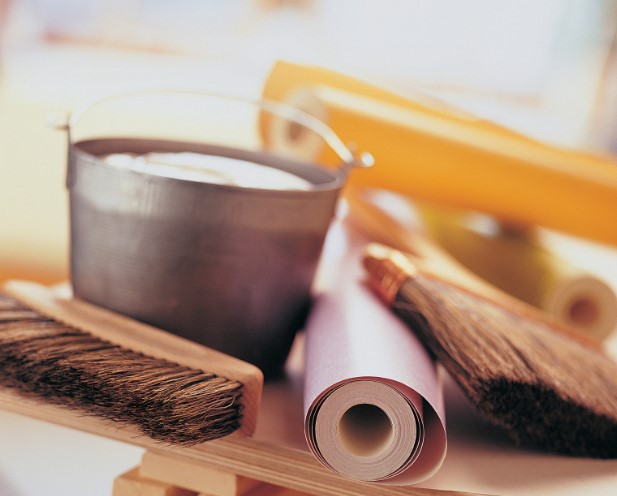
Wallpaper paste is essential for ensuring that your wallpaper adheres smoothly to your walls and stays in place over time. But how long does wallpaper paste last? Understanding the shelf life of your paste, both before and after opening or mixing, is crucial as wallpaper measurements to achieving a flawless wallpaper job.
In this guide, I’ll walk you through the longevity of wallpaper paste, how to store it properly, and when it’s time to replace it.
How Long Does Wallpaper Paste Last?
The lifespan of wallpaper paste varies depending on whether it’s powdered or ready-made and whether it’s been opened or mixed. Knowing these factors will help you avoid using expired or ineffective paste that could result in poor adhesion or bubbling.
Shelf Life of Unopened Wallpaper Paste
Unopened wallpaper paste—whether powdered or ready-made—can last a long time if stored correctly. Most manufacturers print an expiration or best-before date on the packaging, and this can range from 2 to 5 years, depending on the brand and paste type.
- Powdered Wallpaper Paste: This has a longer shelf life because it’s stored in a dry form. As long as it’s kept in a cool, dry place and sealed properly, powdered paste can last up to 5 years unopened.
- Ready-Made Wallpaper Paste: This has a shorter shelf life due to its liquid form. Unopened, it can typically last around 2-3 years. However, storing it in a cool, stable environment can help extend its usability up to the higher end of that range.
Always check the manufacturer’s expiry date before use, and if in doubt, it’s better to start with fresh paste than risk a compromised wallpaper finish.
How Long Does Mixed Wallpaper Paste Last?
Once you’ve mixed powdered wallpaper paste, its lifespan becomes much shorter. Mixed wallpaper paste will generally last for 24-48 hours before it starts to degrade.
- Proper Storage for Mixed Paste: If you have leftover mixed wallpaper paste, you can extend its life slightly by sealing it in an airtight container and storing it in a cool place, such as a garage or shed. However, even with proper storage, mixed paste begins to lose its effectiveness after two days.
- Signs of Expired Paste: If you notice the paste becoming clumpy, thickening, or smelling strange, it’s time to discard it. Fresh paste should have a smooth, creamy consistency.
How Long Does Ready-Made Wallpaper Paste Last After Opening?
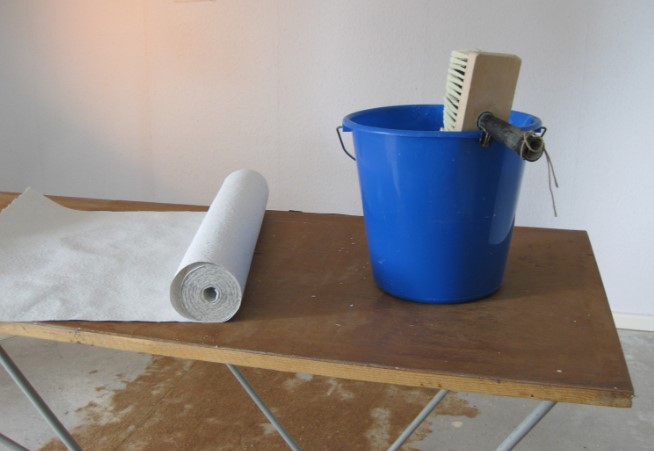
Once opened, ready-made wallpaper paste has a shorter shelf life than powdered paste. After breaking the seal, it should be used within 4-6 weeks, depending on how well it’s stored.
- Proper Storage for Opened Ready-Made Paste: Keep the container tightly sealed and store it in a cool, dry area. Avoid exposing it to extreme temperatures or direct sunlight, which could degrade the paste.
- Shelf Life Tip: If you plan on taking longer breaks between wallpapering sessions, it might be better to work with smaller containers of ready-made paste to avoid waste.
How Long Can You Keep Wallpaper Paste On The Wall Before Hanging Wallpaper?
Timing is key when it comes to wallpaper paste application. After you apply wallpaper paste to the wall or wallpaper, you have a limited window to hang the wallpaper before the paste starts to dry.
- Application Window: Generally, wallpaper paste stays workable for about 20-30 minutes after application. If you wait too long, the paste can start to dry out, losing its stickiness and causing the wallpaper to fail to adhere properly.
- Keep Humidity in Mind: In more humid environments (common in the UK), you may have a bit more time to work with, but in drier conditions, the paste can dry out faster. It’s important to apply the wallpaper relatively soon after pasting for the best results.
What Are The Factors That Affect the Longevity of Wallpaper Paste?
Several external factors can influence how long wallpaper paste lasts, both before and after mixing or opening:
- Temperature: Storing wallpaper paste in extremely hot or cold conditions can cause it to degrade faster. High heat may cause liquid paste to thicken or separate, while freezing temperatures could ruin the consistency.
- Humidity: High humidity can cause moisture to seep into powdered wallpaper paste, leading to clumping or mold growth. This is why it’s critical to keep the paste in a cool, dry location.
- Air Exposure: The more air exposure wallpaper paste has, the faster it will degrade. For both ready-made and mixed paste, always ensure the container is sealed tightly to minimize air contact.
Does Wallpaper Paste Expire or Go Bad?
Yes, wallpaper paste can expire or go bad, especially if it’s been stored improperly or past its recommended shelf life. Using expired paste can lead to poor adhesion, bubbling, or wallpaper peeling away from the wall. This leads to the disposal of wallpaper paste and to completely remove the wallpaper.
Signs Your Wallpaper Paste Has Gone Bad
If you’re unsure whether your wallpaper paste is still good, here are some telltale signs that it has gone bad:
- Texture Change: Fresh paste should have a smooth consistency. If the paste has thickened, become watery, or developed lumps, it’s likely past its usable stage.
- Mold or Odour: Expired or improperly stored paste may develop an unpleasant smell or even show visible signs of mold. In such cases, it’s best to discard it immediately.
- Separation: Ready-made paste can sometimes separate if it’s old or not stored correctly. If the paste has separated into layers of liquid and solid, it’s no longer usable.
What Happens If You Use Expired Wallpaper Paste?
Using expired wallpaper paste can result in several issues during the wallpapering process:
- Poor Adhesion: Expired paste won’t bond as effectively, which can lead to the wallpaper peeling away from the wall over time.
- Bubbles and Wrinkles: The paste may not dry evenly, causing bubbles and wrinkles to form beneath the wallpaper surface.
- Shortened Wallpaper Lifespan: Even if the wallpaper initially sticks, expired paste can reduce the wallpaper’s longevity, causing it to peel or degrade much sooner than it should.
How Should You Store Wallpaper Paste?
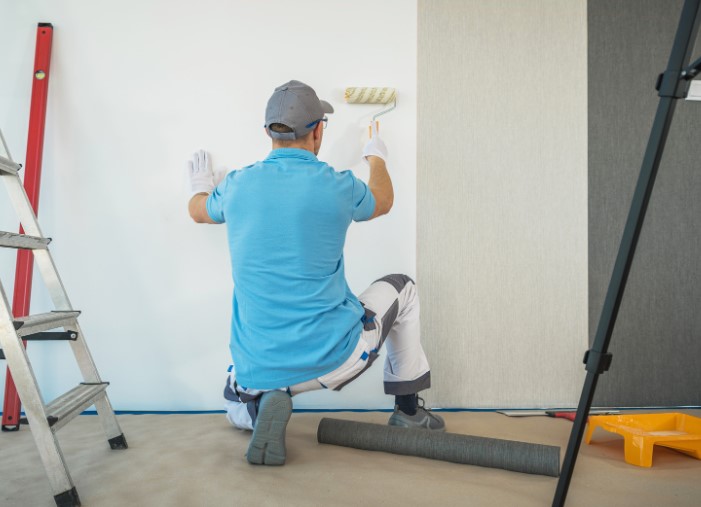
Proper storage is crucial for ensuring your wallpaper paste lasts as long as possible. Here are some guidelines for storing both unopened and leftover paste:
Storing Unopened Wallpaper Paste
- Cool, Dry Place: Unopened wallpaper paste, whether powdered or ready-made, should be stored in a cool, dry environment. Avoid direct sunlight and areas with fluctuating temperatures, such as near radiators or windows.
- Sealed Packaging: Ensure that the packaging remains sealed and intact to prevent air and moisture from getting in.
Storing Leftover Wallpaper Paste After Mixing
If you’ve mixed more wallpaper paste than needed, store the leftovers properly to preserve their usefulness for a short period:
- Airtight Container: Transfer the leftover paste into an airtight container to prevent it from drying out. A sealed plastic tub works well.
- Cool Storage Area: Store the container in a cool place, away from heat or direct sunlight. Even with these precautions, remember that mixed paste should ideally be used within 48 hours.
Ready-Made vs. Powdered Wallpaper Paste: Which Lasts Longer?
When deciding between ready-made and powdered wallpaper paste, their longevity plays an important role. Here’s a comparison to help you decide which works best for your project:
- Ready-Made Wallpaper Paste: This paste is pre-mixed and convenient, but it has a shorter shelf life, especially after opening. Once opened, it typically lasts for 4-6 weeks.
- Powdered Wallpaper Paste: This option comes in a dry form and has a much longer shelf life. Unopened, it can last up to 5 years. Once mixed, however, it has a similar lifespan to ready-made paste and should be used within 24-48 hours.
For long-term storage, powdered paste is the better option, as it offers more flexibility if you plan on doing smaller wallpapering projects over time.
Can You Reuse Wallpaper Paste?
Reusing wallpaper paste is possible, but only under certain conditions.
When It’s Safe to Reuse Wallpaper Paste?
- If the paste has been properly stored in an airtight container and used within 24-48 hours, it’s generally safe to reuse.
- Check Consistency: Before reusing, check the paste for any signs of spoilage, such as clumping or changes in smell. The paste should have the same smooth, creamy consistency as when first mixed.
When to Avoid Reusing Paste?
If the paste has been stored longer than 48 hours, or if it shows signs of degradation, it’s best to discard it. Reusing paste that’s past its prime can lead to adhesion issues and poor wallpaper results.
Conclusion
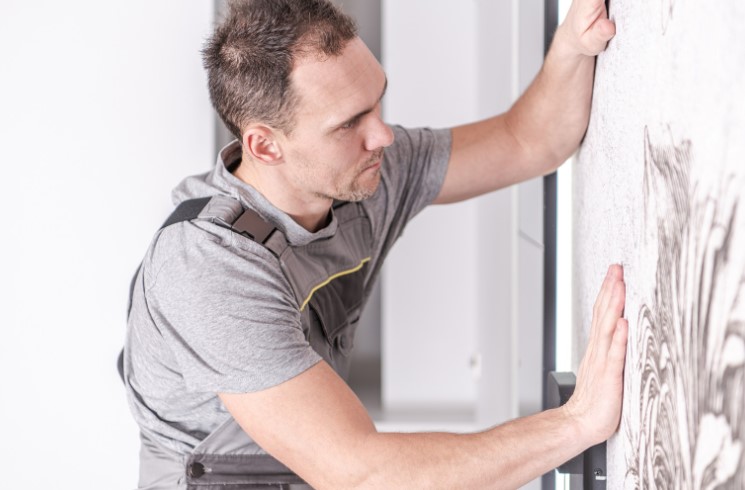
Wallpaper paste is the backbone of any successful wallpapering project that too wallpapering around windows, and using fresh, high-quality paste is essential for a lasting, professional finish.
Unopened paste can last several years, but once mixed or opened, it has a much shorter shelf life. By storing paste properly and knowing the signs of expiration, you can ensure your wallpaper job is flawless and long-lasting.
Table: Comparing the Shelf Life of Ready-Made vs. Powdered Paste
| Paste Type |
Unopened Shelf Life |
After Opening |
After Mixing |
| Ready-Made Wallpaper Paste |
2-3 years |
4-6 weeks |
N/A |
| Powdered Wallpaper Paste |
4-5 years |
N/A |
24-48 hours |
FAQs on How Long Does Wallpaper Paste Last
1. How can I tell if wallpaper paste has expired?
You can tell wallpaper paste has expired if it changes in consistency (becomes lumpy or too thick), develops a strange smell, or shows signs of mold. It is highly advices to check the expiry date on the packaging before usage.
2. Can I still use paste if it smells odd?
No, if your wallpaper paste has developed an odd smell, it’s a sign that it has gone bad. It’s best to dispose of it and use a fresh batch to avoid poor results.
3. What’s the best way to store mixed wallpaper paste?
The best way to store mixed wallpaper paste is in an airtight container in a cool, dry place. Even with proper storage, it should be used within 24-48 hours.
4. How long does wallpaper stay on if paste goes bad?
If you use expired wallpaper paste, the wallpaper may adhere poorly and could start peeling or bubbling within days or weeks. Using fresh paste ensures the wallpaper stays on properly for many years.

by Kanimozhi BV | Oct 22, 2024 | Wall, Interior, Living Room
Wallpaper installation can dramatically change the look of a room, but after hanging it, the next critical step is waiting for it to dry.
Understanding how long does wallpaper take to dry and how to speed up the process can ensure a smooth, professional-looking finish.
In this guide, I’ll explain the typical wallpaper drying time, the factors that affect it, and some practical tips to help speed up the process, especially in the UK’s unpredictable weather.
How Long Does Wallpaper Typically Take To Dry?
General Drying Time for Wallpaper
In most cases, wallpaper takes about 24 to 48 hours to dry fully. However, this is an average estimate, and drying times can vary depending on several factors. For example:
- Standard paper-based wallpapers will generally fall within this time frame.
- Vinyl wallpapers or heavier fabrics may take longer to dry, possibly up to 72 hours, because of the thicker materials.
- If you’re using pre-pasted wallpaper, the drying process might be quicker compared to paste-the-paper methods, which involve applying moisture directly to the wallpaper.
It’s important to remain patient during this process as wallpapering around window. Trying to rush the drying can result in issues like bubbles, peeling edges, or uneven finishes.
What are The Factors That Affect Drying Time?
Several factors can influence how quickly your wallpaper dries:
- Wallpaper Type: Different types of wallpaper (vinyl, paper, fabric) have varying absorption rates. Thicker materials take longer to dry, while thinner, more porous wallpapers absorb moisture faster and therefore dry quicker.
- Adhesive Used: The type of adhesive or paste used also plays a role. Paste-the-wall adhesives tend to dry faster because they involve less moisture than paste-the-paper methods and the disposal of wallpaper paste plays a vital role in wallpapering a room.
- Room Conditions: The environment where the wallpaper is hung has a significant impact on drying time.
- Temperature: A room that’s too cold or too hot will affect drying. Ideal conditions range between 18-21°C (65-70°F).
- Humidity: High humidity levels slow the drying process because the moisture in the air prevents the wallpaper from drying properly.
- Ventilation: Good airflow is essential for faster drying. Poor ventilation can prolong the process, especially in UK homes, where ventilation may be limited during colder months.

How Long Should Wallpaper Dry Before Trimming?
Once your wallpaper is applied, you’ll likely need to trim excess wallpaper from the edges. But when is it safe to do so?
Wallpaper should dry for about 15 to 30 minutes before you begin trimming. During this time, the wallpaper will have adhered well enough to the wall, but it won’t have dried to the point of shrinking or tightening. Here’s why trimming at the right time matters:
- Trimming too soon could cause the wallpaper to shift or tear, as the adhesive might still be wet and the paper isn’t firmly attached.
- Waiting too long to trim can make the wallpaper more difficult to cut cleanly, especially if it’s started to harden and shrink into position.
For the best results, use a sharp blade or utility knife and trim carefully along the edges or around fixtures, ensuring you don’t pull the wallpaper as you cut.
What Happens If Wallpaper Doesn’t Dry Properly?
Skipping the proper drying process or not giving your wallpaper enough time to set can lead to several issues. Here’s what you might face if wallpaper doesn’t dry fully:
Potential Problems With Poor Drying
- Bubbles or Wrinkles: When wallpaper dries unevenly or too quickly in some areas, it can trap air pockets or moisture underneath, leading to bubbles or wrinkles that ruin the smooth finish.
- Peeling Edges: If the wallpaper hasn’t adhered properly to the surface, the edges can start to peel, leaving you with unsightly seams.
- Mold or Mildew Growth: In the UK’s damp climate, moisture left behind the wallpaper can encourage the growth of mold or mildew, particularly in bathrooms or kitchens where humidity is already high.
To avoid these problems, it’s essential to let your wallpaper dry fully under the right conditions and address any bubbles or peeling quickly.
How Can You Speed Up Wallpaper Drying?
While waiting for wallpaper to dry can feel like watching paint dry (pun intended), there are some practical methods you can use to speed up the process. Here are a few tips to help your wallpaper dry faster:
Improving Room Ventilation
Good ventilation is key to speeding up drying times, as it helps moisture evaporate more quickly.
- Use of Fans or Air Circulators: Placing a fan in the room helps circulate the air and speed up drying. Keep the fan on a low setting to prevent blowing the wallpaper loose.
- Keep Windows Open: When possible, open windows to allow natural airflow. However, if it’s particularly damp or rainy outside, this might backfire by increasing humidity, so balance this based on the weather.
Managing Room Temperature
Temperature control is critical. Keeping the room at the right warmth helps the adhesive set more quickly.
- Use of Heaters: A small heater placed at a moderate distance can help maintain a consistent room temperature, which promotes even drying. Aim for a steady room temperature of about 18-21°C.
- Avoiding Direct Sunlight: Direct sunlight can cause wallpaper to dry too quickly, leading to uneven results, such as cracking or shrinking in the areas that dried faster. Draw the blinds or curtains to ensure even drying.

Control Humidity Levels
High humidity levels can severely slow down drying, particularly in damp UK homes.
- Use of Dehumidifiers: If you live in a particularly humid area, using a dehumidifier will help draw moisture out of the air and reduce the drying time significantly. Place the dehumidifier in the center of the room to evenly lower the humidity.
How Long Does Wallpaper Take to Dry Before Painting?
If you plan to paint over wallpaper, ensuring the wallpaper is completely dry is crucial. Generally, you should wait at least 48 hours before painting over the wallpaper.
This gives the adhesive enough time to fully cure and ensures that the moisture from the wallpaper does not interfere with the paint application.
How to Check if Wallpaper is Ready for Painting?
- Touch Test: Gently press your hand on the wallpaper. If it feels cool or damp, it needs time to get ready.
- Look for Texture Changes: Fully dried wallpaper should be smooth and firm. Any signs of wrinkles, bubbles, or soft spots indicate that it’s still drying.
Can Weather Conditions in the UK Impact Wallpaper Drying?
The UK’s weather can indeed play a big role in how long your wallpaper takes to dry. The country’s cool, damp climate—particularly during the autumn and winter months—can slow down the drying process significantly.
High humidity levels, especially in coastal regions, can extend drying times by several hours or even days.
Best Times of Year to Install Wallpaper
- For faster drying times, aim to install wallpaper in the late spring or summer, when the air is naturally warmer and less humid.
- Avoid wallpapering during particularly wet or cold periods, as this will slow drying and potentially cause issues like bubbling or peeling.

How Long Should You Wait Before Hanging Pictures or Decorating?
After wallpaper has fully dried, it’s tempting to start decorating straight away, but it’s best to wait a little longer to ensure everything has set properly.
Generally, you should wait at least 48 hours before hanging pictures, mirrors, or other decorations on your newly wallpapered walls.
Tips to Ensure the Wallpaper Has Fully Set:
- Check for Moisture: Gently press a clean cloth against the wallpaper. If any moisture is absorbed, it needs more time.
- Examine the Edges: Well-adhered wallpaper will have smooth, tightly sealed edges. If the edges lift when touched, wait longer before decorating.
Conclusion
In most cases, wallpaper takes 24 to 48 hours to dry, but several factors—such as the type of wallpaper, adhesive used, and UK weather conditions—can influence this time.
For the best results of how long does wallpaper take to dry, ensure your room has adequate ventilation, controlled humidity, and a consistent temperature. By being patient and allowing your wallpaper to dry fully, you’ll enjoy a flawless finish that lasts.
Table: Wallpaper Types and Their Drying Times
| Wallpaper Type |
Typical Drying Time |
Notes |
| Paper-based Wallpaper |
24-48 hours |
Standard drying time for most paper wallpapers |
| Vinyl Wallpaper |
48-72 hours |
May take longer due to thicker material |
| Fabric-based Wallpaper |
48-72 hours |
Requires extra time due to heavy texture |
FAQs on Wallpaper Drying Time
1. Can I speed up the drying process using a hairdryer?
While a hairdryer might seem like a quick fix, it’s not recommended as the direct heat can cause uneven drying, which may lead to bubbles or peeling. It’s better to use a fan or dehumidifier to circulate air evenly.
2. Does wallpaper dry faster in smaller rooms?
Yes, smaller rooms may dry faster, but only if they’re well-ventilated. Without proper airflow, moisture can become trapped, slowing the drying process.
3. Can I apply wallpaper during winter in the UK?
Yes, but you’ll need to take extra precautions. Use heaters, fans, and dehumidifiers to control the room environment and compensate for the colder, more humid weather.
4. What should I do if I notice bubbles after the wallpaper dries?
If bubbles appear after drying, you can smooth them out using a wallpaper smoothing tool. For larger bubbles, gently lift the wallpaper and reapply adhesive before smoothing it back down.


