
by Kanimozhi BV | Oct 22, 2024 | Interior Painting, Interior, Wall
Painting over wallpaper can be a practical solution when you want to refresh your room without dealing with the hassle of removing the wallpaper.
However, not every type of paint works well for this purpose. It’s crucial to understand similar to wallpaper measurement, which paint provides the best results and how to prepare the surface for long-lasting adhesion.
In this guide, I’ll explain what kind of paint do you use to paint over wallpaper, how to prepare your wallpaper, and offer some expert tips to ensure a smooth and professional finish.
Can You Paint Over Wallpaper?
Yes, you can paint over wallpaper, and in many cases, it’s a practical choice. Removing wallpaper can be time-consuming and may even damage your walls if done incorrectly, so painting over it can save you effort while still giving your room a fresh new look.
Advantages of Painting Over Wallpaper
- Saves Time: Instead of stripping wallpaper and then prepping the wall for paint, you can paint directly over it.
- Preserves the Wall: Removing woodchip wallpaper often damages the underlying wall, requiring patching and repairs. Painting over it keeps the wall intact.
- Smooth Transition: If done properly, painting over wallpaper can give your walls a smooth finish without visible seams or textures.
Types of Wallpaper You Can Paint Over
Not all wallpaper is suitable for painting. In general:
- Vinyl wallpaper can be tricky, as paint might not adhere well to its smooth, shiny surface. You’ll need a strong primer in this case.
- Paper-based wallpaper is the easiest to paint over, as it absorbs the primer and paint better.
- Textured wallpaper can add interesting effects when painted over, but you may need to sand down particularly rough textures.

What Kind of Paint Is Best For Painting Over Wallpaper?
Choosing the right type of paint is crucial when painting over wallpaper. The paint must adhere well to the surface, dry evenly, and provide the desired finish. Here are the three main types of paint you should consider:
1. Water-Based (Emulsion) Paint
Water-based paint, also known as emulsion, is a popular choice for painting over wallpaper. It dries quickly and has low levels of harmful fumes, making it a more environmentally friendly option.
- Pros: Dries quickly, easy to clean up, and has low odour.
- Cons: Might not be as durable or long-lasting as oil-based paints, especially on textured wallpaper.
Best for: Smooth or lightly textured wallpaper surfaces.
2. Oil-Based Paint
Oil-based paint offers excellent durability and a smoother finish, making it an ideal choice for painting over textured or heavily patterned wallpaper.
It covers wallpaper well and tends to hold up better in areas with higher moisture, such as bathrooms or kitchens.
- Pros: Provides excellent coverage and durability. Ideal for covering bold patterns or textures.
- Cons: Longer drying time and requires proper ventilation due to strong fumes.
Best for: Textured wallpaper or wallpaper with intricate patterns that need good coverage.
3. Latex Paint
Latex paint is another option that’s known for its flexibility and ease of application. It’s resistant to moisture and mildew, making it a great choice for rooms where humidity may be an issue.
- Pros: Quick drying, moisture-resistant, and flexible.
- Cons: May need a strong primer to ensure it adheres well to wallpaper.
Best for: Moisture-prone rooms like kitchens and bathrooms.
Do You Need Primer Before Painting Over Wallpaper?
Yes, applying a primer before painting over wallpaper is essential for ensuring that the paint adheres properly and that any patterns or textures underneath are less likely to show through.
The primer seals the wallpaper and provides a smooth, even surface for the paint to cling to.
Best Primers For Painting Over Wallpaper
- Oil-Based Primers: These are particularly good for sealing wallpaper, especially vinyl wallpaper, as they create a strong bond between the wallpaper and the paint.
- Shellac Primers: Known for their stain-blocking properties, shellac primers are great for covering patterns and preventing any bleed-through from the wallpaper beneath.
- Multi-Surface Bonding Primers: These are designed to adhere to a wide variety of surfaces, making them a versatile choice for tricky wallpaper surfaces like vinyl or textured wallpaper.
Using the right primer not only ensures better paint adhesion but also helps prevent future peeling or bubbling.
How To Prepare Wallpaper Before Painting?
Preparation is key when painting over wallpaper or choosing wallpaper for living room. A well-prepared surface will ensure that your paint job looks professional and lasts for years to come. Here are the steps you need to take before picking up your paintbrush.
Clean The Wallpaper Surface
Dirt, dust, and grime can prevent the paint from adhering properly, so it’s crucial to clean the wallpaper before painting.
- Dust the surface: Use a soft cloth or duster to remove any surface dust.
- Wipe down the wallpaper: Use a solution of mild detergent and water to clean the wallpaper. For greasy areas (especially in kitchens), add a bit of vinegar to the mix.
Allow the wallpaper to dry completely further proceeding on to the next step.
Check For Damages or Loose Seams
Before painting, inspect the wallpaper for any damage or peeling.
- Fix loose seams: If you notice the wallpaper peeling away at the edges, apply wallpaper adhesive to reseal the seams.
- Patch small tears or holes: Use a wallpaper seam roller to smooth any loose edges, and patch up any small tears or hole in wall using filler or adhesive.
Sanding or Skimming Textured Wallpaper
If your wallpaper is heavily textured, you may want to sand down some of the rough spots to create a smoother surface for painting.
- Lightly sand the wallpaper with fine-grit sandpaper to reduce the texture.
- Skim coat: For extremely textured wallpaper, you might need to apply a thin skim coat of joint compound to even out the surface before painting.
Step-by-Step Guide: How To Paint Over Wallpaper
Now that you’ve prepped the wallpaper, it’s time to start painting. Follow this step-by-step guide for the best results.
Step 1: Apply Primer
Using a primer is essential for ensuring that your paint adheres properly to the wallpaper and that the underlying pattern or texture doesn’t show through.
- Choose the right primer based on the wallpaper type (oil-based or shellac primer is best for vinyl or heavily textured wallpaper).
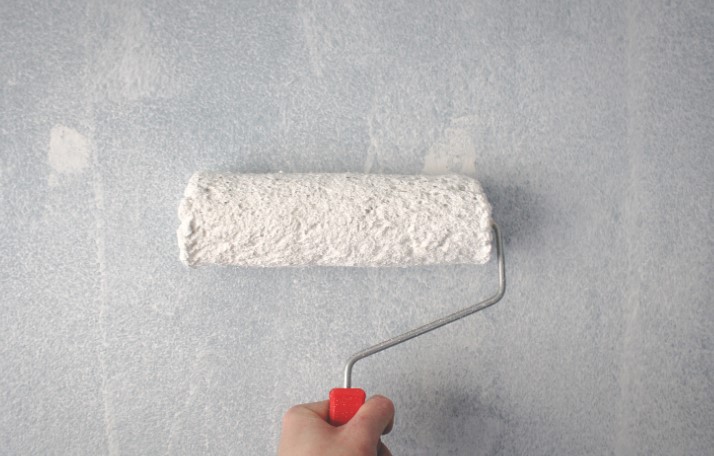
- Apply a thin, even coat of primer using a roller, and use a brush for edges and corners.
- Let it dry completely before moving on to the next step, typically 24 hours depending on the primer used.
Step 2: First Coat of Paint
Once the primer has dried, you can begin painting.
- Choose the right tools: Use a quality roller for large areas and a smaller brush for edges and corners.
- Apply the first coat evenly: Start with a light, even coat, ensuring that the paint covers the wallpaper smoothly. Avoid using too much paint at once to prevent dripping.
- Allow the first coat to dry: Wait at least 4-6 hours before applying the second coat, though drying times may vary depending on the paint type.
Step 3: Apply Second Coat
A second coat of paint ensures full coverage and a professional finish.
- Apply a second, even coat: This coat will provide the depth of colour and evenness you need for a polished look.
- Let it dry thoroughly: Again, follow the drying time instructions on your paint tin. Usually, the second coat can dry within 24 hours.
What Paint Finish Should You Choose?
The finish of your paint will influence how your walls look and how durable the paint is. Here’s a breakdown of the most common finishes you can choose from:
Matte Finish
A matte finish is great for hiding imperfections on the wallpaper, such as small bumps or seams. It gives a soft, non-reflective appearance.
- Best for: Hiding texture or seams, creating a calm, flat look.
- Not great for: High-traffic areas, as it’s less durable and harder to clean.
Satin or Eggshell Finish
These finishes offer a balance between a soft sheen and durability. Satin or eggshell finishes are easy to clean and work well for rooms where you want a bit of shine but not too much.
- Best for: Living rooms, hallways, and areas where you want a smooth finish with moderate shine.
Gloss Finish
For a striking, reflective finish, high-gloss paint is an option. It’s incredibly durable and easy to clean but can highlight imperfections in the wallpaper.
- Best for: Trim, doors, or accent walls where durability is essential.
How Long Does Painted Wallpaper Take To Dry?
Drying times for wallpaper which was painted will depend on the type of paint used:
- Water-based (emulsion) paint: Typically dries within 4-6 hours but requires up to 24 hours for a full cure.
- Oil-based paint: Can take up to 24 hours to dry and may require several days to fully cure.
To avoid issues like peeling or bubbling, ensure the room is well-ventilated, and avoid touching the walls until the paint is fully dry.
Conclusion
Painting over wallpaper is a great way to refresh your space without the hassle of removing wallpaper.
By choosing the right paint type, preparing the wallpaper surface, and following the proper steps on what kind of paint do you use to paint over wallpaper, you can achieve a smooth, professional finish.
Whether you opt for water-based, oil-based, or latex paint, remember to prime the wallpaper first and give it adequate time to dry for long-lasting results.
Table: Comparison of Water-Based, Oil-Based, and Latex Paints for Wallpaper
| Paint Type |
Drying Time |
Best For |
Pros |
Cons |
| Water-Based |
4-6 hours |
Smooth, lightly textured wallpaper |
Quick drying, low odour |
Less durable for high-traffic areas |
| Oil-Based |
24 hours |
Textured or heavily patterned walls |
Great coverage, durable |
Longer drying time, strong fumes |
| Latex |
4-6 hours |
Moisture-prone areas |
Flexible, moisture-resistant |
May require strong primer for adhesion |
FAQs On What Kind Of Paint Do You Use To Paint Over Wallpaper
1. Will the wallpaper pattern show through the paint?
If you properly prime the wallpaper before painting, the pattern should not show through. Using an oil-based or shellac primer is ideal for covering strong patterns.
2. Can I paint over textured wallpaper?
Yes, you can paint over textured wallpaper. However, depending on the texture, you may want to sand it down or apply a skim coat for a smoother finish.
3. How do I prevent bubbles when painting over wallpaper?
To prevent bubbles, ensure the wallpaper is properly adhered to the wall, apply a primer, and use even strokes when painting. Don’t overload the roller with paint.
4. Is it better to remove wallpaper before painting?
Removing wallpaper without steamer can provide a smoother, cleaner surface for painting. However, if the wallpaper is well-adhered and you follow the proper preparation steps, painting over it is a practical alternative.

by Kanimozhi BV | Oct 21, 2024 | Garden, DIY Ideas, Exterior
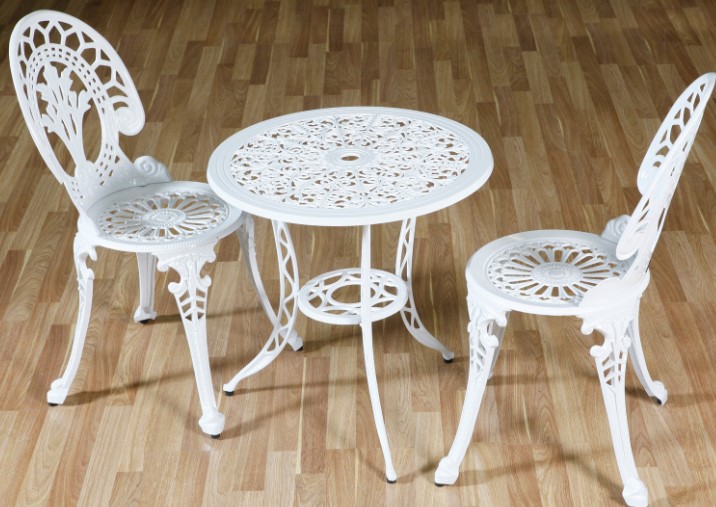
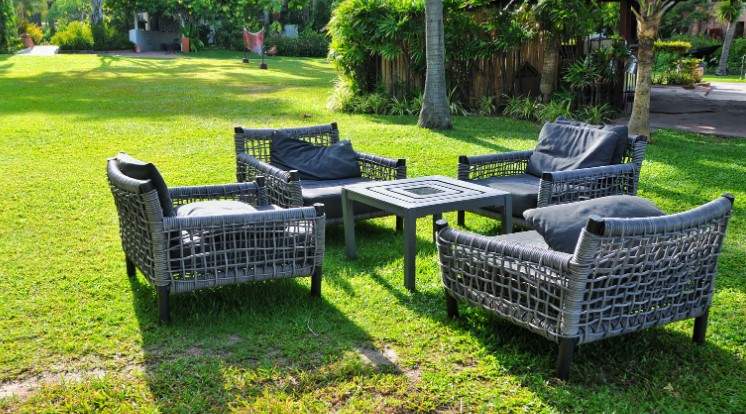
Plastic garden furniture is a convenient and affordable option for outdoor spaces, but it requires regular maintenance to keep it looking fresh and clean.
Over time, dirt, grime, algae, and even sun damage can take a toll on your furniture, but don’t worry! With some basic supplies and DIY methods, you can restore your plastic furniture to its former glory.
In this guide, I’ll walk you through step-by-step tips on how to clean plastic garden furniture and keep it in tip-top shape, especially suited for the UK climate.
Why Is It Important To Clean Plastic Garden Furniture?
Living in the UK, your plastic garden furniture is constantly exposed to changing weather conditions—rain, wind, sun, and even frost. Over time, this exposure can end up as:
- Dirt and grime build-up: Regular exposure to the outdoors causes dust and debris to accumulate on the surface of your furniture.
- Algae and mildew growth: Damp UK weather, particularly during autumn and winter, encourages the growth of algae, which leaves unsightly green patches.
- Sun damage: Prolonged exposure to the sun can cause the plastic to fade or even become brittle.
By regularly cleaning and maintaining your furniture, you not only improve its appearance but also extend its lifespan, saving you from having to replace it prematurely. Plus, a clean patio or garden setup makes outdoor relaxation much more enjoyable!

What Supplies Do You Need For Cleaning Plastic Garden Furniture?
You’ll need a few simple, affordable items:
- Warm soapy water
- White vinegar (a natural cleaning agent)
- Baking soda (for scrubbing tougher stains)
- Soft scrubbing brush or sponge (avoid harsh brushes that could scratch the plastic)
- Garden hose (to rinse off the furniture)
- Optional: Pressure washer (for a quicker clean, but use with caution!)
These cleaning supplies are safe and effective for plastic, and most of them are likely already in your home. Using DIY cleaning solutions like vinegar and baking soda ensures you’re avoiding harsh chemicals that could damage your furniture.
How To Prepare Plastic Furniture Before Cleaning?
Inspect For Stains Or Damages
Before you begin, give your plastic garden furniture a quick inspection. Look for any stubborn stains, discolouration, or potential cracks. This will help you determine if any specific areas need extra attention during the cleaning process.
Rinse Off Loose Dirt With A Garden Hose
The first step is always to rinse the furniture. Using a garden hose, spray down all surfaces of the plastic furniture to remove loose dirt, dust, and debris. This helps avoid scratching the furniture when you start scrubbing. Make sure to focus on crevices where dirt tends to accumulate.

Step-By-Step Guide: How To Clean Plastic Garden Furniture?
Now that the furniture is prepped, let’s get started with cleaning.
Using A DIY Vinegar Solution For General Cleaning
White vinegar is an eco-friendly and highly effective cleaner, especially for everyday dirt and mild stains. Here’s how you can use it:
- Create a cleaning solution by mixing 1 part white vinegar with 2 parts warm water.
- Soak a sponge or cloth in the solution and wipe down the entire surface of the furniture.
- For crevices or textured areas, use a soft brush to gently scrub away dirt.
- After scrubbing, rinse the furniture with your garden hose.
This method works great for removing general grime while being gentle on plastic. Vinegar’s natural acidity helps break down dirt without damaging the material.
How To Remove Tough Stains Using Baking Soda?
For tougher stains, especially those that have built up over time, baking soda is your best friend. Here’s how to tackle them:
- Sprinkle baking soda directly onto a damp sponge or soft brush.
- Scrub the stained areas in a circular motion, applying light pressure.
- Baking soda acts as a mild abrasive, lifting stains without scratching the plastic.
- Once finished, rinse thoroughly with the garden hose.
This method is particularly effective for removing stubborn marks, like bird droppings, sap, or food stains.
Should You Use A Pressure Washer?
If you’re short on time or dealing with a lot of dirt, a pressure washer can be a powerful tool. Anyway, you need to handle it carefully:
- In order to protect the plastic from damaging, use a low-pressure setting.
- Test on a small area first to ensure the pressure doesn’t leave marks or cracks.
- Keep the nozzle at a safe distance (about 1-2 feet away) to avoid damage.
While it’s a quick and efficient method, I recommend using a pressure washer sparingly, especially if your furniture is older or weakened by sun exposure.
How To Remove Algae And Mildew From Plastic Garden Furniture?
In the UK’s damp climate, algae and mildew can easily form on garden furniture, especially if it’s left outside during rainy months. Here’s how you can remove them:
- Mix a bleach solution: Combine 1 cup of bleach with 1 gallon of water.
- Apply the solution to the affected areas using a sponge or brush.
- Let it sit for 10-15 minutes, allowing the bleach to break down the algae and mildew.
- Scrub gently with a brush and rinse off thoroughly with the hose.
Make sure to wear gloves and rinse thoroughly, as bleach can be harmful to plants if it gets onto your lawn or garden. This method is highly effective at removing green patches and discolouration caused by mildew.
Can You Restore Sun-Damaged Plastic Garden Furniture?
Plastic furniture left in the sun can suffer from fading or even become brittle over time. If you notice this, here are a few ways to restore the appearance:
- Commercial plastic restorers: There are various commercial products specifically designed to restore sun-faded plastic. They work by adding a layer of protection and shine.
- DIY Hack with Car Wax: If you want a cheaper option, you can use car wax to restore the shine. Simply apply the wax as you would on a car, buffing it into the plastic with a soft cloth.
These solutions can help bring back the colour and shine of your furniture while providing a layer of protection from further sun damage.
How Often Should You Clean Your Plastic Garden Furniture?
The UK’s weather can be unpredictable, so it’s essential to clean your furniture regularly to keep it looking fresh. I recommend:
- Monthly cleaning during the warmer months (spring and summer) when you’re using the furniture more often.
- Deep cleaning before winter to remove dirt and algae before storing the furniture away.
- Quick clean-ups after heavy rain or storms to prevent grime build-up.
By sticking to a regular cleaning schedule, you’ll make the job easier and prevent the build-up of stains or algae.
What are the Quick Tips For Keeping Plastic Garden Furniture Clean Longer?
Cover Furniture When Not In Use
Invest in good-quality outdoor furniture covers. Not only do they protect against rain and dirt, but they also reduce the chance of sun damage. Covering your furniture when not in use is a simple step to keep it looking new for longer.
Store In A Dry Place During Winter
In the colder months, it’s best to store your plastic garden furniture in a shed or garage especially the outdoor furniture cushions. This protects it from harsh weather conditions like frost, which can weaken the plastic and cause cracking.
Conclusion
By following these smart DIY tips, you’ll be able to keep your plastic garden furniture clean, fresh, and in great condition for years to come.
From regular vinegar cleaning to tackling tough stains with baking soda, the methods I’ve shared are easy, affordable, and perfect for the UK weather.
So, grab your supplies, and enjoy your sparkling garden furniture all year round!
Related Article: Top 10 Websites To Buy Ex-Display Garden Furniture Clearance In UK
Table: DIY vs. Commercial Cleaners for Plastic Garden Furniture
| Aspect |
DIY Cleaners (Vinegar, Baking Soda) |
Commercial Cleaners |
| Cost |
Low (Household items) |
Moderate to high |
| Environmental Impact |
Eco-friendly, non-toxic |
May contain chemicals |
| Ease of Use |
Simple, requires some scrubbing |
Easier but may need multiple applications |
| Effectiveness |
Great for general cleaning |
Often stronger for tough stains |

by Kanimozhi BV | Oct 21, 2024 | Garden, Couch, Exterior
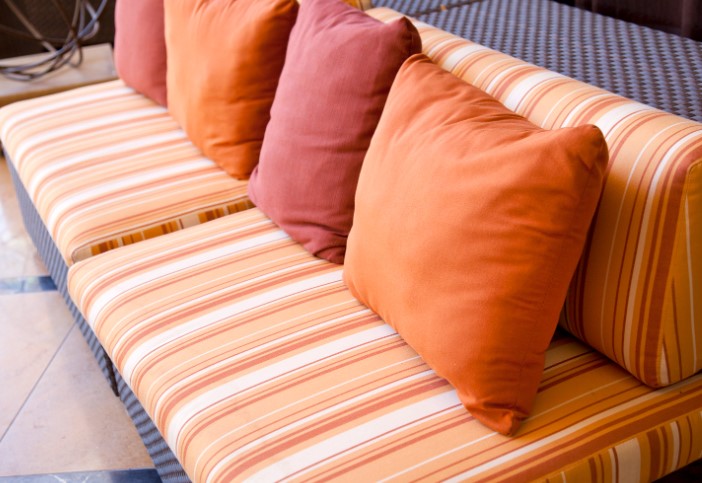
Outdoor furniture cushions make your garden or patio space comfortable and stylish, but they endure a lot-from dirt and rain to mildew and stains.
Cleaning these cushions might seem daunting, but with the right approach and materials, you can restore their freshness quickly and easily.
In this guide, I’ll walk you through simple, effective steps on how to clean outdoor furniture cushions and keep them looking great all year round, especially in the unpredictable UK weather.
Why Should You Clean Outdoor Furniture Cushions Regularly?
Outdoor cushions are constantly exposed to the elements, which in the UK means rain, sun, dirt, and sometimes even frost. Over time, these can cause significant wear and tear, leading to:
- Dirt and grime accumulation: Outdoor air, especially in urban environments, carries dirt and dust that easily settle into fabric fibers.
- Mold and mildew: The damp, rainy weather common in the UK can encourage mold and mildew to grow on cushions, particularly if they’re left outside during wet seasons.
- Sun damage: Prolonged exposure to the sun can cause fabrics to fade and weaken, making them more prone to damage.
Regularly cleaning your cushions will not only keep them looking good, but it can also prolong their lifespan and ensure they remain comfortable and hygienic. Plus, cleaning removes allergens like dust and pollen, creating a healthier outdoor living space for you and your family.
What Cleaning Supplies Will You Need For Outdoor Cushions?
Before starting the cleaning process, it’s important to gather all the necessary supplies. Here’s a list of what you’ll need to get your cushions looking as good as new:
Cleaning Essentials:
- Mild detergent or dish soap: A gentle cleaner is essential to avoid damaging the fabric.
- White vinegar: Vinegar is excellent for tackling mildew and mold.
- Baking soda: This works wonders on tougher stains by acting as a gentle abrasive.
- Soft brush or sponge: You’ll need a tool that can scrub without damaging the fabric.
- Garden hose or bucket of water: For rinsing off the cleaning solutions thoroughly.
- Optional: Fabric cleaner or mold remover (if you’re dealing with particularly stubborn stains or mildew).
These items are effective, safe for most outdoor fabrics, and often available at home, making them cost-efficient alternatives to commercial cleaners.
How To Prepare Outdoor Furniture Cushions Before Cleaning?
Proper preparation is key to achieving the best results when cleaning your cushions. Let’s start by prepping them for a deeper clean.
Remove Cushions from Furniture
The first step is simple: remove the cushions from your outdoor furniture. This ensures you can clean the cushions thoroughly without worrying about damaging the furniture itself, especially if it’s made from wood or metal.
Shake Off Loose Dirt and Dust
Before applying any cleaning solution, shake or beat your cushions outdoors to remove loose dirt, dust, or debris.
You can also use a vacuum cleaner with an upholstery attachment to remove surface dust. This step prevents dirt from becoming embedded in the fabric when you start scrubbing.

Step-by-Step Guide: How To Clean Outdoor Furniture Cushions?
With the cushions prepped, it’s time to dive into cleaning. Here’s a simple, effective step-by-step guide to get your cushions back to their best condition.
How To Hand Wash Cushions With Mild Detergent?
One of the easiest and safest methods to clean your cushions is using a solution of mild detergent and water.
- Mix your cleaning solution: Fill a bucket with warm water and add a small amount of mild detergent or dish soap.
- Scrub the cushions: Dip a soft sponge or brush into the soapy water and scrub the surface of the cushions in circular motions. Focus on areas with visible dirt or stains, but be gentle to avoid damaging the fabric.
- Rinse thoroughly: Once you’ve scrubbed all areas, rinse the cushions thoroughly using a garden hose or by dunking them in clean water. Ensure all soap residue is removed to avoid attracting more dirt.
This method is suitable for most outdoor cushions, providing a deep clean without harsh chemicals.
How To Use Vinegar To Remove Mildew or Mold?
If your outdoor cushions have developed mildew or mold—especially common in the UK’s damp climate—vinegar is a great natural solution. Here’s how to use it:
- Create a vinegar solution: Mix 1 part white vinegar with 1 part water in a spray bottle.
- Apply the solution: Spray the affected areas liberally with the vinegar solution, ensuring you cover all spots where mildew or mold is visible.
- Scrub gently: Use a soft brush to scrub the area. Vinegar helps kill the mold and loosen the stains.
- Rinse well: Rinse the cushion thoroughly with a garden hose or clean water to remove the vinegar.
Vinegar is an eco-friendly alternative to bleach, making it a safer option for your cushions, especially if they’re brightly coloured.
How To Clean Stubborn Stains With Baking Soda?
For tougher stains, especially on light-coloured cushions, baking soda is an excellent choice. Here’s how you can use it to tackle hard-to-remove spots:
- Sprinkle baking soda directly onto the stained area.
- Scrub with a damp sponge: Using a sponge or brush dipped in water, scrub the baking soda into the stain. Baking soda’s mild abrasive properties help lift stains without damaging the fabric.
- Rinse thoroughly: Once the stain is removed, rinse the area with clean water to remove all traces of baking soda.
This method works particularly well on grease stains commonly found in kitchen , bird droppings, or long-standing marks.
Can Your Machine Wash Outdoor Cushion Covers?
If your outdoor cushions come with removable covers, you might wonder if they’re machine washable. The answer is usually yes, but it depends on the material. Always check the care label before machine washing.
Here’s how to safely machine wash cushion covers:
- Remove the covers: Take the cushion covers off the foam inserts.
- Use cold water: Wash the covers in cold water with a mild detergent to prevent shrinkage or damage.
- Avoid tumble drying: Instead of putting them in the dryer, let the covers air dry. This helps avoid shrinkage and preserves the fabric’s integrity.
Air drying your cushion covers ensures they maintain their shape and don’t get damaged by the heat of a dryer.
How To Dry Outdoor Cushions Properly After Cleaning?
Drying your outdoor cushions thoroughly is just as important as cleaning them. Improper drying can lead to mold and mildew, undoing all your hard work.
Air Drying vs. Tumble Drying
Outdoor cushions should always be air dried. Even if they feel dry on the surface, moisture trapped inside the cushion can lead to mildew, so it’s crucial to ensure they’re completely dry before using or storing them.
- Place cushions on their side in a well-ventilated area, ideally in direct sunlight, which helps speed up drying.
- Turn the cushions periodically to ensure all sides dry evenly.
Drying Tips for UK Weather
In the UK, where sunshine is unpredictable, it’s best to dry your cushions on a warm, breezy day. If the weather doesn’t cooperate, you can also dry them indoors in a well-ventilated room or use a fan to help speed up the process.
What are the Quick Tips for Maintaining Outdoor Furniture Cushions Year-Round?
Store Cushions Indoors During Winter
The easiest way to protect your outdoor cushions from damage is to store them indoors during the winter months. This prevents them from being exposed to harsh weather like rain, frost, and snow, which can cause irreversible damage.
Use Fabric Protectors
Applying a fabric protector (like Scotchgard) after cleaning can help shield your cushions from stains and water damage. This protective layer keeps spills from soaking into the fabric and makes future cleaning easier.
Spot Cleaning Tips for Minor Spills
For minor spills, it’s always best to act fast. Blot the spill with a cloth to soak up any liquids, then clean the area with a mild detergent or fabric cleaner. Spot cleaning between deep cleans will keep your cushions looking fresher for longer.
Conclusion
By following this step-by-step guide, you can easily clean your outdoor furniture cushions and maintain their appearance and comfort.
Whether you’re using DIY solutions like vinegar and baking soda or machine-washing removable covers, regular cleaning will keep your cushions looking fresh despite the challenges of the UK’s unpredictable weather.
Don’t forget to protect your cushions by storing them during the colder months and applying a fabric protector. With just a little effort, your outdoor cushions will stay clean, comfortable, and ready for use whenever you’re enjoying your outdoor space.
Table: DIY vs. Commercial Cleaners for Outdoor Furniture Cushions
| Aspect |
DIY Cleaners (Vinegar, Baking Soda) |
Commercial Cleaners |
| Cost |
Low (Household items) |
Moderate to high |
| Environmental Impact |
Eco-friendly, non-toxic |
May contain chemicals |
| Ease of Use |
Simple, requires manual scrubbing |
Often easier with faster results |
| Effectiveness |
Great for general cleaning |
Stronger for heavy-duty stains |
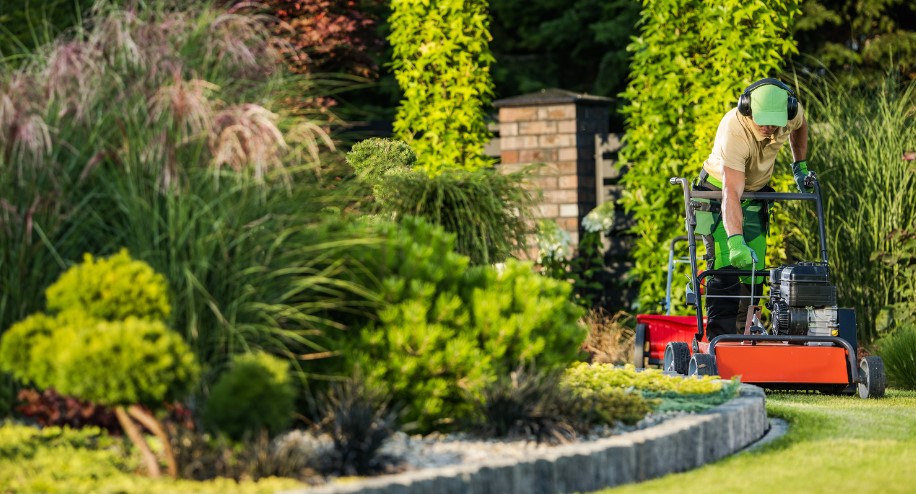
by Kanimozhi BV | Oct 19, 2024 | Garden, Exterior
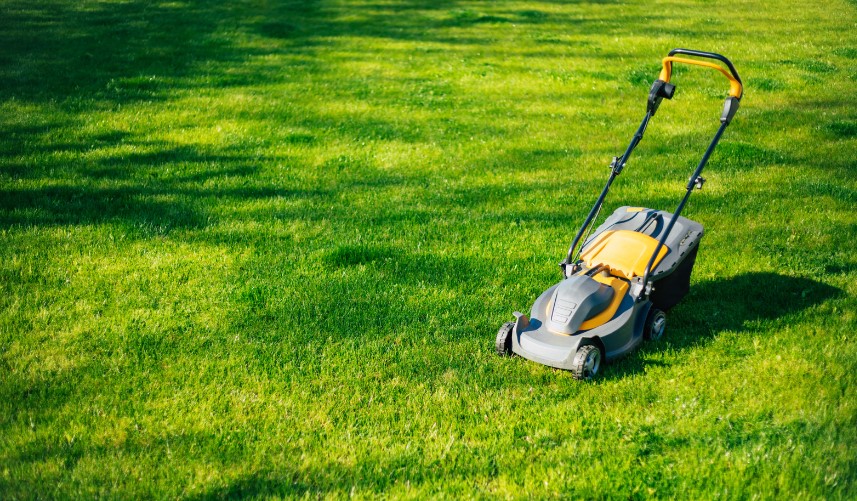
Cutting wet grass can be tricky, especially with a cordless lawn mower. Many homeowners face this dilemma when they wake up to damp lawns but still need to maintain their garden.
You might wonder: Is it safe? Will it damage my mower? This guide on can you cut wet grass with a cordless lawn mower, will explore whether it’s a good idea to cut wet grass with a cordless lawn mower, along with practical advice for keeping your lawn tidy while avoiding potential risks.
Can You Cut Wet Grass With a Cordless Lawn Mower?
Is It Safe to Cut Wet Grass With a Cordless Lawn Mower?
Cutting wet grass can pose certain risks, especially with electrical equipment like a cordless lawn mower. Wet lawn mowing risks primarily stem from moisture getting into the mower’s components.
Cordless electric mowers, though designed to withstand regular garden conditions, are still vulnerable when exposed to excess water.
Moisture can seep into electrical parts, increasing the risk of short circuits, even if modern mowers come with safeguards.
To mow wet grass safely, it’s crucial to assess the amount of moisture. If the grass is lightly damp, you may proceed with caution.
However, if it’s heavily saturated, it’s best to wait for better conditions. Cordless mower wet lawn safety revolves around preventing accidents, like the mower slipping on the wet surface or the blades getting clogged.
What Happens to Your Cordless Mower When Cutting Wet Grass?
Wet conditions can affect your cordless mower’s performance in several ways. First, wet grass tends to stick to the underside of the mower, which can clog the blades and affect cutting efficiency.
This leads to an uneven cut and forces the motor to work harder. Over time, this could cause overheating or strain the battery.
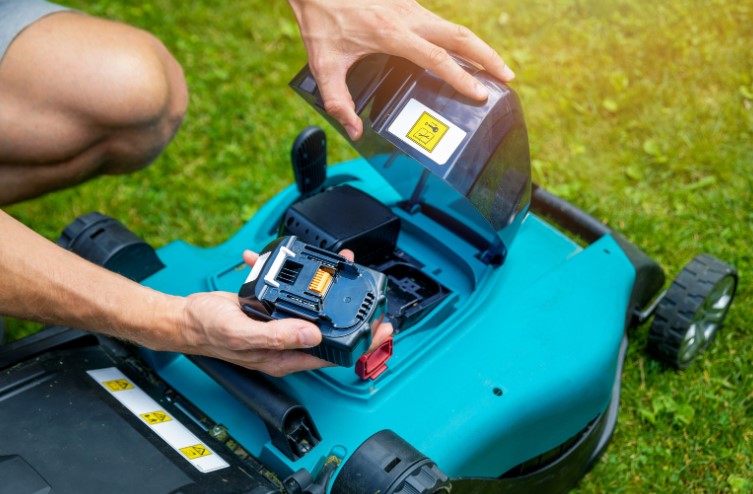
One of the most significant concerns is the impact on battery life in wet conditions. A cordless mower operates on a battery, and when moisture surrounds the mower’s electrical system, it can lead to battery deterioration or failure.
In extreme cases, you may notice the battery draining faster than usual. Additionally, the lawn mower blades can become dull more quickly when frequently cutting wet grass, leading to subpar performance over time.
What Are the Risks of Mowing Wet Grass?
There are several wet lawn mowing risks that you should consider before taking your cordless mower out on a damp day:
- Clogging and Grass Clumping: Wet grass tends to stick together, forming clumps under the mower deck. These clumps can affect the quality of the cut and put additional strain on the mower.
- Uneven Cutting: Wet grass bends under the weight of water, making it difficult for the mower blades to achieve an even cut especially cutting near a wall.
- Slippery Surfaces: Wet lawns are slippery, increasing the likelihood of losing control of the mower, especially on slopes.
- Electrical Issues: Although cordless mowers are designed to handle regular mowing conditions, prolonged exposure to moisture can cause electrical failures, which could be costly to repair.
Additionally, wet grass affects blade care—damp grass can be tougher to cut, and the blades may lose their sharpness more quickly, requiring frequent maintenance.
What Are the Advantages of Cordless Lawn Mowers in Wet Conditions?
Despite the risks, cordless lawn mowers offer certain advantages even in damp conditions. Unlike corded electric mowers, cordless models don’t have a trailing cable, reducing the risk of electrical hazards associated with wet grass.
Here are a few benefits:
- Mobility and Convenience: Cordless mowers are easy to manoeuvre across the lawn without worrying about extension cords or petrol fumes. This can be especially helpful if the lawn is damp, as you can quickly cover the area.
- Environmental Benefits: Battery-powered mowers are more eco-friendly than petrol-powered alternatives, producing no direct emissions and relying on rechargeable batteries.
When comparing corded mowers, petrol mowers, and cordless mowers, cordless models come out on top in terms of safety for everyday garden use, especially in damp but not overly wet conditions.
| Feature |
Cordless Lawn Mower |
Corded Electric Mower |
Petrol Mower |
| Mobility |
High |
Limited by cord |
High |
| Wet Lawn Safety |
Moderate |
Low (risk of shock) |
High risk of slipping |
| Environmental Impact |
Low (battery) |
Low |
High (emissions) |
| Performance in Wet Grass |
Moderate |
Poor |
High but risky |
How to Safely Mow Wet Grass With a Cordless Mower?
If you must mow wet grass, following these best practices for mowing in damp weather will ensure you don’t damage your mower or harm your lawn:
- Keep Blades Sharp: Wet grass dulls blades faster, so ensure your mower’s blades are sharp to achieve cleaner cuts.
- Cut Higher: Raise the mower’s cutting height to avoid overworking the motor and to prevent grass from clumping as much.
- Clean the Mower Regularly: After mowing, clean the underside of the mower to remove any clumps of wet grass. This prevents corrosion and keeps the mower in top shape.
- Mow Slowly: Slowing down allows the blades to cut through the thick, damp grass more effectively.
- Wait for Light Dampness: If the grass is soaking wet, wait for it to dry slightly before mowing. A lightly damp lawn is more manageable.
In terms of safety tips, always avoid mowing during heavy rain or when the ground is saturated. Additionally, never wash the mower immediately after use—let it dry to prevent water from getting into the electrical components.
What Are the Alternatives to Mowing Wet Grass?
If mowing in wet conditions isn’t ideal, what alternatives do you have?
- Wait for Drier Conditions: The safest option is to wait for a dry spell to mow your lawn. Wet grass can be challenging to cut evenly, and waiting ensures your mower performs better.
- Use a Rake: If the grass is too long and wet, consider using a rake to fluff it up. This will help it dry faster and make mowing easier later.
If you absolutely must mow in wet conditions, follow these tips for cutting wet grass:
- Mow at a higher setting.
- Clean the mower frequently to avoid clogging.
- Take breaks to prevent the battery from overheating.
Should You Mow Wet Grass With a Cordless Lawn Mower?
So, can you cut wet grass with a cordless lawn mower? The answer is yes, but with caution. While it’s possible to mow a damp lawn using a cordless mower, you must consider the risks—both to your mower and the lawn itself.
Wet grass can cause clogging, uneven cuts, and dull blades, while moisture can affect the mower’s battery and motor.
However, if you follow best practices, such as keeping the blades sharp, mowing slowly, and waiting for light dampness, you can maintain your lawn without damaging your mower. Ultimately, it’s best to wait for drier conditions whenever possible.
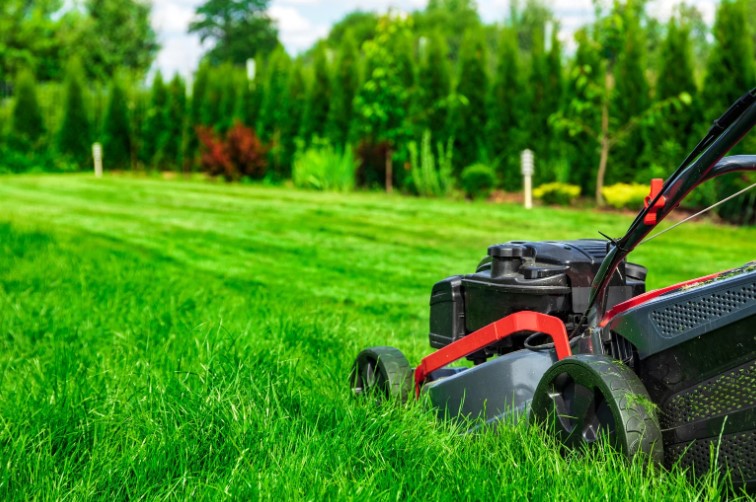
by Kanimozhi BV | Oct 17, 2024 | Garden, Exterior
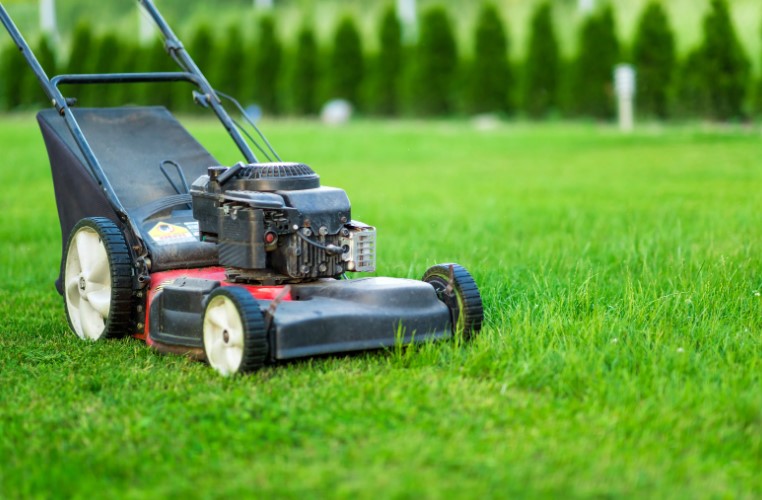
Lawn maintenance is a crucial part of home care, but weather conditions can make it challenging. After a rain shower, you might be tempted to cut the wet grass to keep your lawn looking neat.
But when using an electric lawn mower, is it safe to mow wet grass? In this guide on can you cut wet grass with an electric lawn mower, we’ll explore whether you can, or should, use an electric mower on wet grass and offer tips on how to do so safely if needed.
Is It Safe to Cut Wet Grass with an Electric Mower?
The short answer is no—cutting wet grass safely with an electric lawn mower is generally not recommended. Here’s why:
- Water and Electricity Don’t Mix: The most obvious danger is the risk of electrocution. Water conducts electricity, and if your electric mower comes into contact with moisture—whether through wet grass or puddles on the lawn—there is a significant risk of an electrical short circuit. This could potentially harm you or damage the mower’s electrical components.
- Corded vs. Cordless Mowers: For corded electric mowers, the risk is higher due to the power cord being exposed to wet conditions, which could lead to electric shock. Even with cordless (battery-powered) mowers, water can still seep into the internal components and cause a malfunction.
- Mower Damage: Wet grass can clog the mower’s deck, and the moisture can infiltrate sensitive parts like the motor or battery, leading to rust and corrosion over time. This not only shortens the lifespan of your mower but also reduces its performance.
While there may be times when you feel the need to mow wet grass, safety should always be the top priority.
Can You Cut Wet Grass With an Electric Lawn Mower?
Why Cutting Wet Grass With an Electric Lawn Mower is Risky?
Mowing a wet lawn poses specific risks, particularly when using an electric mower. Here’s why:
- Electrical Hazards: As mentioned earlier, electricity and water can create dangerous situations. Even if the mower appears to be working, moisture inside the device can cause it to short-circuit, leading to potential shock or fire hazards. Additionally, water can enter the electrical components, leading to irreversible damage.
- Slippage: Wet grass is slicker, meaning there’s a higher chance of slipping while mowing. A slip while holding an electric mower could cause you to lose control of the machine, which could result in personal injury or damage to the mower.
- Impact on Mower Efficiency: Wet grass clumps together and can block the blades and the mower deck, making the machine less efficient. This means you’ll likely have to stop frequently to clear out the grass, which is both inconvenient and increases wear on the mower.
For these reasons, using an electric mower in wet conditions is something to avoid when possible.
While electric mowers offer several advantages, including being eco-friendly and quieter than petrol mowers, they are more sensitive to moisture. Here’s how wet grass impacts their performance:
- Blade Clogging: Wet grass is denser and tends to stick to the blades and undercarriage of the mower. This can clog the mower’s cutting deck, causing the blades to slow down and cut less efficiently. Over time, this could lead to dull blades, requiring more frequent sharpening.
- Motor Strain: When the blades are clogged, the motor has to work harder to spin the blades. This strain can lead to overheating or even motor failure in extreme cases. For cordless electric mowers, this additional load will also drain the battery faster, reducing the runtime.
- Reduced Cutting Quality: Wet grass tends to bend and lie flat, making it difficult for the blades to make a clean cut. This can result in a patchy, uneven lawn, requiring additional passes with the mower. In some cases, the mower may simply push the wet grass down without cutting it at all.
In summary, wet grass diminishes the efficiency and performance of electric mowers, leading to more maintenance and potentially costly repairs.
What are the Best Practices for Mowing Wet Grass with an Electric Lawn Mower?
If you find yourself in a situation where you must mow wet grass with an electric mower, here are some best practices to follow to reduce risks and damage:
- Inspect the Lawn First: Before mowing, check the lawn for puddles and excess water. While damp grass may be manageable, mowing through waterlogged grass is extremely unsafe.
- Raise the Mower Height: Increase the cutting height to prevent the blades from overloading with wet grass. This will reduce the chance of clogging and make the mower’s job easier. It may also help avoid tearing the grass, which is more likely when it’s wet.
- Mow Slowly: When cutting wet grass, go slower than usual. This gives the mower time to process the thicker, heavier grass without overwhelming the motor.
- Take Frequent Breaks: Wet grass can accumulate quickly under the mower. Pause frequently to turn off the machine and clean out the deck and blades. This will prevent the motor from overheating and ensure a smoother cut.
- Dry the Mower After Use: Once you’re done, thoroughly clean and dry the electric mower. Remove any wet grass clippings from the blades, deck, and motor casing to prevent rust and damage to the machine’s electrical components.
By following these practices, you can reduce the risk of damaging both your lawn and your mower when mowing under less-than-ideal conditions.
Can Electric Mowers Handle Wet Grass Better Than Petrol Mowers?
There’s often a debate about whether electric mowers or petrol mowers perform better on wet grass. Here’s a quick comparison:
- Power: Petrol mowers generally have more cutting power, making them better equipped to handle thick, wet grass without clogging as easily. Electric mowers, while quieter and more eco-friendly, may struggle with the density of wet grass.
- Weight: Electric mowers are typically lighter than petrol mowers, which can be a disadvantage on wet grass. A heavier mower can press down on the grass more effectively, ensuring a cleaner cut, whereas a lighter electric mower might ride over the wet grass without cutting it properly.
- Maintenance: Electric mowers are easier to maintain but are more sensitive to moisture. Petrol mowers, while more robust in wet conditions, require more maintenance due to their engines.
In conclusion, while electric mowers can cut wet grass in a pinch, petrol mowers are generally better suited for handling damp conditions.
What Precautions Should You Take If You Must Mow Wet Grass with an Electric Mower?
If you have no choice but to mow wet grass with an electric lawn mower, there are some important precautions to keep in mind:
- Wear Appropriate Footwear: Ensure you have good traction by wearing sturdy shoes with good grip. This helps prevent slipping while operating the mower on a wet surface.
- Use a GFCI-Protected Outlet: If you are using a corded electric mower, always plug it into a Ground Fault Circuit Interrupter (GFCI) outlet. This will automatically cut off the power if there’s an electrical fault, helping to prevent electric shock.
- Mow in Dry Intervals: If it’s still raining or drizzling, wait until it stops. Allow the grass to dry for as long as possible before mowing, reducing the risks of electrical hazards.
- Inspect the Cord (if applicable): For corded electric mowers, check the power cord for any signs of damage or fraying before you begin mowing. A damaged cord can lead to electrocution, especially in wet conditions.
Taking these precautions will help you avoid the most serious risks when mowing wet grass with an electric mower.
Should You Use an Electric Lawn Mower on Wet Grass?
While it is technically possible to mow wet grass with an electric lawn mower, it’s not recommended due to the numerous risks involved, including electrical hazards, mower damage, and harm to your lawn.
If you must mow wet grass, follow the safety tips and best practices discussed here to reduce risks. Ultimately, waiting for the grass to dry is the safest and most effective approach for both your mower and your lawn. Certainly there are ways to mow lawn without the lawn mower.

FAQs About Using Electric Mowers on Wet Grass
1. Can I use my electric mower after it rains?
It’s best to wait until the grass has dried somewhat after it rains. If the grass is still too wet, the risks of electrical hazards, mower damage, and a poor-quality cut are high.
2. Will mowing wet grass with an electric mower damage the lawn?
Yes, mowing wet grass can tear the blades of grass instead of cutting them cleanly. This leaves the lawn vulnerable to diseases and fungal infections, which thrive in damp conditions.
3. How do I safely clean an electric mower after cutting wet grass?
First, unplug the mower or remove the battery to ensure there’s no power running through it. Use a brush or cloth to clean off any grass clippings from the blades and deck. Make sure to let the mower dry completely before storing it.
4. Should I sharpen the blades after using an electric mower on damp grass?
Yes, cutting wet grass dulls the blades faster, so sharpening them after use will ensure a clean, effective cut the next time you mow.
