
by Kanimozhi BV | Mar 8, 2025 | Interior, Exterior
What carries the useful energy from a lamp to its surroundings? is a common question among us. Lets dive in to learn what it is.
How Does a Lamp Transfer Useful Energy?
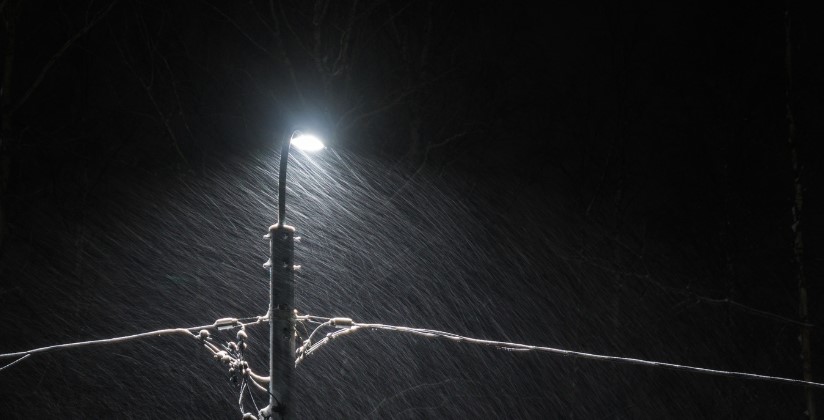
The useful energy from a lamp is carried by electromagnetic waves, mainly in the form of visible light and infrared radiation.
When a lamp is switched on, electrical energy is converted into light energy, which spreads out to illuminate objects and surroundings. However, not all of the energy is useful—some is lost as heat.
What Type of Energy Does a Lamp Produce?
A lamp converts electrical energy into two main forms:
- Light energy (useful energy) – This is carried by visible electromagnetic waves and is responsible for illumination.
- Heat energy (wasted energy) – This is carried by infrared radiation, which is often lost to the surroundings.
The efficiency of a lamp depends on how much of the electrical energy is converted into useful light energy instead of being lost as heat.

What Carries the Useful Energy from a Lamp to Its Surroundings?
The useful energy from a lamp is primarily carried by visible light waves that travel through the air. These electromagnetic waves move in straight lines and can be reflected, absorbed, or refracted when they interact with surfaces.
- Reflection: When light bounces off a surface, changing direction.
- Absorption: When light is absorbed by an object, converting into heat.
- Refraction: When light bends as it passes through different materials.
How Efficient Are Different Types of Lamps in Energy Transfer?
Different types of lamps vary in how efficiently they convert electrical energy into light. Here’s a comparison:
| Lamp Type |
Useful Energy (Light) |
Wasted Energy (Heat) |
Efficiency (%) |
| Incandescent |
10% |
90% |
Low (Less than 20%) |
| LED |
80% |
20% |
High (80-90%) |
| Fluorescent |
70% |
30% |
Moderate (60-70%) |
- Incandescent bulbs waste most of their energy as heat.
- Fluorescent lamps are more efficient but still produce some wasted heat.
- LED bulbs are the most energy-efficient, converting most of their energy into useful light.
Why Do Some Lamps Waste More Energy?
The amount of wasted energy depends on how the lamp generates light:
- Incandescent bulbs heat a filament until it glows, but most energy is lost as heat.
- Fluorescent lamps use gas and a phosphor coating to produce light, wasting less heat.
- LEDs pass electricity through a semiconductor, generating very little heat and maximising useful energy.
How Can We Reduce Energy Wastage in Lighting?
To improve efficiency and reduce wasted energy:
- Use LED bulbs – They convert most energy into useful light.
- Use reflectors and diffusers – They direct more light where it’s needed.
- Optimise lamp placement – Positioning lamps correctly can reduce the number of bulbs needed.

Common Myths About Light Energy Transfer
- Myth: All bulbs transfer energy the same way → Reality: Some are much more efficient than others.
- Myth: Heat energy from lamps is always useful → Reality: In most cases, it is wasted energy.
Conclusion – Understanding Energy Transfer from Lamps
Lamps transfer useful energy through visible light waves that illuminate surroundings. However, some energy is lost as heat (infrared radiation). Choosing energy-efficient bulbs, like LEDs, helps reduce energy waste and improve lighting efficiency.
Hope this guide has given answer for “what carries the useful energy from a lamp to its surroundings?”
Related Article: How Much Work Is Done If a Force of 20N Is Used to Move an Object 6 Metres?
FAQ On Energy Transfer from Lamps
1. Does a lamp transfer energy through conduction or convection?
No, a lamp primarily transfers energy through radiation. Unlike conduction (which requires direct contact) or convection (which involves fluid movement), the useful energy from a lamp is carried by electromagnetic waves, specifically visible light and some infrared radiation.
2. Can the useful energy from a lamp be stored for later use?
No, once a lamp emits light, the energy is immediately absorbed, reflected, or scattered by surrounding objects. However, solar-powered lamps can store electrical energy in batteries for later use.
3. Why do some lamps appear brighter than others if they all use the same amount of electricity?
The brightness of a lamp depends on how efficiently it converts electrical energy into light. LEDs appear brighter than incandescent bulbs of the same wattage because they produce more visible light and waste less energy as heat.
4. Does the colour of light affect how energy is carried from a lamp?
Yes, different colours of light carry different amounts of energy. Blue and violet light waves have more energy than red or yellow light because they have a shorter wavelength and higher frequency on the electromagnetic spectrum.

by Kanimozhi BV | Mar 6, 2025 | Garden, Exterior
Rotavating is a common method used to break up soil, making it easier to plant flowers, vegetables, or new turf. However, a common question among gardeners is “Do I need to remove grass before rotavating?” whether grass should be removed before rotavating.
Some prefer to rotavate directly over the grass, while others believe removing it first is essential for better soil preparation.
This guide will explore whether you should remove grass before rotavating, how to prepare your soil, and the best practices for achieving a healthy and fertile garden bed.
Can You Rotavate Grass?
Yes, you can rotavate grass, but the results depend on factors like soil condition, grass type, and future planting plans. Rotavating over grass can help break it down into the soil, but it may also lead to regrowth if the roots are not properly removed.
Some gardeners prefer to leave the grass in place to decompose naturally, while others remove it to create a clean planting surface.

Do I Need to Remove Grass Before Rotavating?
Should You Remove Grass Before Rotavating?
Whether or not to remove grass before rotavating depends on your gardening goals.
When Should You Remove Grass?
- If you are planting new turf or a vegetable garden, removing the grass ensures a smoother surface and takes less time for turf rooting.
- If the grass contains weeds, rotavating without removal can spread weed seeds.
- When the soil is compacted, removing the grass helps improve aeration and drainage.
When Can You Rotavate Over Grass?
- If the grass is sparse, rotavating may break it down effectively.
- When creating a wildflower meadow, some grass can help retain soil structure.
- If you plan to mulch heavily afterward, the remaining grass can decompose naturally.
What Happens If You Rotavate Over Grass?
Rotavating over grass can mix the organic matter into the soil, which may be beneficial. However, there are some risks:
- Regrowth: Grass may regrow if not completely uprooted.
- Weed Spread: Weeds can become more problematic if rotavated into the soil.
- Uneven Surface: Decomposing grass can cause uneven soil levels.
To avoid these issues, consider removing the grass or rotavating multiple times to break down the roots thoroughly.

Do You Need to Remove Weeds Before Rotavating?
Yes, removing weeds before rotavating is recommended. Rotavating weeds can spread their seeds and roots, leading to more growth.
Best Methods to Remove Weeds:
- Manual removal: Pulling weeds out by hand or using a hoe.
- Herbicides: Applying a selective herbicide before rotavating.
- Mulching: Covering weeds with mulch to block sunlight and kill them naturally.
How Do You Prepare Ground for Rotavating?
Proper ground preparation ensures effective rotavating and a healthy planting bed.
Steps to Prepare the Soil:
- Clear the Area: Remove large rocks, sticks, and debris.
- Check Soil Moisture: Rotavating dry or overly wet soil can cause clumping.
- Remove Grass and Weeds (if needed): Cut the grass short or use a turf cutter.
- Loosen the Soil: Use a fork or spade to break up compacted areas.
- Apply Compost or Fertilizer: Enrich the soil with organic matter if needed.

How to Remove Grass Before Rotavating?
If removing grass, the following methods can help:
- Manual Digging: Using a spade to lift and remove grass layers.
- Turf Cutter: A mechanical tool that removes grass efficiently.
- Herbicide Treatment: Killing the grass before rotavating (use eco-friendly options if possible).
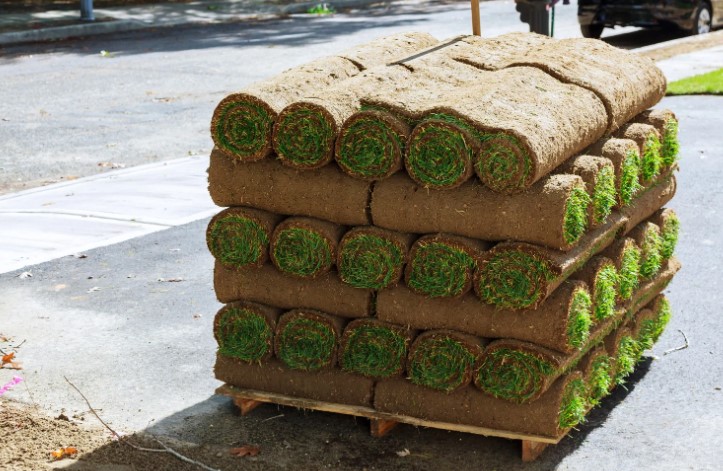
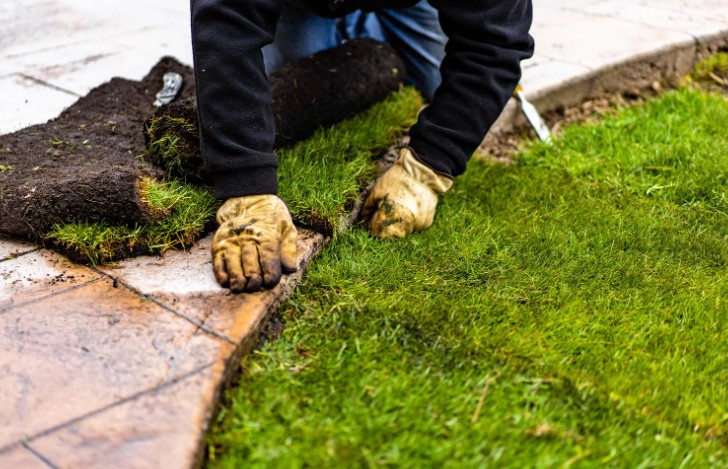
Do You Remove Old Grass Before Levelling and Turfing?
Yes, removing old grass before levelling and laying new turf at right time is essential for a smooth, even lawn. Leaving grass underneath may lead to uneven settling and poor root establishment.
Best Practices for Levelling and Turfing:
- Remove the old grass using a turf cutter or spade.
- Rotavate the soil to improve aeration.
- Rake the lawn and level the soil before laying new turf.
- Water and compact the soil to remove air pockets.
Pros and Cons of Rotavating Without Removing Grass
| Factor |
Removing Grass Before Rotavating |
Rotavating Over Grass |
| Soil Quality |
Improves aeration and drainage |
May cause uneven breakdown |
| Effort Required |
More labor-intensive |
Easier and quicker |
| Weed Growth |
Reduces weed regrowth |
Risk of weeds returning |
| Planting Readiness |
Ready for planting sooner |
May require additional levelling |
Best Practices for Rotavating Your Garden
- Choose the right rotavator for your soil type.
- Avoid rotavating when the soil is too wet or dry to prevent damage.
- Work in sections to ensure even coverage.
- Incorporate organic matter like compost for better soil fertility.
Conclusion
Removing grass before rotavating is generally the best option if you want a smooth, weed-free garden bed. However, in some cases, rotavating over grass may work, especially if you plan to mulch heavily or create a wildflower area.
For the best results, assess your soil condition, garden goals, and the effort you’re willing to invest. If in doubt, removing grass before rotavating will give you better soil quality and long-term gardening success.
Suggestion:
If you’re unsure whether to remove grass, consider testing a small section first. Rotavate one area with the grass intact and another with the grass removed to compare the results.
Here you got the answer for your question on “do i need to remove grass before rotavating”.
Frequently Asked Questions (FAQs) on Removing Grass Before Rotavating
1. Can I rotavate my garden if the soil is too wet?
No, rotavating wet soil can cause compaction and clumping, making it difficult for plants to grow. It’s best to wait until the soil is moist but not soggy.
2. Will rotavating kill grass permanently?
Not necessarily kill grass permanently. Some grass may regrow, especially if roots remain intact. To prevent this, consider removing the grass first or rotavating multiple times.
3. How long should I wait before planting after rotavating?
It depends on the soil condition and amendments used. If you’ve added compost or fertilizer, wait a week or two for the nutrients to settle before planting.

by Kanimozhi BV | Mar 5, 2025 | Garden, Exterior
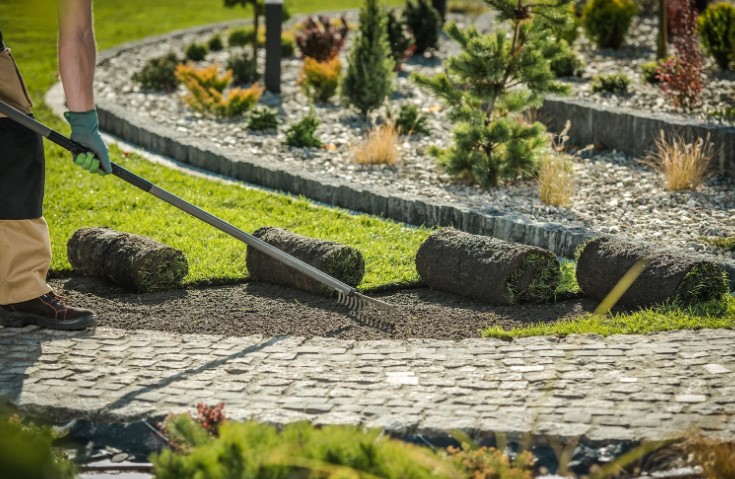
Laying new turf is an exciting step towards achieving a lush, green lawn, but one of the most common concerns is how long does it take for the turf to root. The process of turf establishment is crucial because strong roots ensure a healthy, long-lasting lawn.
However, the time it takes for turf to root can vary depending on several factors, including soil preparation, watering routine, weather conditions, and the type of turf used.
In this guide, I will explain how long does turf take to root, what affects the rooting time, and how to speed up the process. I will also provide tips on checking if the turf has rooted properly and troubleshooting common issues.
How Long Does Turf Take to Root?
Understanding the Turf Rooting Process
Turf establishes itself in two main stages:
- Shallow Rooting (Days 1-10): In the first few days after laying, the turf begins developing shallow roots that help it absorb water and nutrients. During this stage, the turf is delicate and requires careful maintenance.
- Deep Rooting (Weeks 3-6): After the initial stage, the roots start growing deeper into the soil, anchoring the turf securely. By the end of six weeks, a properly maintained lawn should be well-established and resilient.
The exact time for turf to root depends on the environment and how well it is cared for during the initial weeks.
What are the Factors That Affect Turf Rooting Time?
Several factors influence how quickly turf establishes its roots:
- Soil Quality: Well-prepared soil with good drainage and aeration promotes faster rooting. Compacted or poor-quality soil can slow down the process.
- Weather Conditions: Warm temperatures and moderate rainfall create the best conditions for turf growth. Extreme heat, drought, or frost can delay rooting.
- Turf Type: Different grass varieties have varying rooting times. Some species establish quickly, while others take longer to develop strong roots.
- Watering Routine: Consistent and correct watering encourages deep root growth, while overwatering or underwatering can hinder the process.
- Foot Traffic: Walking on newly laid turf too soon can disturb the roots and slow their development.
How to Help Turf Root Faster?
How to Prepare the Soil for Quick Rooting?
Proper soil preparation is essential for fast and healthy root development. Before laying the turf, I ensure the soil is:
- Loosened and aerated to allow roots to penetrate easily.
- Leveled and free of debris for even growth.
- Enriched with organic matter or topsoil to provide essential nutrients.
A well-prepared base gives the turf the best possible start.
What are the Watering Schedule for New Turf?
Watering is critical for turf establishment, but it must be done correctly. Here’s the ideal schedule:
| Time After Laying Turf |
Watering Frequency |
| Days 1-7 |
Twice daily |
| Days 8-14 |
Once daily |
| Weeks 3-4 |
Every 2-3 days |
| Weeks 5+ |
Once per week |
Signs of overwatering include soggy soil and yellowing grass, while underwatering causes wilting and dry patches. Adjusting watering based on weather conditions is essential.
What are the Fertilising Tips for Stronger Roots?
Applying fertiliser at the right time helps turf develop a robust root system. I recommend:
- Using a phosphorus-rich fertiliser immediately after laying turf to encourage root growth.
- Applying a balanced fertiliser after four weeks to maintain healthy growth.
- Avoiding over-fertilisation, which can weaken the roots and burn the grass.
What are the Common Mistakes to Avoid That Slow Rooting?
To ensure the best results, I avoid these common turf-laying mistakes:
- Walking on the turf too soon – This can disrupt the roots and cause uneven growth.
- Watering too much or too little – Consistency is key for healthy establishment.
- Skipping soil preparation – Poor soil conditions lead to weak root development.
How to Check If Turf Has Rooted?
Simple Tests to Check Root Growth
Checking if turf has rooted properly is easy with these methods:
- The Tug Test: Gently lift a small section of turf. If it resists being pulled up, it has started rooting.
- Visual Inspection: Healthy turf should have new growth and a uniform green colour.
- Firmness Underfoot: Walking on the lawn should feel stable, not soft or spongy.
What to Do If Turf Is Not Rooting Properly?
If the turf is struggling to establish, I take the following steps:
- Check the soil moisture – Ensure the soil is damp but not waterlogged.
- Aerate compacted soil – Loosening the soil helps roots penetrate deeper.
- Apply a light top dressing – Adding a thin layer of nutrient-rich soil can support growth.

Conclusion
The time it takes for turf to root depends on several factors, but with the right preparation, watering, and care, it usually takes around three to six weeks to fully establish. Proper soil preparation, a consistent watering schedule, and avoiding common mistakes all contribute to a successful lawn.
By following these guidelines on how long does turf take to root, I ensure that new turf grows strong, healthy, and resilient, providing a lush green lawn for years to come.
Related Article: Best Time to Lay Turf UK: When Is the Perfect Month of the Year?
Frequently Asked Questions on How Long Does Turf Take to Root
1. Can you walk on turf before it has rooted?
No, walking on turf before it has rooted can disturb the soil and slow down the establishment process. It’s best to avoid foot traffic for at least two weeks.
2. How long before I can mow new turf?
I usually wait three to four weeks before mowing. The first cut should be light, with the mower blades set high to avoid damaging young roots.
3. Does laying turf in winter affect rooting time?
Yes, colder temperatures slow down root development. However, turf can still establish in winter if the ground isn’t frozen. It just takes longer compared to spring or summer.
4. Can I speed up turf rooting with special treatments?
Using a root-stimulating fertiliser and keeping a consistent watering schedule helps speed up the process. However, patience and proper care are necessary.

by Kanimozhi BV | Mar 4, 2025 | Garden, DIY Ideas, Exterior
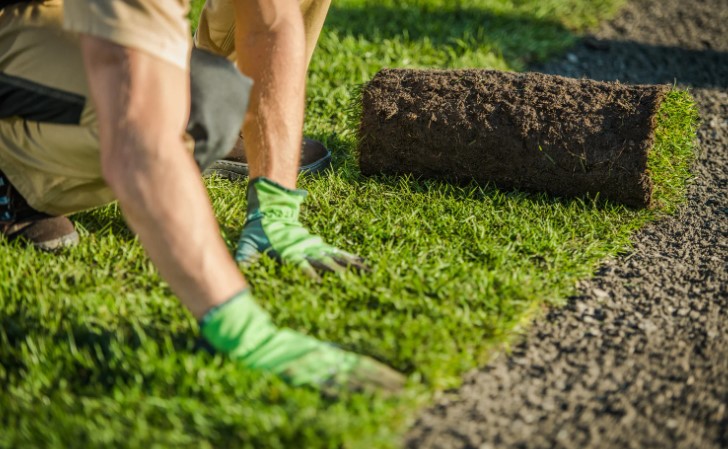
Laying turf at the right time is crucial for a healthy, long-lasting lawn. The UK’s weather plays a major role in turf establishment, affecting root growth, water retention, and overall lawn health. So, when is the best time to lay turf in the UK?
Choosing the right season and month can make a huge difference in how well your turf takes root. In this guide, I’ll explain:
- The best time of year to lay turf
- The perfect month for turfing
- How seasons affect turf growth
- Essential preparation and aftercare tips
If you’re planning to lay new turf, this guide will ensure you pick the best time for a lush, green lawn.
When Is the Best Time to Lay Turf in the UK?
The best time to lay turf UK depends on weather conditions, soil temperature, and water availability. Generally, the best time of year is:
- Autumn (September – October) – Best season for laying turf
- Spring (March – April) – Good alternative
- Summer (May – August) – Possible, but needs extra care
- Winter (November – February) – Not recommended
Turf needs mild temperatures, consistent moisture, and minimal stress to establish properly. That’s why autumn is considered the perfect season for laying turf.
Can I Lay Turf in Autumn? – Why It’s the Best Season?
Autumn (September-October) is the best time to lay turf UK because:
- The soil is warm after summer, helping roots establish quickly.
- Rainfall is more consistent, reducing the need for frequent watering.
- Weeds in lawn are less aggressive, giving new turf a better start.
- There’s less foot traffic, preventing damage to young turf.
If I had to choose the best month to lay turf, it would be September or early October. The combination of warmth, moisture, and low stress makes this period ideal for new turf to thrive.
Is Spring a Good Time to Lay Turf?
Spring (March-April) is the second-best time to lay turf because:
- The weather is warming up, encouraging strong growth.
- Rainfall is moderate, helping with hydration.
However, there are risks:
- Unpredictable UK weather – Sudden cold snaps can slow root development.
- Drier periods – If April turns dry, you’ll need to water frequently.
If you plan to lay turf in spring, make sure to monitor moisture levels and fertilise correctly to support new growth.
Can I Lay Turf in Summer?
Laying turf in summer (May-August) is possible but challenging because:
- Hot weather dries out the turf quickly, requiring constant watering.
- There’s a higher risk of drought, making turf establishment difficult.
Tips for summer turfing:
- Water daily for the first two weeks.
- Lay turf early in the morning or late in the evening to avoid heat stress.
- Use a shade cloth if temperatures exceed 25°C.
If I had a choice, I would avoid summer unless absolutely necessary.

Is Winter Turfing Possible?
Technically, you can lay turf in winter, but I wouldn’t recommend it because:
- Cold soil slows root establishment.
- Heavy rain can cause waterlogging.
- Frost damage may kill young turf.
If you must lay turf in winter, choose mild days with no frost and avoid walking on it until spring.
What Is the Perfect Month to Lay Turf?
Here’s a breakdown of each month and whether it’s suitable for turfing:
| Month |
Suitability for Laying Turf |
| September |
Best month – warm soil, good rainfall |
| October |
Still ideal – cooler but moist |
| March |
Good – warming up, needs some care |
| April |
Good – but watch out for dry spells |
| May-August |
Risky – hot weather, high watering needs |
| November-February |
Not recommended – frost & waterlogging |
So, when is the perfect month of the year to lay turf?
September is the absolute best, followed by early October.
What are the Key Factors That Determine the Best Time to Lay Turf?
Before laying turf, I always consider these key factors:
1. Soil Temperature
- Turf roots grow best in 10-18°C soil temperatures.
- If the soil is too cold, roots won’t establish properly.
2. Weather Conditions
- Mild temperatures (10-20°C) are ideal for laying turf.
- Frequent rainfall reduces watering needs.
3. Lawn Usage
- If your garden is used heavily, avoid laying turf in high-traffic seasons.
What are the Step-by-Step Guide to Laying Turf at the Right Time?
- Prepare the soil – Remove weeds, level the ground, and improve drainage.
- Choose the right turf – Pick a UK climate-friendly grass variety.
- Lay turf strips carefully – Stagger the joins like brickwork for stability.
- Water immediately – Soak the turf to help roots establish.
- Avoid walking on it – Let it settle for 2-3 weeks before heavy use.
What are the Common Mistakes to Avoid When Laying Turf?
- Laying turf at the wrong time (too hot, too cold, too wet).
- Skipping soil preparation (poor drainage, compacted soil).
- Not watering enough (especially in spring and summer).
- Walking on new turf too soon (damaging roots).
Conclusion
The best time to lay turf in the UK is autumn, with September being the perfect month. Spring is a good alternative, while summer and winter should be avoided if possible.
By choosing the right time and following proper turfing techniques, you’ll have a beautiful, healthy lawn that thrives year-round.
Related Article: How Do You Cut Artificial Grass Turf?
What are the FAQs About the Best Time to Lay Turf in the UK?
1. When is the best time to lay turf in the UK?
September and October are the best months.
2. Can I lay turf all year round?
Technically, yes, but winter and summer have major risks.
3. How long does turf take to root?
- Spring/autumn: 2-3 weeks
- Summer: 1-2 weeks (with extra watering)
- Winter: 4-6 weeks (or longer)
4. Should I fertilise turf before or after laying it?
After. Use a starter fertiliser once it starts rooting.

by Kanimozhi BV | Mar 4, 2025 | Garden, Exterior
Scarifying is a crucial part of maintaining a healthy, lush lawn. By removing thatch, moss, and dead grass, scarifying improves airflow, allowing nutrients and water to reach the soil more effectively.
However, after scarifying, your lawn can look bare and thin, which is why overseeding is essential to restore its density.
But the big question is: “How long after scarifying should I overseed?” Timing is crucial to make sure that successful grass seed germination, long-term lawn health.
In this guide, I’ll explain the best waiting period before overseeding, how to prepare your lawn, and essential aftercare tips to help your lawn recover beautifully.
What Is Scarifying and Why Does Your Lawn Need It?
What Is Lawn Scarifying?
Scarifying is the process of removing built-up thatch, getting rid of moss, and debris from your lawn using a scarifier or verticutter. It creates space for new grass to grow by improving air circulation, water absorption, and nutrient uptake.
Why Is Scarifying Important?
If your lawn feels spongy or has yellowing patches, poor drainage, or excessive moss to remove, scarifying can help by:
- Preventing thatch buildup, which blocks water and nutrients.
- Encouraging stronger, deeper grass roots.
- Enhancing lawn density and overall health.
How Long After Scarifying Should I Overseed? – How Soon Can I Do?
You shouldn’t overseed immediately after scarifying because the lawn needs some recovery time. Generally, you should wait 3 to 7 days before overseeding, depending on the weather, lawn condition, and soil moisture levels.
What are the Factors Affecting the Timing of Overseeding?
- Weather Conditions: In the UK, mild temperatures (10-18°C) with some moisture are ideal for overseeding.
- Lawn Condition: If the lawn is heavily damaged, allow a few extra days for recovery.
- Soil Moisture: Ensure the soil is slightly moist but not overly wet before spreading new seeds.
What is the Risk of Overseeding Too Soon?
If you overseed immediately, the seeds may fail to establish properly due to soil disturbance. Giving your lawn a few days to settle ensures better seed-to-soil contact and successful germination.
When is the Best Time of Year to Scarify and Overseed in the UK?
Timing plays a vital role in lawn renovation success. The best seasons for scarifying and overseeding in the UK are:
| Season |
Pros |
Cons |
| Autumn (September-October) |
Warm soil, consistent rainfall, minimal weed competition |
Shorter growing period before winter |
| Spring (March-April) |
Warmer temperatures, rapid seed germination |
Risk of dry spells, more weed competition |
Why Autumn Is Best for overseeding?
Autumn provides the ideal conditions for overseeding after scarifying, as the soil is warm, there’s natural moisture, and weeds are less aggressive.

How to Prepare Your Lawn for Overseeding After Scarifying?
To maximise seed germination, proper preparation is key. Here’s what I do before overseeding:
- Clear Debris – Remove any remaining thatch or moss with a rake.
- Loosen the Soil – Lightly aerate the lawn to improve seed-to-soil contact.
- Choose the Right Grass Seed – Use a UK climate-friendly mix, such as ryegrass for hard-wearing lawns or fescues for shady areas.
- Fertilise (Optional) – Apply a low-nitrogen pre-seeding fertiliser to support new seed growth.
What is the Step-by-Step Guide to Overseeding After Scarifying?
Overseeding correctly ensures healthy, even grass growth. Here’s my step-by-step process:
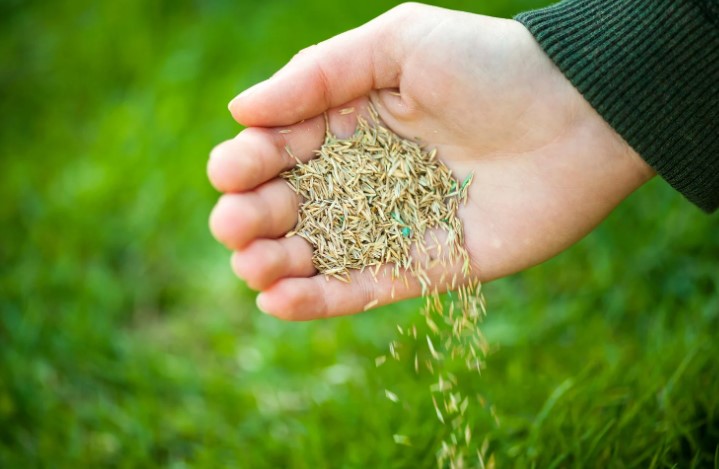
- Water the Lawn Lightly – Moist soil helps seeds settle in better.
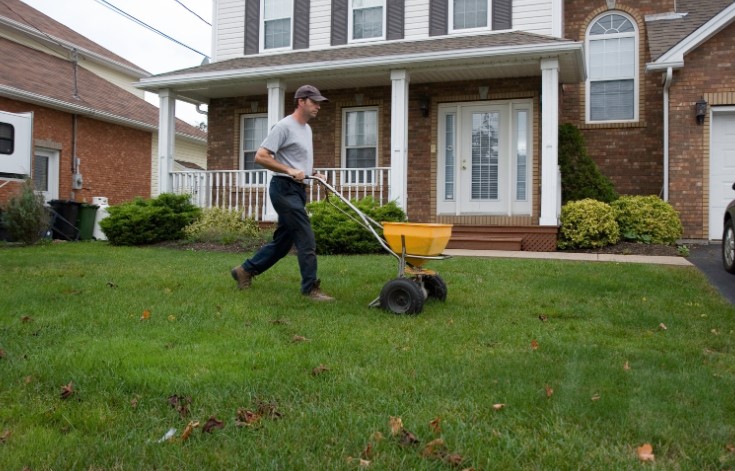
- Spread the Grass Seed Evenly – Use a seed spreader or hand-sow for small areas.
- Rake the Seeds In – Lightly rake the surface to cover the seeds with a thin layer of soil.
- Firm the Soil – Gently press down the seeds using a roller or by walking over them.
- Water Regularly – Keep the soil consistently moist, especially during the first 2–3 weeks.
What are Common Mistakes to Avoid When Overseeding After Scarifying?
Even with the right process, some mistakes can reduce seed germination rates. Here are a few pitfalls to avoid:
- Overseeding Too Soon – Waiting 3-7 days allows the soil to settle for better seed growth.
- Using the Wrong Grass Seed – Choose a variety suitable for your lawn type and climate.
- Not Keeping Soil Moist – Seeds need constant moisture to sprout.
- Skipping Aftercare – Fertilisation and proper mowing help new grass thrive.
How Long Before I See Results from Overseeding?
The time it takes to see results depends on the type of grass seed and growing conditions.
| Grass Type |
Germination Time |
| Ryegrass |
5-10 days |
| Fescues |
7-14 days |
| Bentgrass |
10-14 days |
What are Key Factors Affecting Growth?
- Soil Temperature – Ideal range is 10-18°C.
- Watering – Keep soil moist but not waterlogged.
- Mowing Lawn – Avoid mowing until new grass reaches 5-7 cm.
Conclusion
Scarifying helps rejuvenate your lawn, but overseeding ensures it grows back thicker and healthier. The key takeaway is to wait 3-7 days before overseeding, allowing the soil to settle for optimal seed germination.
By following the step-by-step overseeding guide, choosing the right grass seed, and avoiding common mistakes, you’ll achieve a lush, green lawn ready to thrive! 🌱
Final Tip:
Regular lawn maintenance, including aeration, watering, and seasonal fertilisation, will keep your lawn in top condition for years to come.
What are the FAQs About How Long After Scarifying Should I Overseed?
No, it’s best to wait 3-7 days for the soil to settle.
2. Should I Fertilise Before or After Overseeding?
Use a pre-seeding fertiliser before sowing, and a low-nitrogen fertiliser after germination.
3. What If It Rains Heavily After Overseeding?
Light rain is beneficial, but heavy rain can wash away seeds. If rain is forecasted, delay overseeding.
4. How Soon Can I Mow After Overseeding?
Wait until new grass reaches 5-7 cm before mowing on a high setting.
