
by Kanimozhi BV | Sep 7, 2024 | Carpet, DIY Ideas, Interior
Need Tips on how to remove stagnant water smell from carpets? Stagnant water trapped in carpets can leave behind a musty, unpleasant odor that not only ruins the atmosphere of your home but can also lead to mold and mildew growth. If left untreated, this could result in health risks and permanent damage to your carpet.
In this guide, I’ll walk you through some of the most effective methods for removing stagnant water smells from carpets and tips to prevent them from coming back.
Why Does Stagnant Water Smell Linger in Carpets?
Absorption of Moisture
Carpets are porous and absorb moisture like a sponge. When water gets trapped in the fibers, it becomes difficult to dry out, especially in thicker carpets.
This stagnant water sits in the carpet’s fibers, and as it becomes stale, it starts to emit a strong, musty odor. If not dealt with quickly, this water can cause the carpet’s underlying padding and even the flooring to absorb moisture, making the problem worse.

Growth of Mold and Mildew
The presence of moisture in your carpet creates a perfect breeding ground for mold and mildew. These fungi thrive in damp, dark environments, and the musty odor you notice is often due to their growth.
Mold can start developing within 24-48 hours on a wet carpet, and once it does, it can be difficult to remove. Mold spores are not only harmful to your carpet but can also pose serious health risks, especially to individuals with allergies or respiratory conditions.
How to Remove Stagnant Water Smell from Carpets?
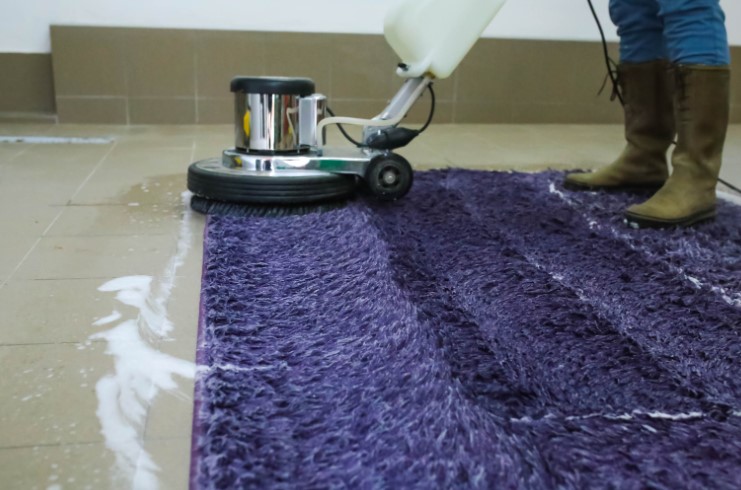
1. Dry the Carpet Thoroughly
The first step in eliminating stagnant water smells is to ensure that the carpet is completely dry. Begin by removing as much moisture as possible:
- Towels and Wet-Dry Vacuums: Use towels to blot excess water from the carpet. For a more efficient process, use a wet-dry vacuum to suction out water from the carpet and underlying padding.
- Fans and Dehumidifiers: After removing the excess water, place fans around the area and use a dehumidifier to draw moisture from the air. This will help speed up the drying process, preventing further damage and mold growth.
2. Baking Soda for Odor Absorption
Baking soda is a fantastic, natural odor absorber. Once the carpet is dry, sprinkle a generous amount of baking soda over the affected area:
- Let the baking soda sit on the carpet for at least a few hours, so it can absorb any lingering smells.
- Vacuum up the baking soda thoroughly. To process strong odors, you may need to repeat.
3. White Vinegar Solution
White vinegar is a powerful cleaning agent that helps neutralize odors and disinfect surfaces:
- Mix an equal amount of white vinegar with water in a spray bottle.
- Lightly mist the carpet with this solution, paying special attention to the areas with the most odor. Avoid over-saturating the carpet.
- Allow the vinegar to air dry. The strong vinegar smell will dissipate, taking the musty odor with it.
4. Use of Carpet Shampoo
For a more thorough cleaning, you can use a carpet shampoo designed to lift odors and dirt from deep within the fibers:
- Apply the shampoo following the product instructions, focusing on the areas affected by the stagnant water.
- Once the shampoo dries, vacuum up any residue to leave your carpet smelling fresh and clean.
5. Apply Hydrogen Peroxide for Mold Removal
If you suspect mold or mildew has developed in the carpet, hydrogen peroxide can help:
- Mix two cups of water with half a cup of hydrogen peroxide in a spray bottle.
- Lightly spray the affected areas and allow it to sit for a few minutes. Hydrogen peroxide kills mold spores and eliminates associated odors.
- Blot the area with a clean cloth to remove excess moisture and let the carpet dry fully.
6. Dehumidifiers and Airflow
Maintaining proper airflow is key to preventing mold growth and further odors. Place dehumidifiers in the room to absorb excess moisture from the air and keep windows open for better ventilation. Using a dehumidifier long-term can also help reduce humidity in the room, which helps prevent musty smells from returning.
How to Prevent Future Stagnant Water Smells?
Check for Leaks and Dampness
The best way to prevent stagnant water smells is to address the root cause:
- Regularly check for leaks in the walls, ceilings, and under the carpet. If you find any leaks, address them immediately to avoid further moisture issues.
- If your home is prone to dampness or floods, consider taking preventive measures like installing waterproof flooring under carpets or sealing cracks where moisture could enter.
Regular Carpet Maintenance
Keeping your carpets clean and dry is essential in preventing odors:
- Vacuum regularly to remove dirt and dust that can trap moisture.
- If your carpet is in a high-moisture area, consider deep-cleaning it every few months to keep it fresh.
- Spot clean any spills or damp areas as soon as possible to prevent them from setting into the carpet.
Use of Waterproof Carpet Padding
In moisture-prone areas, using waterproof carpet padding beneath your carpet can help. This padding prevents water from soaking deep into the carpet and provides an additional layer of protection against odors and mold.
Conclusion
Eliminating stagnant water smells from carpets requires a combination of drying, cleaning, and deodorizing techniques. With the right approach, you can restore your carpet to its fresh, clean state and prevent future odors by maintaining a dry and clean environment. Remember, prompt action is crucial when dealing with water damage to avoid long-term damage and unpleasant odors.
FAQs on Removing Stagnant Water Smells
1. How Long Does It Take for a Carpet to Dry Completely?
The time it takes for a carpet to dry depends on several factors such as the carpet’s thickness, the level of moisture, and the drying methods used. Typically, it can take 12 to 24 hours to dry a damp carpet, but if fans and dehumidifiers are used, the process may be faster.
2. Can Mold Grow in Carpets Due to Stagnant Water?
Yes, mold can grow in carpets as quickly as 24 to 48 hours after water exposure. Mold not only causes a musty smell but can also pose health risks. It’s important to act quickly to dry and disinfect the carpet.
3. Is Professional Cleaning Necessary?
Professional cleaning may be necessary if the smell persists after DIY efforts or if the water damage is extensive. Professional cleaners can deep clean the carpet, remove mold, and ensure the padding underneath is properly dried and deodorized.
by Kanimozhi BV | Sep 5, 2024 | Pest Control
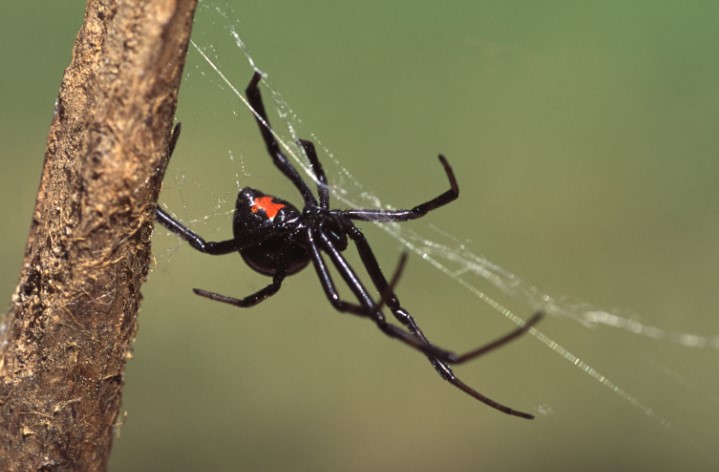
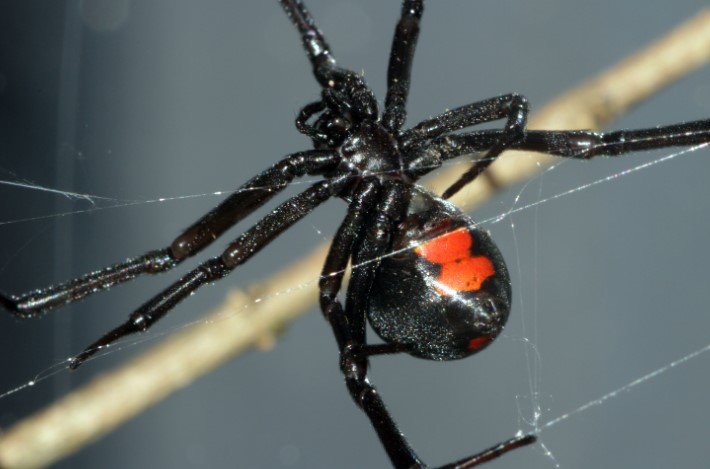
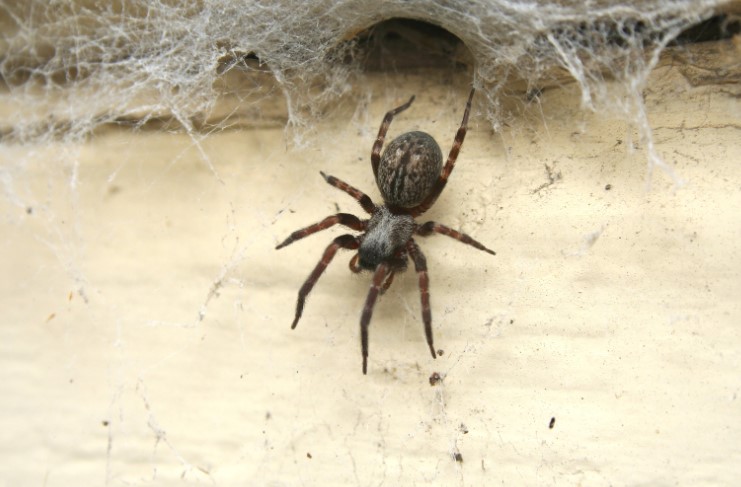
What Is a False Widow Spider and Why Should I Care?
False widow spiders have become increasingly common in the UK, sparking concern and confusion among homeowners. Often mistaken for the far more dangerous black widow, false widows are less harmful but can still cause alarm if found indoors.
This guide will help you on how to identify a false widow spider by covering their key characteristics such as size, color, and distinctive markings. We’ll also explore how to differentiate them from other common UK spiders, what steps to take if you find one, and how to prevent them from settling in your home.
By the end of this guide, you’ll be able to confidently spot a false widow spider and take appropriate actions to keep your home safe.
What are the Key Characteristics of a False Widow Spider?
What is the Size and Shape Of False Widow Spiders?
False widow spiders are medium-sized and can be identified by their robust, rounded bodies. Typically:
- Females: Measure between 8.5 to 14mm in body length.
- Males: Are slightly smaller.
- Body Shape: They have a distinctive bulbous abdomen, making them easy to differentiate from other, more slender spiders.
What are The Color and Markings Of False Widow Spiders?
One of the most noticeable features of a false widow spider is its coloration. Key identifying characteristics include:
- Color: Dark brown or black with a glossy finish.
- Markings: Cream-colored patterns on the abdomen, often resembling a skull or other distinct shapes.
How is the Web Structure?
The webs of false widow spiders are another telltale sign. Unlike the organized, circular webs of orb-weavers:
- Structure: Their webs are tangled and messy.
- Location: Typically found in undisturbed corners like sheds, garages, and eaves.
How to Differentiate a False Widow from Other Common UK Spiders?
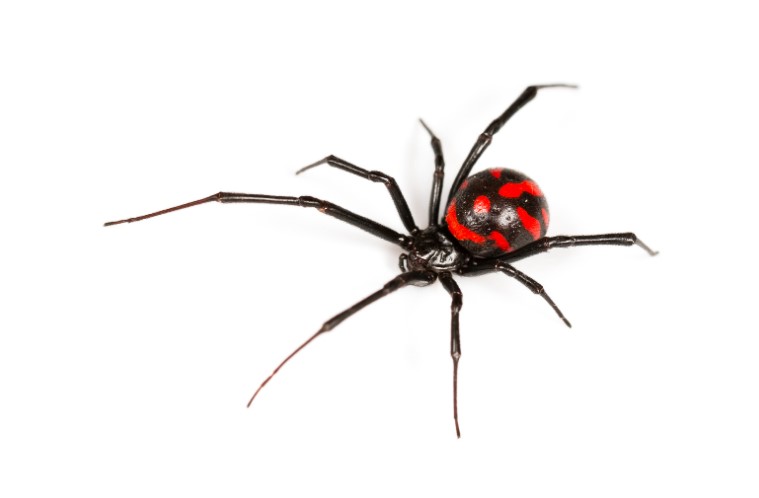
False Widow vs. Black Widow
- Danger Level: Black widows are much more dangerous and rare in the UK.
- Markings: Black widows have a red hourglass marking, while false widows do not.
False Widow vs. Common House Spider
- Color: House spiders are generally lighter in color.
- Body Structure: House spiders have longer, thinner legs compared to the robust false widow.
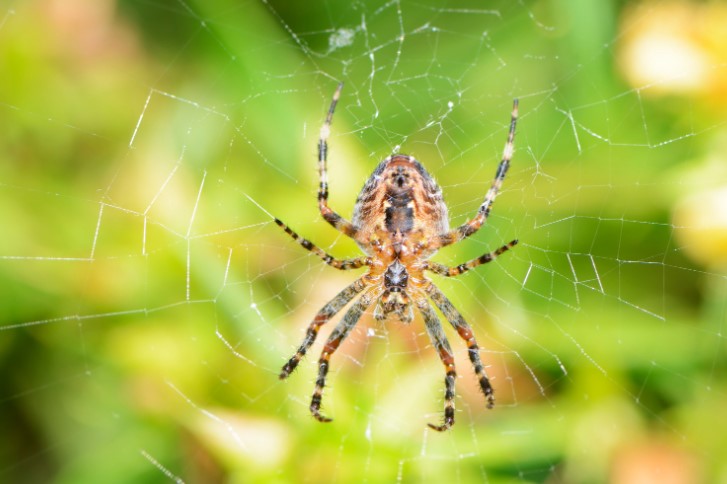
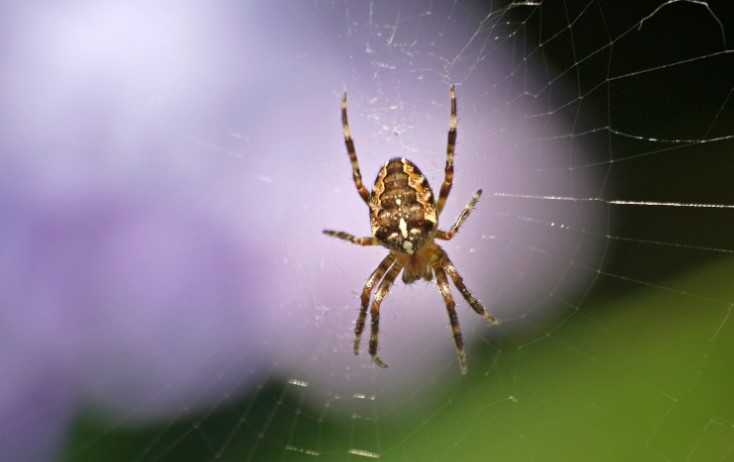
False Widow vs. Garden Spider
- Web Type: Garden spiders spin large, circular webs, unlike the tangled webs of false widows.
- Markings: Garden spiders often have distinct stripes or cross-shaped patterns.
What to Do If You Find a False Widow Spider?
How To Safely Identify and Handle False Widows?
If you find a spider that you suspect is a false widow:
- Observe Carefully: Avoid disturbing it and use a clear container if you need to capture it.
- Identify: Look for the distinctive markings, size, and shape before deciding on the next steps.
Should I Be Concerned About False Widow Bites?
While false widow bites are rare, they can cause symptoms similar to a wasp sting:
- Symptoms: Redness, swelling, and minor pain.
- Action: Clean the bite area and monitor for unusual symptoms; seek medical advice if needed.
How To Prevent False Widow Spiders in Your Home?
How To Reduce Spider-Friendly Environments?
To deter false widow spiders from making your home their own:
- Keep Your Home Tidy: Regularly clean and declutter areas like basements and garages.
- Seal Entry Points: Repair any cracks or gaps around windows, doors, and walls.
How to Use Natural Repellents?
For those who prefer not to use chemicals, try these natural options:
- Essential Oils: Spiders dislike strong scents like peppermint and tea tree oil.
- Vinegar: Wipe down surfaces with a vinegar solution to repel spiders.
Conclusion:
Identifying a false widow spider is relatively simple once you know the key characteristics. By staying informed and taking preventive measures, you can reduce the likelihood of encountering these spiders in your home and handle them safely if you do.
Frequently Asked Questions (FAQs)
1. Are false widow spiders dangerous?
False widow spiders can bite, but their bites are generally mild, similar to a wasp sting. Severe reactions are rare.
2. How can I tell if a spider is a false widow?
Look for a dark, glossy body with a bulbous abdomen and cream-colored markings. Their tangled webs are also a key indicator.
3. What should I do if I find a false widow in my home?
Observe it carefully without disturbing it. Capture it in a clear container if necessary and identify it by its size, color, and markings. Release it outside or contact a professional if you’re unsure.
by Kanimozhi BV | Sep 5, 2024 | Kitchen, Interior
Why Knock Down a Wall Between Kitchen and Dining Room?
Open-plan living has become increasingly popular in the UK, and one of the most common renovations involves knocking down a wall between the kitchen and dining room. This transformation creates a more spacious, brighter, and functional area for modern living, ideal for hosting guests and improving family interactions.
In this guide on how much to knock down a wall between kitchen and dining room in UK, we will understand the costs involved and how various factors can impact your budget.
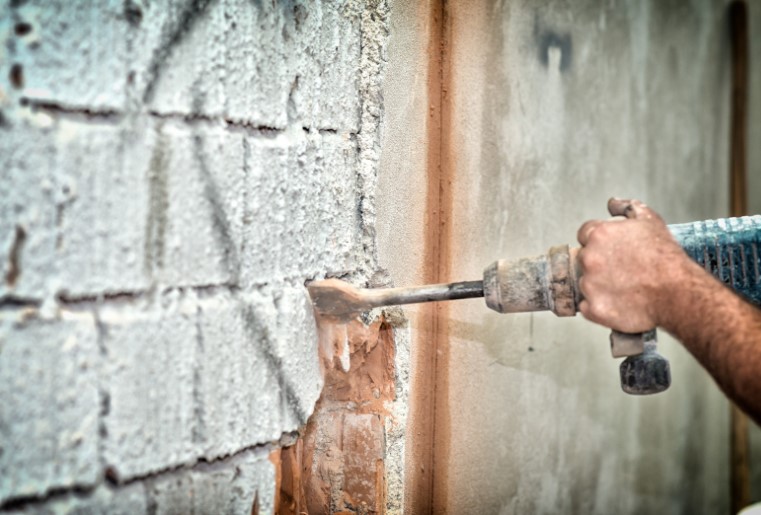
What are the Factors That Affect the Cost of Knocking Down a Wall?
Is the Wall Load-Bearing or Non-Load-Bearing?
The first and most important consideration is whether the wall you’re removing is load-bearing or non-load-bearing. Non-load-bearing walls are easier and cheaper to remove since they don’t support the structure of your home.
However, if it’s a load-bearing wall, you will need the expertise of a structural engineer to ensure that the removal doesn’t compromise the integrity of the building.
- Non-load-bearing walls: Easier and cheaper to remove.
- Load-bearing walls: Require structural support and the installation of an RSJ (Rolled Steel Joist), adding to the overall cost.
What is the Wall Size and Material Used?
The size and material of the wall also significantly impact the cost. Larger walls and those made of solid materials, like brick or concrete, are more expensive to demolish than stud walls (timber frame with plasterboard). Bigger walls also mean more labour, waste, and time, increasing costs.
How Much Does Labour Costs in the UK?
Labour costs can differ widely depending on your location in the UK. In general:
- Labour in London and the Southeast tends to be more expensive, with builders charging around £200-£250 per day.
- Other regions of the UK may have lower rates, ranging from £150-£200 per day.
What are the Additional Work Required?
After removing the wall, there may be additional tasks such as:
- Electrical rewiring: Moving or adding new power outlets and switches.
- Replastering and decorating: To smooth out the area after the demolition.
- Flooring adjustments: You may need new flooring if the wall ran through different sections.

Average Cost to Remove a Wall Between Kitchen and Dining Room in the UK
Non-Load-Bearing Wall Removal Costs
Removing a non-load-bearing wall is typically more affordable. Here’s a breakdown of the costs:
| Item |
Approximate Cost (UK) |
| Demolition |
£300 – £500 |
| Waste removal |
£100 – £200 |
| Electrical adjustments |
£100 – £250 |
| Replastering and painting |
£200 – £500 |
| Total |
£700 – £1,450 |
Load-Bearing Wall Removal Costs
A load-bearing wall requires additional structural support, typically through the installation of an RSJ (Rolled Steel Joist). This can significantly raise the price.
| Item |
Approximate Cost (UK) |
| Structural engineer |
£200 – £500 |
| RSJ installation |
£800 – £1,500 |
| Demolition |
£500 – £1,000 |
| Replastering and painting |
£300 – £600 |
| Total |
£1,800 – £3,600 |
Do I Need Planning Permission or a Structural Engineer?
UK Building Regulations
In most cases, you won’t need planning permission to knock down an internal wall, but you will need to comply with building regulations. These regulations ensure the structural safety of your home, especially if you’re removing a load-bearing wall.
Structural Engineer’s Role
For load-bearing walls, you’ll need to hire a structural engineer to assess your home and determine the correct method of support. A typical cost of a structural engineer ranges between £200 and £500 depending on the complexity of the job.

How to Find the Right Professional for the Job
Hiring a Professional Builder
When it comes to removing a wall, it’s essential to hire a reputable and experienced builder. Be sure to get quotes from several builders and ask for references. Look for professionals who specialize in wall removals, and make sure they have relevant insurance.
Is DIY Wall Removal an Option?
While it’s tempting to reduce costs by taking a DIY approach, knocking down a wall involves significant risks. Without professional help, you could:
- Damage the structure of your home
- Risk causing harm to yourself or others throughout the entire demolition process.
- Violate building regulations, leading to future issues with your property
In most cases, especially with load-bearing walls, it’s best to leave this job to the experts.
Hidden Costs and Extras You Should Be Aware Of
Waste Removal and Disposal
Demolishing a wall creates a lot of waste, which needs to be properly disposed of. Waste removal services typically cost between £100 and £200 depending on the volume of debris.
Replastering and Decorating Costs
After the wall is removed, the exposed areas will likely need replastering and redecorating. This could cost an additional £200 to £500, depending on the finish you require.
Structural Support and Safety Considerations
For load-bearing walls, it’s crucial to install adequate structural support, such as an RSJ. Ensuring safety is a non-negotiable part of the process, and cutting corners here could result in serious damage.

Conclusion: Is It Worth Knocking Down a Wall Between Kitchen and Dining Room?
In the end, knocking down a wall between your kitchen and dining room can open up your living space and add value to your home. While the costs can vary significantly depending on whether it’s a load-bearing wall, the potential benefits of an open-plan layout, improved light, and better use of space often outweigh the expenses.
To ensure the process goes smoothly, always work with qualified professionals, and make sure you’ve factored in all potential hidden costs.
Frequently Asked Questions (FAQs)
1. How long does it take to remove a wall between the kitchen and dining room?
The process of removing a wall can take from 1 to 3 days, depending on the size of the wall and whether it is load-bearing. Additional time might be needed for replastering and decorating.
2. Can I remove a load-bearing wall without a structural engineer?
No, you cannot. A structural engineer is necessary to ensure that the removal does not compromise the structural integrity of your home.
3. What are the risks of removing a wall on my own?
DIY wall removal can lead to serious structural damage, personal injury, and legal complications if building regulations are not followed.
4. How much does a structural engineer cost for wall removal in the UK?
The cost of hiring a structural engineer typically ranges from £200 to £500, depending on the complexity of the wall removal.
5. Will removing the wall increase the value of my home?
Yes, in many cases, creating an open-plan layout can increase the value of your home by making it more attractive to potential buyers.
by Kanimozhi BV | Sep 4, 2024 | Pest Control, DIY Ideas
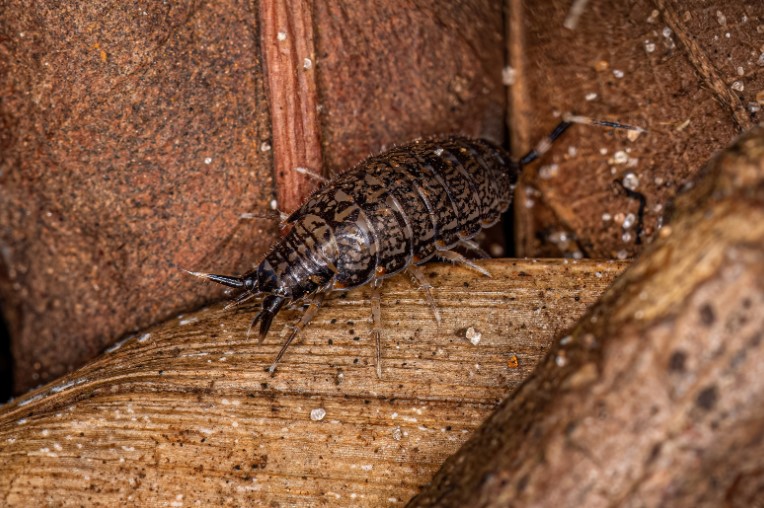
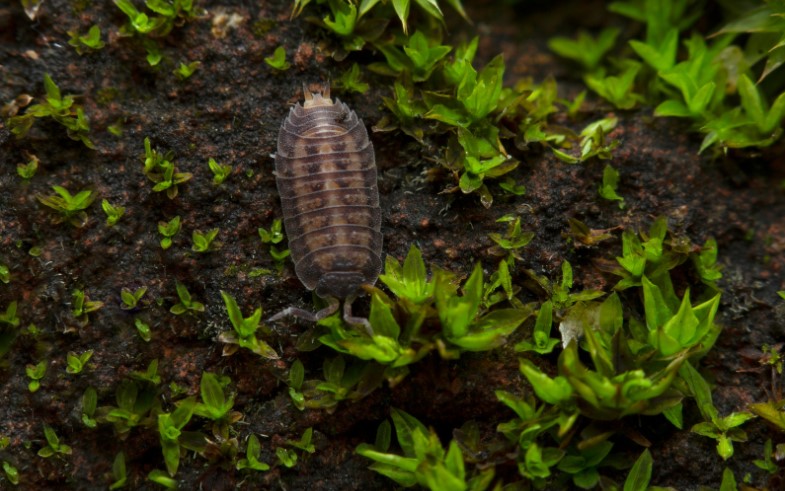
Are you looking for how to get rid of woodlice? Woodlice, those small, segmented creatures often found in damp corners, are a common sight in UK homes. While they don’t pose any real harm to humans, they can become a persistent nuisance, especially in moisture-rich environments. Understanding what draws woodlice into your home is crucial to effectively getting rid of them. In this guide, we will look into the best DIY Ideas to get rid of woodlice.
How to Identify a Woodlice Infestation
Signs of Woodlice in Your Home
Woodlice are easily recognizable by their oval-shaped, segmented bodies, usually grey or brown. They tend to congregate in dark, damp places like basements, bathrooms, and under sinks. If you frequently spot them in these areas, it could indicate an infestation.
Why Woodlice Prefer Damp Environments
These creatures thrive in moist surroundings, making homes with high humidity levels, leaky pipes, or poor ventilation prime targets. Addressing moisture issues is essential in preventing woodlice from settling in.
Best DIY Methods to Get Rid of Woodlice
1. Keep Your Home Dry and Ventilated
One of the most effective strategies to eliminate woodlice is gradually reducing the moisture in your home. Here’s how you can do it:
- Fix leaks promptly: Address any leaking pipes or faucets.
- Improve ventilation: Use dehumidifiers and ensure proper airflow in all rooms, particularly bathrooms and kitchens.
- Monitor humidity levels: Keep indoor humidity low to make your home less inviting to woodlice.
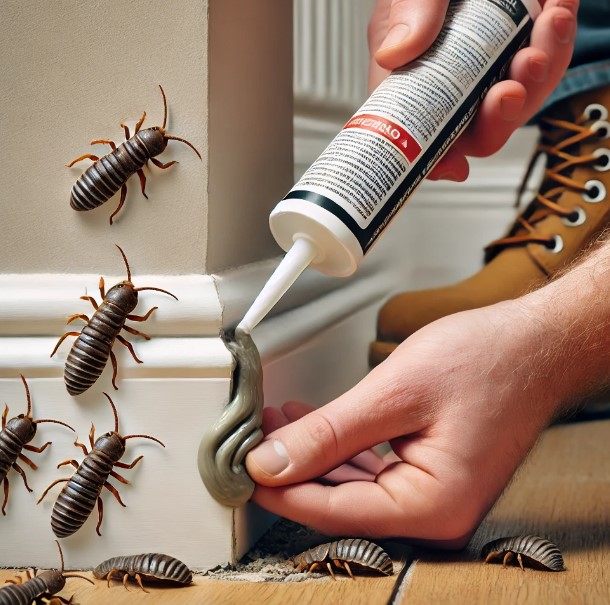
2. Seal Entry Points
Woodlice typically enter through small cracks and gaps. To keep them out:
- Inspect your home’s exterior: Look for cracks, gaps, and other potential entry points.
- Seal them up: Use caulking or weatherstripping around doors, windows, and utility lines to block their entry.
3. Natural Repellents and Remedies
For those who prefer natural solutions, several household items can act as effective woodlice repellents:
- Vinegar: Spray around entry points to deter woodlice.
- Essential oils: Mix a few drops of tea tree, eucalyptus, or peppermint oil with water and spray in infested areas.
- Salt: Sprinkle around the edges of your home to create a barrier against woodlice.
4. Set Up Woodlice Traps
Traps are a straightforward method to reduce woodlice numbers:
- Damp newspaper or cardboard: Roll up the paper and place it in woodlice-prone areas. The moisture will attract them, and you can easily discard the traps the next day.
5. Remove Potential Food Sources
Woodlice feed on decaying organic matter, so eliminating their food sources is crucial:
- Keep your home clean: Regularly clean up crumbs and food waste, especially in the kitchen.
- Declutter: Reduce clutter to minimize hiding spots for woodlice.
6. Use Diatomaceous Earth
Diatomaceous earth is a natural, non-toxic option for controlling woodlice:
- Apply in key areas: Sprinkle diatomaceous earth along skirting boards, under sinks, and around entry points.
Preventing Future Woodlice Infestations
Regular Home Maintenance
Consistent maintenance can help prevent woodlice from returning:
- Check for dampness: Regularly inspect your home for leaks and moisture build-up.
- Ensure proper ventilation: Keep your home well-ventilated, especially in high-moisture areas like basements and bathrooms.

Outdoor Measures to Reduce Woodlice
Managing your outdoor environment is just as important:
- Maintain your garden: Remove piles of leaves, wood, and other decaying materials that attract woodlice.
- Manage water drainage: Ensure gutters and downspouts are clear and direct water away from your home’s foundation.
When to Call a Professional Pest Control Service
Signs You Need Expert Help
Sometimes, professional intervention is necessary:
- Persistent infestations: If woodlice continue to invade despite your efforts, it’s time to call in a professional.
- Comprehensive solutions: Pest control experts can offer stronger treatments and more thorough solutions.
Costs and Considerations
Before hiring a pest control service:
- Cost range: Expect to pay between £60 and £120 for professional woodlice extermination in the UK.
- Evaluate options: Consider the service’s reputation, chemicals used, and any guarantees offered.
Conclusion: Keeping Your Home Woodlice-Free
To keep woodlice at bay, follow these DIY methods and maintain good home hygiene. The key is to manage moisture levels, seal entry points, and keep your home clean and free of potential food sources. If DIY solutions don’t work, professional help is readily available to ensure your home stays woodlice-free. Follow these ideas on how to get rid of woodlice to maintain a better and proper hygiene.
Frequently Asked Questions (FAQs)
1. Are woodlice harmful to humans?
No, woodlice are not harmful to humans. They do not bite, sting, or carry diseases, though they can be an annoyance if they invade in large numbers.
2. What is the fastest way to get rid of woodlice?
The quickest way to eliminate woodlice is to reduce moisture in your home, seal any entry points, and use diatomaceous earth or woodlice traps. Combining these methods typically produces the fastest results.
3. Can woodlice damage my home?
Woodlice do not cause structural damage to homes. However, they can damage plants and may cause minor cosmetic issues if left unchecked.
4. Why are woodlice more common in certain areas?
Woodlice thrive in areas with high moisture levels, such as basements, bathrooms, and kitchens. Homes in damp or wooded areas may experience higher numbers of woodlice.
5. What should I do if woodlice keep returning?
If woodlice continue to return, reassess your home’s moisture levels and check for any overlooked entry points. Persistent issues might need professional pest control services.
by Kanimozhi BV | Sep 3, 2024 | Pest Control, DIY Ideas
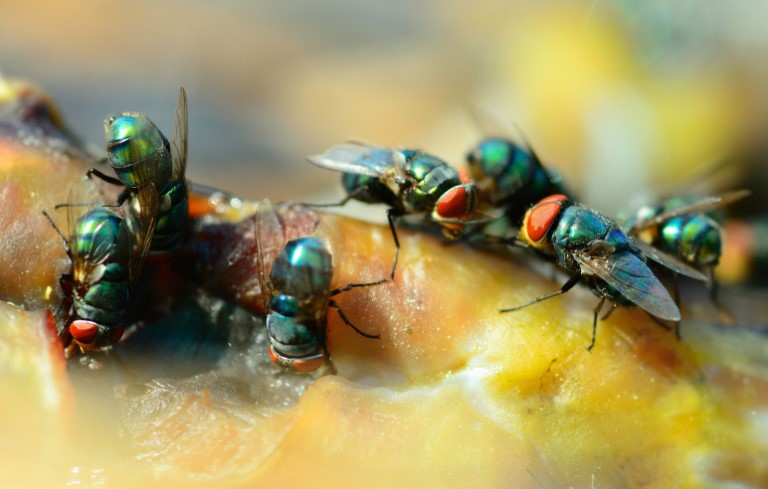
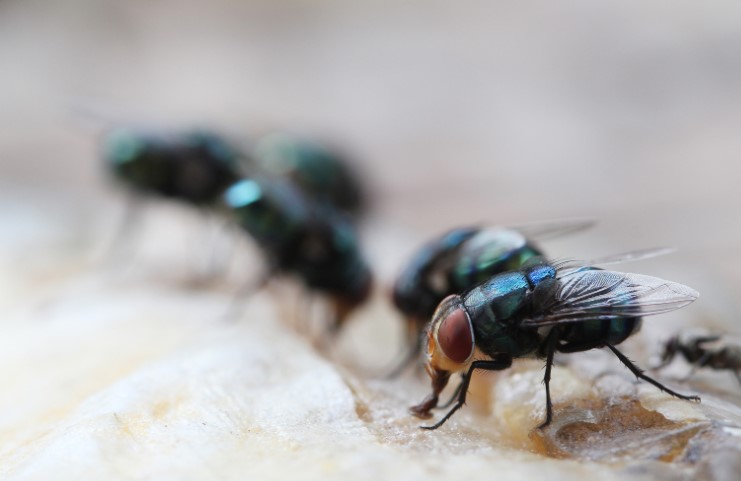
Flies are more than just a nuisance—they can spread diseases and contaminate food, making them unwelcome guests in any home. With warmer weather, the problem often intensifies, and keeping flies away becomes a top priority. In this guide on what smells do flies hate, I’ll explore the scents that flies hate and share effective, natural methods to keep them out of your home.
Why Is It Important to Keep Flies Away?
The Risks Flies Pose
Flies are not just annoying; they pose real health risks. They can carry bacteria and pathogens that cause illnesses like food poisoning and diarrhea. It is important to remove fruit flies in home. Here’s why it’s crucial to keep them away:
- Health Hazards: Flies can contaminate food and surfaces with harmful bacteria, leading to health issues.
- Food Contamination: Flies are known to lay eggs on food, which can lead to infestations.
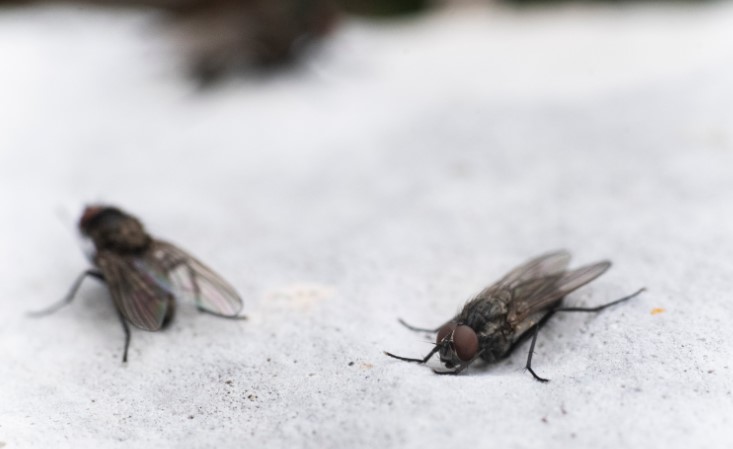
Common Areas Where Flies Are a Problem
Flies are attracted to specific areas in your home, where they find food, moisture, or warmth:
- Kitchens: The abundance of food sources makes kitchens a prime target.
- Garbage Areas: Flies are drawn to the smell of decaying organic matter.
- Outdoor Spaces: BBQ areas and patios can become breeding grounds if not properly maintained.
What Smells Do Flies Hate?
Understanding Fly-Repelling Scents
1. Lemon and Cloves
Lemon and cloves are a classic combination for repelling flies. The citrusy smell of lemon combined with the spicy aroma of cloves creates a scent that flies can’t stand.
- How to Use: Slice a lemon in half and then stud it with cloves. Place the lemon halves around your kitchen, near windows, or on outdoor tables to keep flies at bay.
2. Lavender Oil
Lavender is well-known for its pleasant scent, actually flies find it unbearable. Its calming aroma for humans doubles as an effective fly deterrent.
- How to Use: Add a few drops of lavender oil to a spray bottle filled with water and spritz it around your home. You can also place lavender sachets in drawers and closets to repel flies.
3. Eucalyptus
The strong scent of eucalyptus is another powerful fly repellent. It not only drives away flies but also leaves your home smelling fresh.
- How to Use: Use eucalyptus oil in a diffuser or soak cotton balls in the oil and place them near doors and windows. Eucalyptus leaves can also be hung around the home.
4. Basil
Basil isn’t just for cooking; it’s also a natural fly repellent. The pungent smell of fresh basil leaves is something flies hate.
- How to Use: Plant basil in pots and place them on windowsills, kitchen counters, or outdoor dining areas. This will not only repel flies but also provide you with fresh basil for your meals.
5. Cinnamon
Cinnamon has a strong, spicy scent that flies find repulsive. It’s a simple and effective way to keep them away.
- How to Use: Sprinkle ground cinnamon in areas where flies tend to gather, such as countertops or around garbage bins. Alternatively, use cinnamon sticks in your kitchen or pantry.
6. Vinegar
Vinegar, with its sharp odor, is a great natural fly deterrent. Flies dislike the acidic scent, making it an excellent option for keeping them away.
- How to Use: Mix equal parts vinegar and water in a spray bottle and apply it to surfaces where flies are a problem. You can also create a simple vinegar trap by placing a bowl of vinegar with a few drops of dish soap near fly-prone areas.
7. Citronella
Citronella is a well-known insect repellent, commonly used in candles and oils. Its citrusy scent effectively keeps flies and other pests at bay.
- How to Use: Light citronella candles in outdoor areas or use citronella oil in a diffuser inside your home. It’s especially useful during outdoor gatherings to keep flies away.
8. Mint
Mint’s refreshing scent is something flies can’t tolerate. It’s also easy to grow and maintain around your home.
- How to Use: Plant mint around the perimeter of your home or place potted mint plants indoors. You can also crush mint leaves and place them in areas where flies are a problem.
How To Keep Flies Away?
Practical Tips and Strategies
Maintaining a Clean Environment
A clean environment is your first line of defense against flies. Here are some habits to adopt:
- Regular Cleaning: Wipe down countertops, clean up spills immediately, and don’t leave dirty dishes out.
- Daily Garbage Disposal: Empty trash cans regularly and clean them to prevent odors that attract flies.
Proper Food Storage
Storing food correctly is essential to prevent attracting flies:
- Use Airtight Containers: Store pantry items and leftovers in airtight containers to keep flies out.
- Cover Food: Always cover food, especially during meal preparation or when eating outside.
Managing Garbage and Compost
Flies are attracted to garbage and compost, so managing these areas effectively is crucial:
- Seal Trash Bags: Always tie trash bags securely before placing them in the bin.
- Compost Carefully: Cover compost bins and avoid adding meat or dairy products, which attract flies.

Using Fly Traps and Screens
Fly traps and screens are effective physical barriers to keep flies away:
- Set Up Fly Traps: Use store-bought or homemade traps near entry points and in fly-prone areas.
- Install Screens: Fit windows and doors with fine mesh screens to prevent flies from entering your home.
Natural Predators of Flies
Encouraging natural predators can help control the fly population:
- Birds and Bats: Attract birds and bats to your garden by providing nesting boxes or feeders. They naturally prey on flies.
- Spiders: While not everyone’s favorite, spiders can help keep flies under control in and around your home.
Additional Prevention Methods for Keeping Flies Away
Using Essential Oils
Beyond lavender and eucalyptus, other essential oils also repel flies:
- Rosemary and Tea Tree Oils: These oils have strong scents that flies dislike. Use them in sprays or diffusers around the home.
- DIY Essential Oil Spray: Mix your choice of essential oil with water in a spray bottle and apply it to fly-prone areas.
Placing Fly-Repellent Plants Around Your Home
Certain plants naturally deter flies when placed strategically:
- Marigolds and Tansy: Plant these around the garden or in pots near entryways. Their strong scent is off-putting to flies.
- Strategic Placement: Place these plants near windows, doors, and outdoor dining areas to maximize their effectiveness.

Reducing Moisture and Standing Water
Flies are attracted to moisture, so it’s important to minimize it:
- Fix Leaks: Repair any leaky pipes or faucets that could create damp areas.
- Dry Up Puddles: After rain or watering your garden, ensure no standing water is left to attract flies.
Installing Air Curtains
Air curtains create a barrier of air that flies struggle to penetrate:
- Where to Install: Place air curtains above doors that are frequently opened, especially in commercial kitchens or areas with heavy foot traffic.
- Effectiveness: Air curtains work well in high-traffic areas to keep flies from entering.
Using Light Traps
Light traps attract and capture flies, making them an effective indoor solution:
- Where to Place: Set up light traps in areas with heavy fly activity, like kitchens or patios.
- Setting Up: Ensure they’re placed away from windows to avoid attracting more flies from outside.
Long-Term Fly Control and Prevention Tips
Regular Home Inspections
Regularly inspect your home to ensure it’s fly-proof:
- Check for Entry Points: Inspect doors, windows, and walls for gaps or cracks that flies could use to get in.
- Seal Any Openings: Use caulk or weatherstripping to seal these entry points.
Seasonal Fly Prevention Strategies
Fly activity can change with the seasons, so adapt your methods accordingly:
- Summer Strategies: In warmer months, increase the use of fly-repelling scents and maintain stricter cleaning routines.
- Winter Preparations: Even in cooler months, flies can seek warmth indoors. Ensure your home is sealed and free of food scraps.
Integrating Fly-Repelling Habits into Your Routine
Consistency is key to keeping flies away:
- Daily Routines: Make fly prevention part of your daily cleaning and maintenance routines.
- Natural Repellents: Keep essential oils, plants, and traps in regular use to maintain a fly-free environment.

Conclusion
Flies can be a persistent problem, but with the right strategies, you can keep them at bay naturally. By understanding what smells do flies hate and incorporating these scents into your home, alongside maintaining cleanliness and using prevention methods, you can enjoy a fly-free environment. Start implementing these tips today and experience the difference.
FAQs
1. How often should I reapply natural fly repellents like essential oils?
Reapply essential oils every few days or whenever you notice the scent fading, especially after cleaning.
2. Are these natural methods safe for pets?
Yes, most of these methods are safe for pets, but be mindful of using oils and plants in moderation
