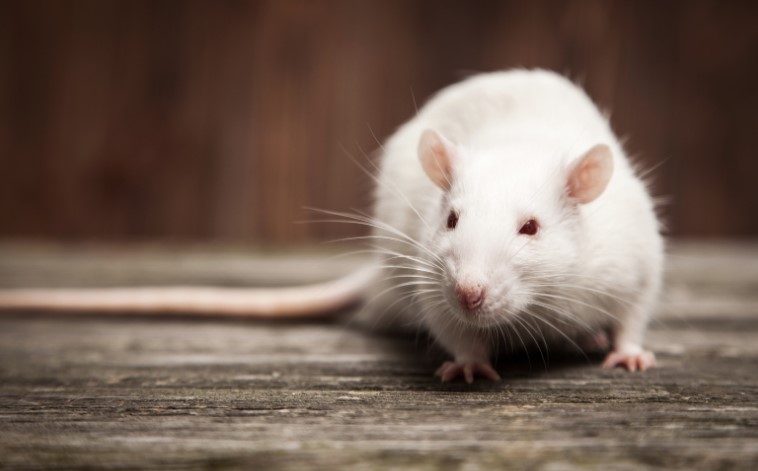
by Kanimozhi BV | Sep 3, 2024 | Pest Control, DIY Ideas
What keeps rats away naturally? Here are the best 10 DIY Ideas. Rats can be more than just an annoyance—they can cause serious damage to your property and pose health risks. While there are many chemical options available, natural and non-toxic methods are often safer, especially if you have pets or children. In this guide, I’ll share the best DIY ideas to keep rats away naturally.
Why Choose Natural Rat Repellents?
What are the Benefits of Using Natural Methods?
Using natural methods to repel rats offers several advantages:
- Safety: Natural repellents are non-toxic and safe for pets and children.
- Eco-Friendly: These methods are non-toxic and don’t harm the environment.
- Cost-Effective: Many natural repellents use common household items.
What are the Drawbacks of Chemical Rat Control?
While chemicals may be effective, they come with downsides:
- Health Risks: Chemical rat poisons can be hazardous to humans and pets.
- Environmental Impact: These substances can pollute soil and water.
What Keeps Rats Away Naturally? – Top 10 DIY Ideas
1. Peppermint Oil
Peppermint oil is a powerful natural repellent due to its strong scent, which rats find unpleasant. Here’s how you can use it:
- Soak cotton balls in peppermint oil.
- Place the cotton balls near entry points, under sinks, and in corners where rats are likely to enter.
2. Ultrasonic Rat Repellents
Ultrasonic devices emit high-frequency sound waves that are irritating to rats but inaudible to humans and pets. To use them effectively:
- Place the device in areas where rats are active.
- Ensure the sound waves aren’t blocked by furniture or walls.
3. Vinegar
Vinegar is another strong-smelling substance that rats dislike. Here’s how to apply it:
- Mix vinegar with water in a spray bottle.
- Spray it along baseboards, entry points, and areas where you’ve seen rat activity.
4. Cayenne Pepper
Cayenne pepper can deter rats with its spicy heat. Use it as follows:
- Sprinkle cayenne pepper along the perimeter of your home.
- Focus on cracks, crevices, and potential entry points.
5. Essential Oils
Certain essential oils, like eucalyptus and citronella, are effective in repelling rats. To use them:
- Add a few drops of essential oil to a diffuser or dilute it with water in a spray bottle.
- Place or spray the solution in areas where rats are known to frequent.
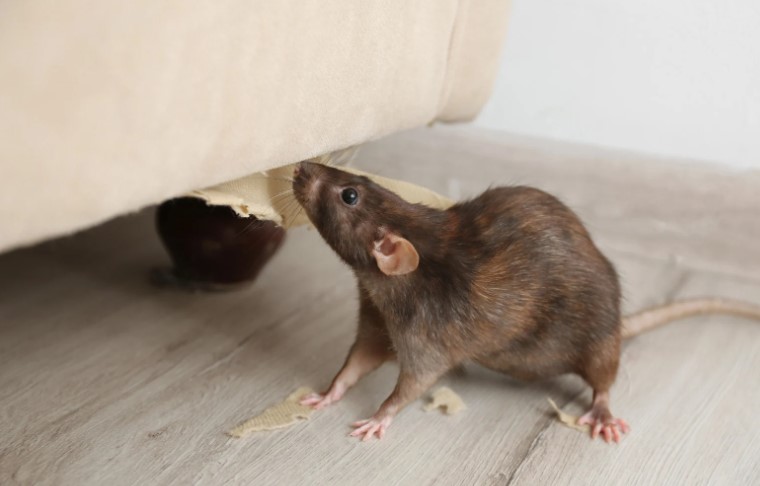
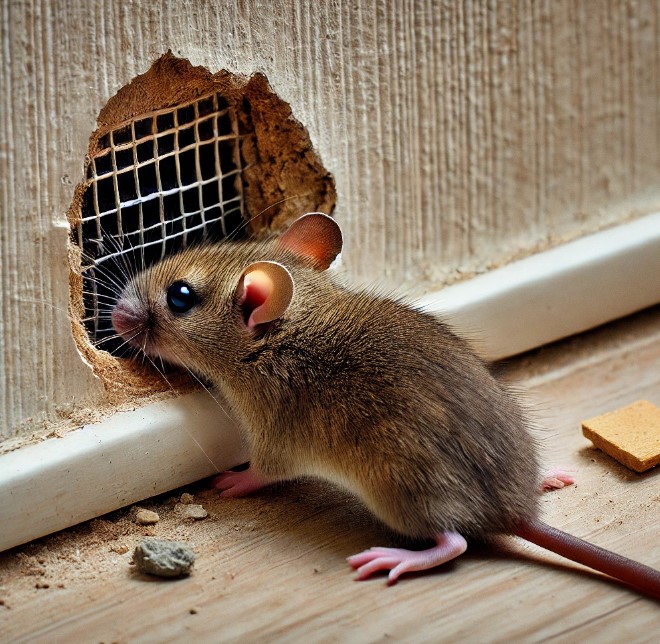
6. Sealing Entry Points
One of the most effective ways to keep rats out is to prevent them from entering in the first place. I make sure to:
- Thorough Inspections: Regularly check your home for any gaps or openings around windows, doors, vents, and pipes. Use materials like steel wool, caulk, or mesh to seal these entry points securely.
7. Homemade Rat Traps
Homemade traps can be a humane and effective way to deal with rats. Here’s a simple approach:
- Use a bucket and bait (like peanut butter) to create a simple trap.
- Place the trap in areas where rats are active.
8. Keeping a Clean Environment
A clean home is less attractive to rats. Focus on these areas:
- Kitchen: Keep counters and floors free of food crumbs.
- Garden: Remove any fallen fruit or vegetables that could attract rats.
- Storage Areas: Declutter and store items in sealed containers.
9. Natural Predators
Encouraging natural predators like cats or owls can help control the rat population. Here’s how:
- Keep a cat as a pet, or install an owl box to attract owls to your garden.
- Avoid using chemicals that could harm these predators.
10. Planting Rat-Repellent Herbs
Certain herbs can naturally repel rats. Consider planting the following:
- Mint: Plant around the perimeter of your home or in pots near doors.
- Lavender: Grows well in gardens and repels rats with its strong scent.

What are the Tips for Long-Term Rat Prevention?
Regular Home Inspections
Conduct regular inspections of your home to check for any potential entry points. Look for:
- Cracks in walls
- Gaps around windows and doors
- Openings around pipes and vents
Storing Food Properly
Store food securely to avoid attracting rats:
- Use airtight containers for pantry items.
- Keep pet food in sealed containers.
- Avoid leaving food out overnight.

Monitoring for Signs of Rats
Early detection is important in preventing a full-blown infestation. Watch for:
- Droppings near food sources
- Gnaw marks on wood or wires
- Scratching sounds in walls or ceilings
Conclusion
Keeping rats away naturally is both effective and eco-friendly. By implementing these DIY ideas, you can protect your home from these unwelcome visitors without resorting to harmful chemicals. Remember, consistent application and regular home maintenance are key to long-term success.
FAQs
1. How often should I reapply natural rat repellents like peppermint oil?
Reapply natural repellents like peppermint oil every few days, or whenever the scent fades, to ensure effectiveness.
2. Can ultrasonic rat repellents harm pets?
Ultrasonic rat repellents are generally safe for pets, but it’s best to monitor your pets for any signs of discomfort and adjust placement if necessary.
3. Are natural rat repellents effective for large infestations?
Natural repellents can be effective for small to moderate infestations, but large infestations may require professional pest control.
by Kanimozhi BV | Sep 2, 2024 | Pest Control, DIY Ideas
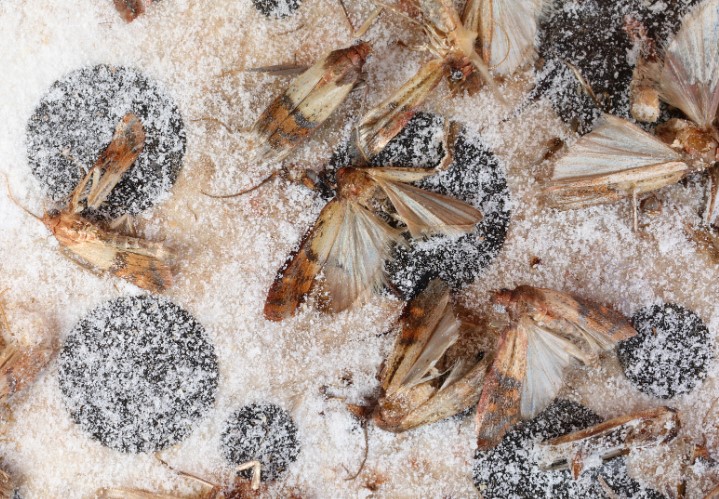
Are you searching for how to get rid of brown house moths? Brown house moths might be small, but they can cause significant damage to your home if left unchecked. These pests are known for infesting homes, particularly in areas where food, fabric, or other organic materials are stored. In this guide, I’ll walk you through the process of identifying, eliminating, and preventing brown house moth infestations to protect your home effectively.
What Are Brown House Moths?
Identifying Brown House Moths
Brown house moths are small, usually about 8-14mm long, with brown or bronze-colored wings speckled with darker spots. They are most active at dark night and are often found in undisturbed areas. The first sign of an infestation is typically the appearance of adult moths fluttering around your home, especially near windows or light sources.
Life Cycle of Brown House Moths
Understanding the life cycle of brown house moths is crucial in controlling an infestation. The cycle begins with tiny eggs laid in secluded places, which hatch into larvae (caterpillars). These larvae are the most destructive stage, feeding on organic materials like wool, fur, and stored food. After a few weeks, they pupate and emerge as adult moths, ready to continue the cycle.
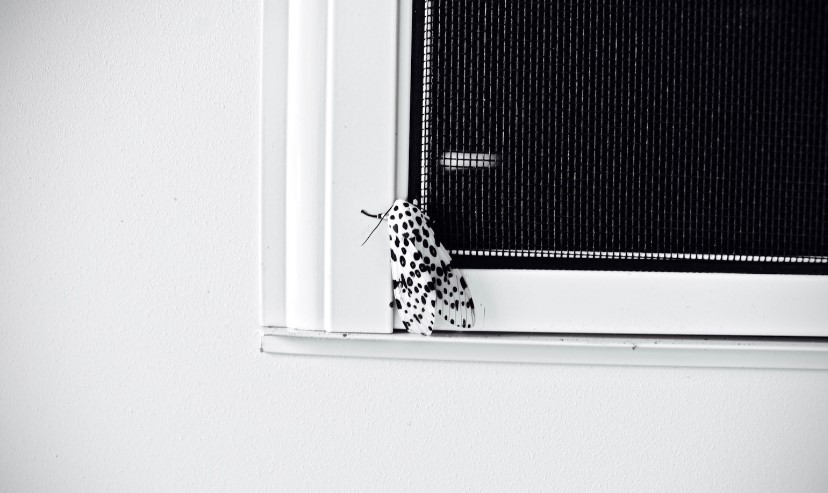
How Do Brown House Moths Infest Homes?
Common Entry Points for Moths
Brown house moths can enter your home in various ways, often hitching a ride on infested items like second-hand furniture, clothing, or food products. They are also attracted to homes with poor ventilation or where organic materials are stored improperly. Once inside, they seek out dark, undisturbed areas to lay their eggs, starting the infestation process.
High-Risk Areas in Your Home
Certain areas of your home are more susceptible to moth infestations. Carpets, wardrobes, and pantries are prime targets due to the availability of food sources and fabrics. Moths are also drawn to attics, basements, and storage rooms where items are stored long-term without disturbance.
Step-by-Step Guide to Getting Rid of Brown House Moths
Step 1: Identifying the Infested Areas
The first step in tackling a moth infestation is to identify where they are hiding. Check common hiding spots such as closets, under furniture, and in pantries. Look for signs like larvae, webbing, or tiny holes in fabrics.
Step 2: Cleaning and Vacuuming
Once you’ve identified the infested areas, the next step is thorough cleaning. Vacuum carpets, rugs, and upholstery to remove any larvae or eggs. Try to focus on cracks and crevices where moths might hide. Dispose of the vacuum bag immediately to prevent any chance of reinfestation.
Step 3: Using Natural Moth Repellents
Natural repellents like cedarwood, lavender, and essential oils can be highly effective in deterring moths. Place cedar blocks or lavender sachets in closets and drawers. You can also make a spray with essential oils and water to treat vulnerable areas.
Step 4: Setting Up Moth Traps
Moth traps are a great way to catch adult moths and reduce their population. There are various types available, including sticky traps that attract moths using pheromones. Place these traps near infested areas for the best results.
Step 5: Applying Insecticide (If Necessary)
If natural methods aren’t enough, you may need to use an insecticide. Look for products specifically designed for moths and follow the instructions carefully to avoid harm to yourself and your home.

Preventing Future Moth Infestations
Regular Cleaning and Maintenance
Regular cleaning is key to preventing moth infestations. Vacuum frequently, dust surfaces, and clean out your pantry regularly to remove potential food sources. This simple routine can make your home less inviting to moths.
Storing Items Properly
Proper storage of items is crucial in keeping moths at bay. Store clothing in sealed bags or containers & keep food in airtight containers. Avoid leaving fabrics or food out in the open, especially in high-risk areas.
Monitoring for Signs of Moths
Even after eliminating an infestation, it’s important to stay vigilant. Regularly inspect your home for signs of moths, such as damaged fabrics or the presence of adult moths. Early detection is the best way to prevent another infestation.
When to Call Professional Pest Control
Signs You Need Professional Help
If you’ve tried all the above methods and still have a moth problem, it might be time to call in the professionals. Persistent infestations, or if the infestation is widespread, are clear indicators that you need expert help.
What to Expect from a Professional Service
Professional pest control services will assess the extent of the infestation and use specialized tools and treatments to eradicate the moths. They can also provide advice on long-term prevention and help ensure your home remains moth-free.
Conclusion
Dealing with brown house moths can be challenging, but with the right approach, it’s possible to eliminate them and prevent future infestations. By following this step-by-step guide on how to get rid of brown house moths, you’ll protect your home and belongings from these pesky invaders. Remember, the key is to act quickly and thoroughly to ensure the moths don’t return.
FAQs
1. How long does it take to get rid of brown house moths?
It typically takes a few weeks to fully eliminate an infestation, depending on the severity and methods used.
2. Are brown house moths harmful to humans?
Brown house moths are not harmful to humans, but their larvae can damage fabrics, carpets, and stored food.
3. Can I prevent moths without using chemicals?
Yes, natural repellents like cedarwood and regular cleaning can effectively prevent moth infestations without chemicals.
4. What is the best natural moth repellent?
Cedarwood and lavender are among the most effective natural repellents for moths.
5. When should I call a professional for a moth infestation?
Call a professional if DIY methods aren’t working or if the infestation is widespread across your home.
by Kanimozhi BV | Aug 31, 2024 | Couch, DIY Ideas, Interior
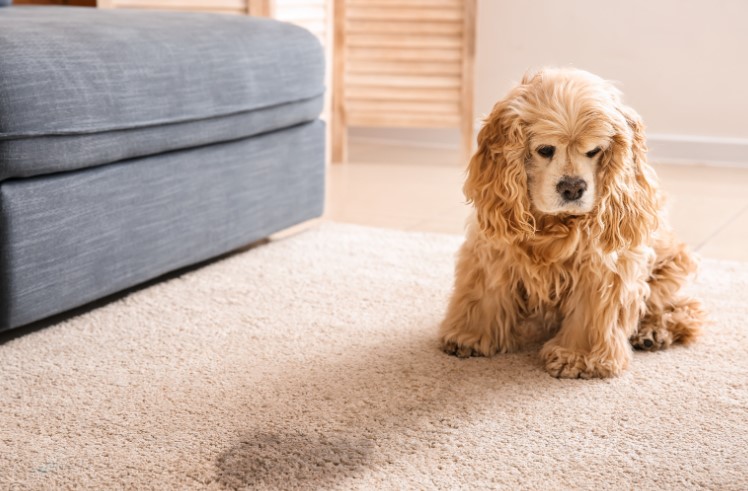
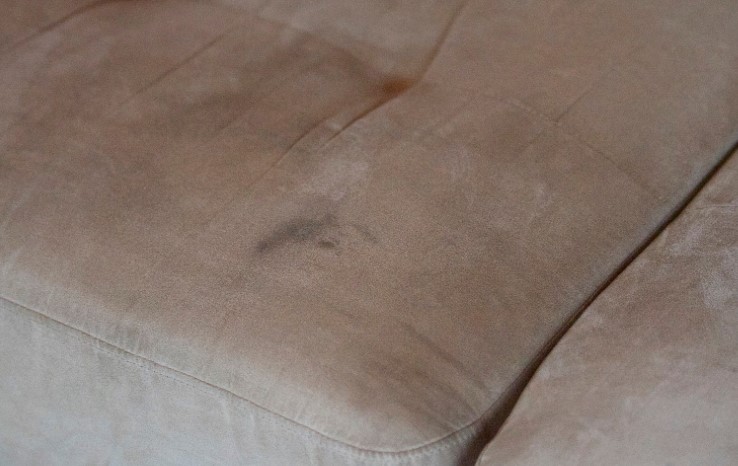
Accidents happen, especially if you have pets or young children, and one of the most frustrating mishaps can be urine on the couch. Whether it’s a fresh spill or an old, dried stain, knowing how to clean urine from couch is crucial to maintaining your furniture.
Quick action is essential to prevent permanent stains and lingering odors that can turn your cozy couch into a less-than-pleasant place to sit. In this guide, I’ll walk you through smart DIY methods tailored for UK readers to help you effectively clean and deodorize your couch.
Cleaning urine from your couch as soon as possible is essential for several reasons. First, urine can penetrate deep into the upholstery, leading to difficult-to-remove stains and persistent odors.
The longer it sits, the harder it is to eliminate, as the urine can break down and create an environment where bacteria thrive, leading to unpleasant smells in your home that can be hard to remove.
Additionally, if not properly cleaned, urine can cause discoloration and damage to the fabric, making your couch look worn and unappealing.
What Materials Will You Need?
Here’s a list of DIY cleaning supplies and optional tools that will help you effectively clean urine from your couch.
List of DIY Cleaning Supplies
- White vinegar: An excellent natural cleaner that neutralizes odors.
- Baking soda: It absorbs moisture & eliminates odors.
- Dish soap: Mild and effective for breaking down stains.
- Enzyme cleaner: Specially designed to break down organic stains like urine.
- Clean cloths: For blotting and cleaning.
- Spray bottle: It is mainly used for applying cleaning solutions.
- Wet/dry vacuum: Ideal for thoroughly removing liquid and cleaning residue.
- Soft-bristle brush: Helps to gently scrub and lift stains without damaging the fabric.
Smart DIY Ideas to clean Urine from Couch
How to Clean Fresh Urine Stains from a Couch?
When dealing with fresh urine stains, quick action is critical. Follow these steps to clean up the mess and prevent any long-term damage.
Step-by-Step Process
- Blot the area with a clean cloth: Start by gently blotting the urine stain with a clean, dry cloth to absorb as much liquid as possible. Avoid rubbing, as this could lead to pushing the urine deeper into the fabric.
- Mix a solution of vinegar and water: In a spray bottle, combine equal parts white vinegar and water. Vinegar is excellent for neutralizing the urine’s acidity and removing odors.
- Apply the solution to the stained area: Spray the vinegar solution generously over the affected area on the couch, make sure that the stain is thoroughly soaked.
- Let it sit: Allow the solution to sit for about 5-10 minutes, giving the vinegar time to break down the urine.
- Blot the area again: Use a fresh cloth to blot up the vinegar solution, removing as much moisture as possible.
- Sprinkle baking soda over the area: Once the area is mostly dry, sprinkle a generous amount of baking soda over the stain to neutralize any remaining odors.
- Vacuum the area: After the baking soda has sat for several hours (or overnight), vacuum it up. Your couch should now be clean and odor-free.

How to Remove Dried Urine Stains from a Couch?
Dried urine stains can be more challenging to remove, but with the right approach, you can still restore your couch to its former glory.
Step-by-Step Process
- Use an enzyme cleaner: Enzyme cleaners are designed to break down the proteins in urine, making them particularly effective for old, dried stains. Apply the cleaner directly to the stain, ensuring it penetrates deep into the fabric.
- Let it sit according to the instructions: Follow the manufacturer’s directions for how long to leave the cleaner on the stain. This ranges from 15 min – 1 hour.
- Blot the area: After the enzyme cleaner has had time to work, blot the area with a clean cloth to remove any excess moisture.
- Allow it to air dry: It’s essential to let the area air dry completely. This may take several hours, depending on the extent of the stain and the amount of cleaner used.
- Use a soft-bristle brush: Once dry, gently brush the area to lift any remaining residue.
- Vacuum the area: Finally, vacuum the area to remove any loosened particles or residues, leaving your couch fresh and clean.
How Can You Eliminate Lingering Urine Smells?
Even after cleaning, urine smells can sometimes linger. Here’s how you can ensure your couch smells fresh and clean.
-
How to use Baking Soda and Vinegar?
- Sprinkle a small amount of baking soda over the cleaned area. Baking soda is generally a natural odor absorber.
- Let it sit for several hours (or overnight), then vacuum it up.
- If the smell persists, spray a mixture of vinegar and water over the area again before applying baking soda.
-
How to use Enzyme Cleaners?
- Use enzyme cleaners, which break down the organic compounds in urine that cause odors.
- Apply the enzyme cleaner according to the instructions and let it sit for the recommended time.
- Products like “Simple Solution” or “Urine Off” are effective and available in the UK.

What Are Some Common Mistakes to Avoid?
When cleaning urine from a couch, avoid these common mistakes to prevent further damage to your furniture.
-
Using Harsh Chemicals:
- Bleach and ammonia can damage your couch fabric and may not effectively remove urine odors.
- These chemicals can also leave strong, unpleasant smells that are difficult to remove.
-
Scrubbing Too Hard:
- Aggressive scrubbing can push the urine deeper into the upholstery and damage the fabric.
- Instead, blot gently to absorb the stain without spreading it.
-
Delaying the Cleaning Process:
- The longer urine sits, the more it soaks into the couch, making it harder to remove.
- Immediate action prevents stains from setting and odors from developing.
How Can You Protect Your Couch in the Future?
Protecting your couch from future accidents is simple and can save you a lot of hassle.
- Use Protective Covers: Waterproof covers or slipcovers can protect your couch from spills and stains. They are easy to remove and wash, keeping your couch clean.
- Perform Regular Maintenance: Regular vacuuming and spot cleaning help prevent dirt and stains from accumulating.
- Train Your Pets: If you have pets, train them to avoid accidents on the couch. Positive reinforcement, regular outdoor breaks, and deterrent sprays can help keep your furniture safe from pet accidents.
Conclusion
Cleaning urine from a couch might seem daunting, but with the right approach, it’s entirely manageable. By acting quickly and using the appropriate materials, you can effectively remove both the stain and the odor, leaving your couch fresh and clean.
Remember, prevention is key, so consider protective measures like slipcovers and regular maintenance to keep your couch in top shape. Whether dealing with fresh spills or old stains, these smart DIY ideas on how to clean urine from couch will help you tackle the problem with confidence.
FAQs About Cleaning Urine from a Couch
1. Can I Use Bleach to Clean Urine Stains?
No, bleach could result in damaging the fabric and make the stain worse. Use vinegar, baking soda, or enzyme cleaners instead.
2. How Long Does It Take for Urine Smell to Go Away?
It typically takes hours to a couple of days. If the smell persists, reapply an enzyme cleaner.
3. What If the Stain Comes Back After a Few Days?
If the stain reappears, try applying an enzyme cleaner again to remove any leftover urine.
4. Are Commercial Cleaners Better Than DIY Solutions?
Commercial cleaners can be more effective, but DIY methods like vinegar and baking soda work well for fresh stains.
5. How Often Should I Clean My Couch?
Clean your couch every 3-6 months, or more frequently if you have pets or children.
by Kanimozhi BV | Aug 30, 2024 | DIY Ideas
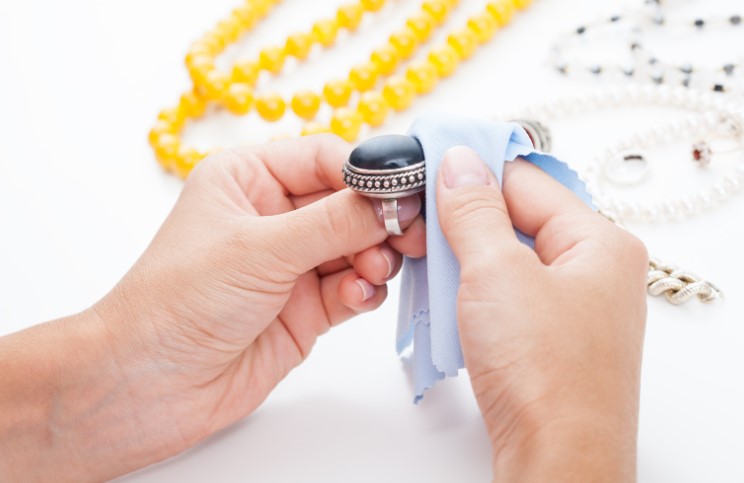
Are you looking for top ideas on how to clean silver chain at home? Here it is. Silver chains are a timeless accessory, but they can lose their shine over time due to tarnish and dirt build-up.
Keeping your silver chain looking as good as new is easier than you might think, especially when you have a few DIY tricks up your sleeve. In this guide, I’ll share some of the best ways to clean your silver chain at home using simple household items.
Why Do Silver Chains Tarnish?
Silver chains tarnish when exposed to air and moisture, which results in a chemical reaction that darkens the metal. Factors like sweat, perfumes, and air pollutants can speed up this process, leaving your once-shiny chain looking dull and dirty. Regular cleaning is essential to maintain your silver’s sparkle and prevent long-term damage.
What Materials Do You Need for Cleaning Silver Chains at Home?
Before you start cleaning, gather these common household items:
- Baking soda: Great for gently removing tarnish.
- White vinegar: Effective for deep cleaning.
- Lemon juice: Natural cleaner with a fresh scent.
- Olive oil: Adds shine while cleaning.
- Toothpaste: A quick fix for mild tarnish.
- Soft cloth: For applying cleaners and polishing.
- Bowl of warm water: For rinsing.
- Soft-bristle toothbrush: To reach small crevices.
Step-by-Step Process on Cleaning Silver Chain At Home
How to Clean a Silver Chain with Baking Soda?
One of the easiest ways to clean a silver chain is by using baking soda. It’s gentle on the silver and works well to remove tarnish.
- Create a paste: Mix two parts baking soda with one part water until it forms a paste.
- Spread the paste: Gently rub the paste onto your silver chain using a soft cloth.
- Gently rub the chain: Rub the paste into the chain, focusing on areas with tarnish.
- Rinse with warm water: After rubbing, rinse the chain under warm water to remove the paste.
- Dry with a soft cloth: Pat the chain dry with a clean, soft cloth, and enjoy its restored shine.
How to Clean a Silver Chain with Vinegar?
Vinegar is another excellent option for cleaning silver. It’s especially useful for chains that have developed a lot of tarnish.
- Immerse the chain in vinegar: Submerge your silver chain in a bowl of white vinegar.
- Let it sit: Allow the chain to soak for 2-3 hours.
- Rinse under warm water: After soaking, rinse the chain thoroughly with warm water.
- Dry and polish: Use a soft cloth to dry and polish the chain, bringing back its natural luster.
How to Use Lemon Juice and Olive Oil to Clean a Silver Chain?
Lemon juice is a natural acid that helps remove tarnish, while olive oil adds a protective shine.
- Mix lemon juice with olive oil: In a small bowl, combine equal parts lemon juice and olive oil.
- Dip a soft cloth into the mixture: Use the cloth to apply the mixture to your silver chain.
- Rub gently: Gently rub the chain to remove tarnish and dirt.
- Rinse with warm water: Wash off the mixture under warm water.
- Dry thoroughly: Pat the chain dry with a soft cloth to reveal a bright, shiny finish.
What Are Some Quick Tips for Maintaining Your Silver Chain?
Everyday Care Tips
Regular care can help prevent tarnish and keep your silver chain looking its best:
- Store in a cool, dry place: Moisture accelerates tarnishing, so keep your chain in a dry area.
- Use anti-tarnish paper: Place anti-tarnish paper or cloth in your storage box to protect the silver.
- Wipe after wearing: After wearing your chain, wipe it with a soft cloth to remove oils, sweat, and other residues.
What Common Mistakes Should You Avoid When Cleaning Silver Chains?
Avoid these pitfalls to keep your silver chain in great condition:
-
Using Harsh Chemicals:
- Bleach and other strong chemicals can damage silver, leaving it dull and discolored.
-
Over-Scrubbing:
- Aggressive scrubbing can scratch the silver, so always clean gently.
-
Ignoring Tarnish:
- Leaving tarnish untreated for too long can cause permanent damage to the silver.
Conclusion
Keeping your silver chain clean and shiny at home is easy with the right DIY methods. Whether you’re using baking soda, vinegar, or lemon juice, these household items can restore your chain’s sparkle without the need for expensive products.
Remember, regular care and gentle cleaning will keep your silver chain looking its best for years to come. Try these methods if you are looking for how to clean silver chain at home and let me know how they work for you.
FAQs About Cleaning Silver Chain at Home
1. Can I Use Toothpaste to Clean My Silver Chain?
Yes, but use a non-gel toothpaste. Apply it gently to avoid scratching the silver.
2. How Often Should I Clean My Silver Chain?
Clean your silver chain every few months or when you notice tarnish starting to form.
3. What If My Silver Chain Has Gemstones?
Avoid soaking the chain if it has gemstones. Instead, clean it carefully with a cloth dipped in a mild cleaner.

by Kanimozhi BV | Aug 28, 2024 | Roof, Exterior, Interior, Loft
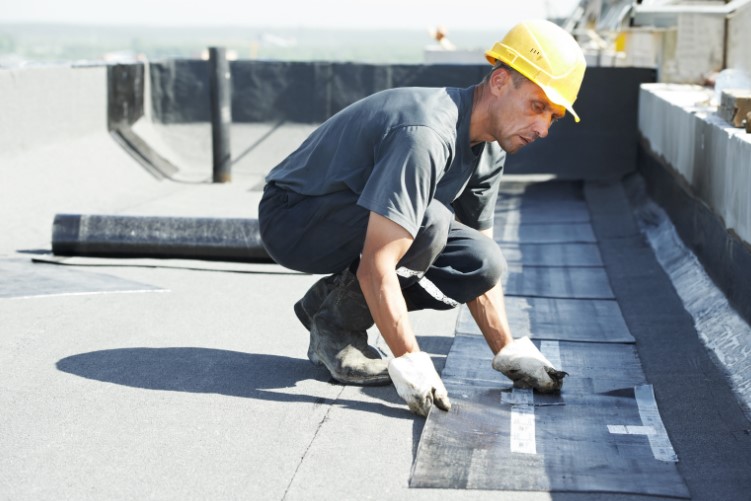
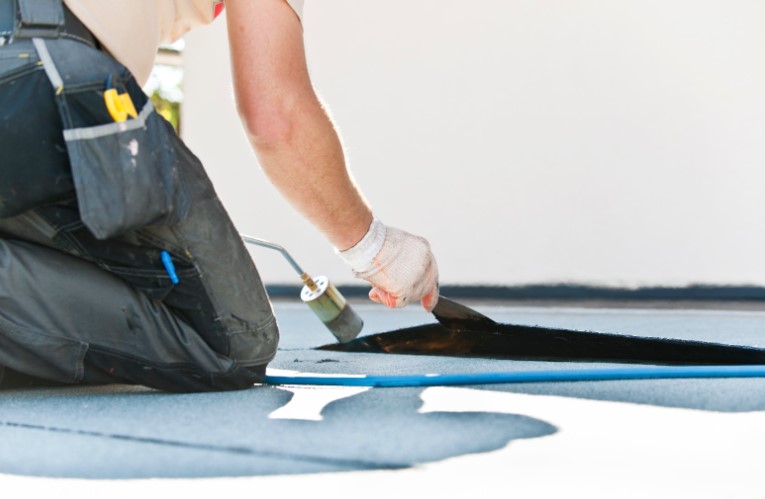
How to repair roof felt from inside loft? Roof felt plays a crucial role in protecting your home from the elements, acting as a barrier against water and wind. Over time, however, roof felt can wear down or become damaged, leading to leaks and other issues.
If you’ve noticed signs of damage in your loft, you might be wondering how to fix it without getting on the roof. Fortunately, it’s possible to repair roof felt from inside the loft, and I’m here to guide you through the process step by step.
What is Roof Felt and Why is it Important?
Roof felt, also known as underlayment or tar paper, is a layer of material that sits between your roof’s structural elements and the external roofing material, like tiles or shingles. Its primary function is to provide an extra layer of waterproofing, protecting your home from water infiltration. Roof felt also helps to protect against wind-driven rain and contributes to the overall durability of your roof.
When roof felt becomes damaged, it can compromise the integrity of your roof, leading to leaks, dampness, and even structural damage if left unaddressed. That’s why it’s essential to keep an eye on the condition of your roof felt and repair any issues as soon as they arise.
What are the Signs to Find that Your Roof Felt Needs Repair?
Before diving into the repair process, it’s important to identify whether your roof felt is indeed in need of repair. Here are 4 common signs to look out for:
- Water Stains on the Ceiling: If you notice water stains or discolouration on the ceiling inside your home, it could be a sign of a roof felt issue.
- Dampness in the Loft: Damp or musty smells in your loft might indicate that water is seeping through damaged roof felt.
- Visible Tears or Gaps: During a loft inspection, check for any visible tears, gaps, or holes in the roof felt.
- Dripping Water: If you see water dripping inside the loft during or after rain, it’s likely that your roof felt has been compromised.
If you notice any of these signs, it’s time to take action and repair the roof felt before the problem worsens.
Before you begin the repair, you’ll need to gather a few essential tools and materials. Here’s what you’ll need:
- Utility Knife: For cutting the roof felt and the patch material to size.
- Roofing Adhesive or Sealant: To securely attach the patch to the damaged area.
- Roof Felt Patch: You can purchase a small roll of roof felt or use a patch kit specifically designed for repairs.
- Tape Measure: To measure the area that needs to be patched.
- Ladder: For accessing the higher parts of the loft if necessary.
- Safety Gear: Wear Gloves, safety glasses to protect you.
What are the Step-by-Step Guide to Repair Roof Felt from Inside the Loft?
Now that you’re equipped with the necessary tools, let’s get started with the repair.
Step 1: Locate the Damaged Area
The first step is to locate the exact spot where the roof felt is damaged. This might be obvious if you can see a tear or hole, but if not, look for signs of water ingress, such as damp patches, drips, or water stains. Once you’ve found the damaged area, you’re ready to begin the repair.
Step 2: Prepare the Area for Repair
Before you apply any patches, it’s important to prepare the area properly:
- Clear the Area: Remove any insulation or debris around the damaged area to ensure you have a clear workspace.
- Dry the Area: If the area is wet, use a cloth or towel to dry it out as much as possible. Roofing adhesive works best on dry surfaces.
- Cut Away Damaged Felt: Use your utility knife to carefully cut away any loose or severely damaged sections of felt. This will give you a clean surface to work on.
Step 3: Cut and Apply the Felt Patch
Next, you’ll need to cut a piece of roof felt that’s large enough to cover the damaged area with a bit of overlap:
- Measure the Area: Use your tape measure to determine the size of the patch needed. It should be slightly larger than the damaged area to ensure full coverage.
- Cut the Patch: Cut a piece of roof felt to the required size using your utility knife.
- Apply Roofing Adhesive: Apply a generous amount of roofing adhesive around the edges of the damaged area and on the underside of the patch.
- Position the Patch: Carefully position the patch over the damaged area, pressing it firmly into place.
Step 4: Secure the Edges and Seal the Patch
To ensure the patch holds and remains waterproof:
- Seal the Edges: Apply additional roofing adhesive around the edges of the patch, pressing it down firmly to ensure a good seal.
- Smooth Out the Patch: Use your hands or a flat tool to smooth out any wrinkles or air bubbles in the patch, ensuring it adheres properly to the roof felt.
Step 5: Inspect and Test the Repair
After completing the patch, it’s important to inspect your work:
- Check the Patch: Make sure the patch is securely attached with no gaps or loose edges.
- Test for Leaks: The next time it rains, check the loft to ensure no water is getting through the repair. You can also simulate rain by spraying water onto the roof from the outside and checking for leaks inside.
What are the Alternative Methods for Repairing Roof Felt?
If the standard patch method doesn’t work for your situation, here are a few alternative methods:
What are Temporary Fixes?
If you’re not able to make a permanent repair right away, you can use a temporary fix to stop water ingress. A tarpaulin or heavy-duty plastic sheet can be secured over the damaged area as a temporary barrier.
How to Use Roofing Tape?
Roofing tape is a quick and easy option for small tears or cracks. It’s self-adhesive and can be applied directly over the damaged area to create a waterproof seal. This method works best for minor repairs.
When to Call a Professional?
If the damage is extensive or if you’re not confident in your ability to repair it yourself, it might be best to call a professional roofer. They can assess the situation and make the necessary repairs safely and effectively.
What are the Safety Tips for Working in the Loft?
Working in the loft can be tricky, so it’s important to follow some basic safety precautions:
- Ensure Proper Ventilation: Make sure the loft is well-ventilated, especially if you’re using adhesives or sealants.
- Use Adequate Lighting: Ensure you have enough light to see clearly while you work. A headlamp or portable light can be helpful.
- Watch Your Step: Be mindful of where you step to avoid damaging insulation or losing your balance.
- Wear Protective Gear: Always wear gloves, safety glasses, and a dust mask to protect yourself from dust and debris.
What are the Common Mistakes to Avoid When Repairing Roof Felt?
Even with the best intentions, mistakes can happen. Top 3 pitfalls to avoid:
Improper Patch Application
Applying the patch incorrectly can lead to leaks and further damage. Ensure the patch is large enough and fully sealed around the edges to prevent water from getting in.
Ignoring Small Leaks
Small leaks might seem insignificant, but they can lead to bigger problems if not addressed. Always take the time to repair even minor damage to prevent it from worsening.
Using Inappropriate Materials
It’s tempting to use whatever materials you have on hand, but it’s important to use the right materials for roof felt repairs. This ensures the repair is durable and effective.
Conclusion
Repairing roof felt from inside the loft is a practical and effective way to address leaks and damage without the need to climb onto the roof. By following these steps on how to repair roof felt from inside loft and by taking the necessary precautions, you can make a durable repair that protects your home from water damage.
Remember to use the right tools and materials, take your time to ensure a proper seal, and always prioritise safety. With a little effort, you can keep your roof in top condition for years to come.
FAQs About Repairing Roof Felt from Inside the Loft
1. Can I repair roof felt in the rain?
It’s best to wait for dry conditions, as adhesives and sealants may not work properly on wet surfaces.
2. How long does a roof felt repair last?
A properly done repair can last for several years, but it’s always a good idea to check it regularly for signs of wear.
3. Is it safe to repair roof felt myself?
Yes, as long as you take proper safety precautions and use the correct materials. If you’re unsure, consider consulting a professional.
