by Kanimozhi BV | Nov 11, 2025 | Garden, Exterior
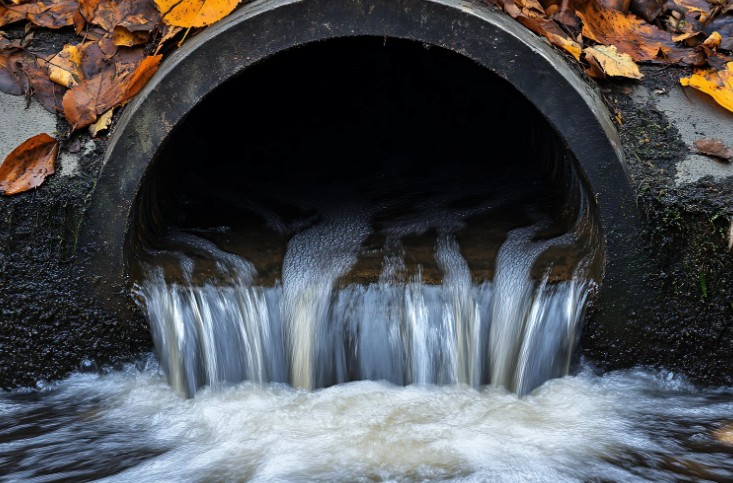
Outdoor drain blockages are one of those things I’ve dealt with more times than I can count. Whether it’s garden debris, mud, or years of grease buildup, knowing how to unblock a drain properly can save a lot of stress, money, and mess.
In this guide, I’ll walk you through six professional ways I use to tackle outdoor drain blockages, along with prevention tips and safety advice. So, if you’re struggling with a blocked drain outside your house, let’s get into it.
Why Do Outdoor Drains Get Blocked So Often?
What causes outside drains to clog?
In my experience, outdoor drains tend to get blocked due to a mix of natural debris and poor maintenance. Over time, this builds up and eventually stops water from flowing freely.
Common causes include:
- Fallen leaves and twigs
- Mud and silt washed in during rain
- Fat and grease from kitchen waste
- Hair and food scraps if external sinks drain here
- Tree roots infiltrating pipes
- Accidental disposal of plastics or non-degradable materials
How can you tell if an outdoor drain is blocked?
I usually spot a blockage when there’s water pooling around the drain cover or if a foul smell starts creeping up from the pipe.
In some cases, the water in sinks or outdoor taps starts draining slowly. A gurgling noise or bubbling when water tries to pass through is another clear warning sign that there’s an issue down below.

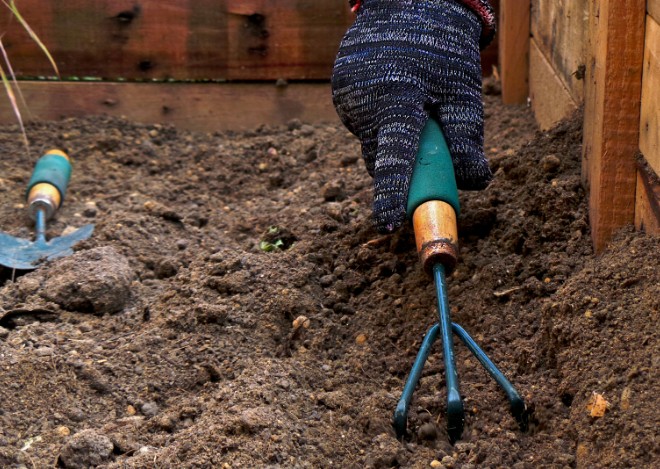
Having the right tools makes a massive difference. Here’s what I personally keep handy depending on how severe the blockage is.
- Rubber gloves
- Bucket
- Garden trowel or scoop
- Drain unblocking rods
- Drain grate keys or flathead screwdriver
- High-pressure drain jetting machine
- CCTV camera for pipe inspection
- Wet/dry vacuum
- Enzyme-based drain cleaner
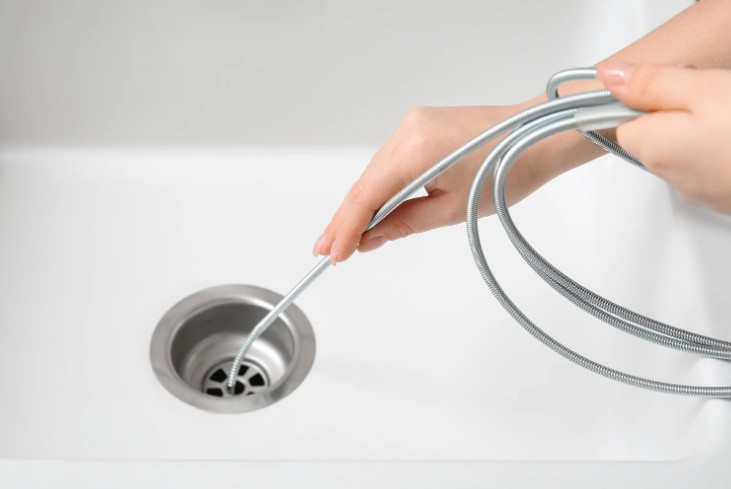
- Drain snake or auger
How to Unblock a Drain? The 6 Professional Methods I Use
Now, let’s dive into the methods I personally use to deal with outdoor drain blockages. Choose based on the type and severity of the clog.
1. Manual Clearance with Drain Rods
This is often my first go-to method for blockages near the surface.
Steps:
- Remove the drain cover using a key or flat tool.
- Wear gloves and use a scoop or hand to remove visible debris.
- Insert the drain rod and gently push it through the pipe.
- Twist clockwise until resistance reduces – this usually means the blockage has cleared.
- Flush with a bucket of water.
Best for: Leaves, silt, garden waste
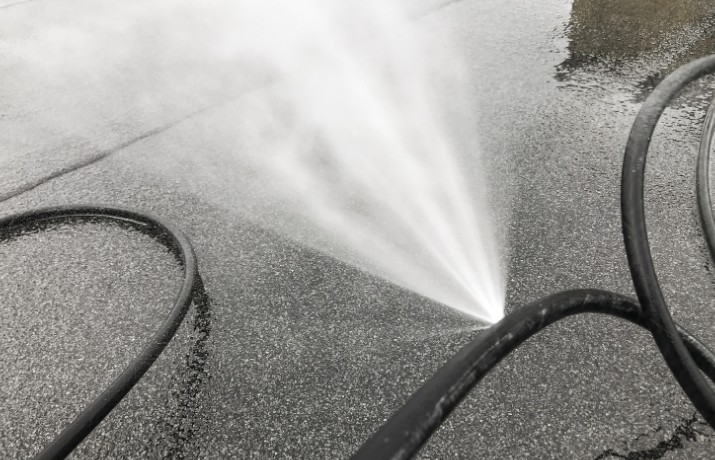
2. Drain Jetting for Tough Blockages
Drain jetting is one of the most effective professional methods I use. It uses high-pressure water to break down grease and sludge.
Steps:
- Insert the jetting hose into the pipe.
- Turn on the water jet machine.
- Slowly feed the hose while maintaining pressure.
- Pull out and check if water flows freely.
Best for: Grease build-up, mud, sludge
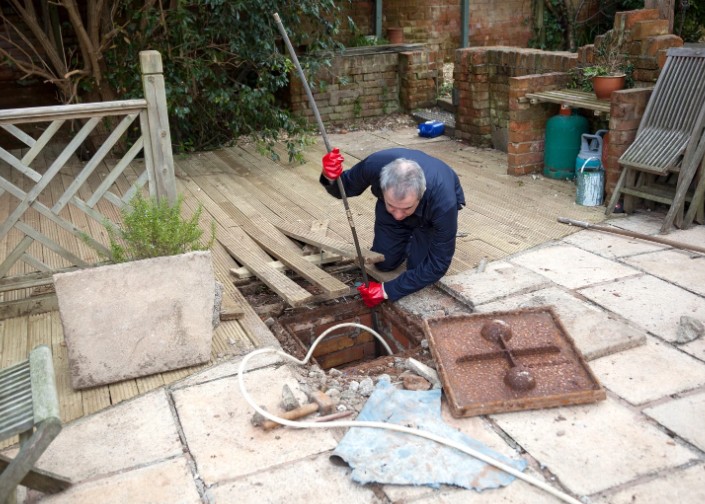
3. Removing the Drain Cover and Cleaning the Gully
Sometimes, blockages are localised right at the top – in the gully trap.
Steps:
- Lift the manhole cover or gully grate.
- Scoop out all visible waste and clean thoroughly.
- Rinse the area using a hose or bucket.
- Replace the cover securely.
Best for: Surface-level obstructions
4. Natural Enzyme Cleaners (Eco-Friendly Option)
If I suspect the blockage is from organic material, enzyme cleaners are a gentle but effective method.
Steps:
- Pour the cleaner down the drain as per product instructions.
- Leave it to work overnight.
- Rinse with warm water the next day.
Best for: Organic matter, biodegradable waste
5. High-Pressure Hose Flush
When I don’t have a jetting machine handy, a garden hose with good pressure can sometimes do the trick.
Steps:
- Insert the hose into the drain.
- Wrap a cloth around the gap to prevent splash-back.
- Turn on the water and let it blast through.
Best for: Soft blockages, recent clogs
6. CCTV Drain Survey (When the Cause Is Unclear)
If I can’t figure out what’s causing the blockage or suspect deeper issues, a CCTV inspection is my final step before calling in the heavy-duty specialists.
What it helps detect:
- Roots in drain pipes
- Pipe collapse
- Fatbergs
- Structural damage
You’ll need a professional service for this unless you own the equipment.
How Do I Stay Safe While Unblocking Drains?
Working with drains isn’t just unpleasant — it can be risky. I always wear thick rubber gloves, waterproof boots, and protective goggles, especially when using jetting equipment. After the job, I disinfect my tools and clean up thoroughly.
What should you never do?
- Never pour boiling water on PVC pipes (can warp them)
- Don’t mix chemical cleaners – it’s dangerous
- Avoid using metal objects that could damage the pipe
Comparison Table: DIY vs Professional Drain Unblocking
| Method |
DIY Friendly? |
Cost-effective |
Best For |
| Manual Rods |
Yes |
Yes |
Leaves, garden waste |
| Drain Jetting |
No |
No |
Grease, heavy dirt |
| Enzyme Cleaners |
Yes |
Yes |
Organic clogs |
| CCTV Survey |
No |
No |
Root/damage detection |
What If the Drain Is Still Blocked After Trying Everything?
If I’ve tried multiple methods and the problem persists, it’s usually a sign of:
- Tree root intrusion
- Collapsed or damaged pipes
- Deep blockages beyond DIY reach
In these cases, I always recommend calling a professional drainage company. It’s safer and ultimately more cost-effective.
How Do I Prevent Outdoor Drains from Blocking Again?
I follow a few simple steps to make sure I don’t deal with the same issue over and over:
- Use drain guards to trap leaves and debris
- Avoid pouring fats or oils into outside drains
- Clean grates and gullies regularly
- Trim plants or trees near drain lines
- Schedule CCTV inspections annually if blockages are frequent
Conclusion
Knowing how to unblock a drain has saved me countless call-out fees and hours of waiting. From basic rod work to pressure jetting and enzyme cleaning, each method has its place — and when used correctly, they work. But when nothing seems to fix the issue, don’t force it. Sometimes the smartest move is to call a professional.
Outdoor drains don’t have to be a mystery or a mess — you just need the right approach and a bit of patience. I hope this guide helps you tackle your next blockage with confidence.
Frequently Asked Questions (FAQs) On How To Unblock a Drain
1. What is the fastest way to unblock an outdoor drain?
The fastest method I’ve used is manual clearance with a drain rod, especially if the blockage is near the surface. It takes just minutes to break up leaves or debris and restore flow. For deeper clogs, a drain jet is quicker but requires the right equipment.
2. Can I use boiling water to unblock a drain?
You can use hot water, but I avoid boiling water — especially if the pipes are PVC, as it can cause warping. Warm water with an enzyme cleaner is safer and still effective for breaking down grease and organic matter.
3. Is it safe to use chemical drain cleaners for outdoor drains?
I personally avoid harsh chemical cleaners. They can damage your pipes over time and pose safety risks. Enzyme-based or natural cleaners are safer, especially for ongoing maintenance.
4. How do I know if tree roots are blocking my drain?
If you’ve tried multiple unblocking methods and water still isn’t flowing, tree roots could be the cause. A CCTV drain survey is the only way to confirm this, as it lets you inspect the inside of the pipe directly.
5. When should I call a professional to unblock my drain?
If your DIY methods haven’t worked, or if water keeps backing up repeatedly, it’s best to call in a drainage expert. Also, if you suspect structural damage, a professional is needed to prevent further problems.
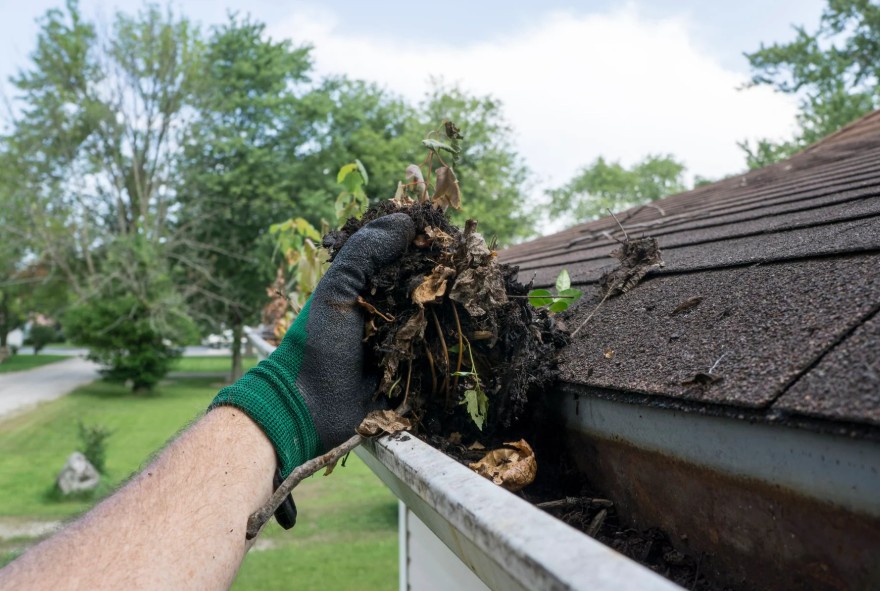
by Kanimozhi BV | Oct 31, 2025 | Gutters, Exterior
Are you wondering and looking for tips on how often should gutters be cleaned? Then explore the guide for the complete gutter maintenance for UK homeowners.
Why Is Regular Gutter Cleaning Important in the UK?
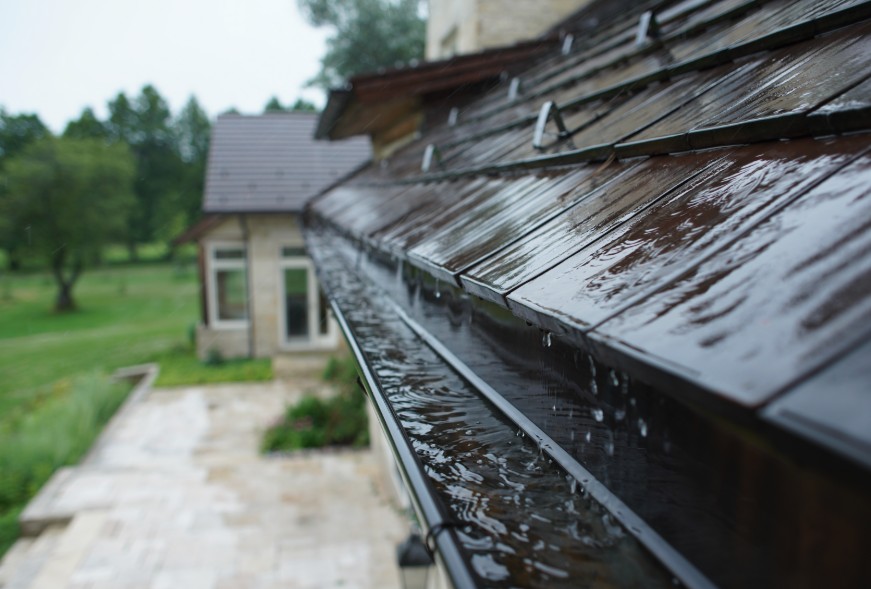
Keeping gutters clean isn’t just a routine chore — it’s crucial for protecting your home. I’ve seen firsthand how neglected gutters lead to damp walls, overflowing water, and even structural damage.
In a country like the UK, where heavy rainfall is frequent, a functioning roof drainage system is your first line of defence.
What role do gutters play in your home’s drainage system?
Gutters guide rainwater away from your roof and foundation. If they’re blocked, that water ends up cascading down your walls or pooling at your foundation, which can lead to internal damp, mould growth, and even basement leaks.
The UK climate — wet winters, frequent rainfall, and leaf-heavy autumns — puts gutters under constant strain. Moss buildup is also common here, especially on older or shaded roofs. These conditions mean our gutters clog more easily and need more attention than those in drier climates.
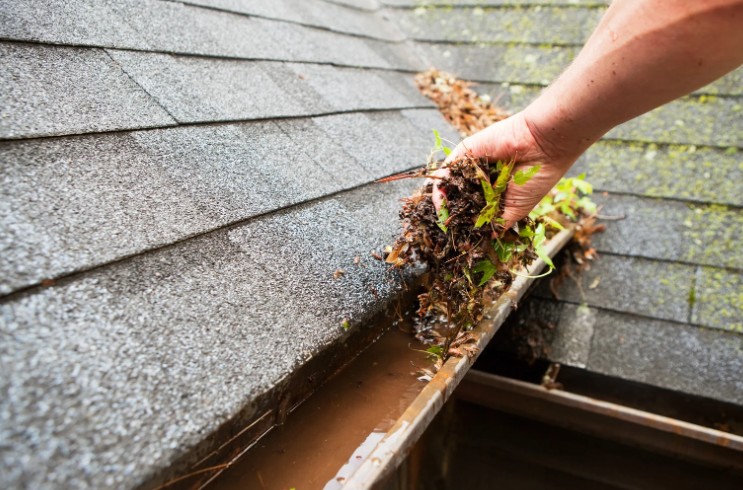
What happens if you skip cleaning your gutters?
The risks of neglect are real. Water starts to overflow, and that moisture gets into places it shouldn’t. I’ve had to deal with peeling paint, water stains, and even minor fascia board damage — all caused by clogged gutters I hadn’t got around to cleaning.
How Often Should Gutters Be Cleaned in the UK?
What is the recommended gutter cleaning frequency for UK homes?
From my experience — and that of many UK maintenance experts — gutters should be cleaned twice a year: once in spring and again in autumn. These are the two seasons when debris tends to build up most.
But if your home is near overhanging trees, you’ll likely need to clean more often — every 3–4 months.
| Type of Area |
Recommended Cleaning Frequency |
| Urban (few trees) |
Twice a year |
| Suburban (some trees) |
3 times a year |
| Rural/wooded areas |
Quarterly (4 times a year) |
Does property location or surroundings matter?
Yes, absolutely. When I moved to a home surrounded by mature trees, I noticed my gutters filled up almost monthly in autumn. If you’ve got pine needles, moss, or high winds in your area, that will also increase the frequency.
How do seasons like autumn and spring impact cleaning needs?
In autumn, falling leaves and twigs clog gutters rapidly. In spring, you’re dealing with pollen, seed pods, moss, and bird activity. These two seasons make up the majority of debris build-up, so they’re ideal times for preventive cleaning.
How Can I Tell If My Gutters Need Cleaning?
What are the Signs of clogged gutters and downpipes?
There are a few things I keep an eye out for, especially after heavy rain: water spilling over the sides, visible plant growth, or staining on the brickwork. I also check for sagging sections, which often means they’re full of wet debris.
Can I visually inspect my gutters safely?
Yes, I usually start with a ground inspection using binoculars or zooming in with my phone camera. If I suspect blockages, I’ll use a ladder with stabilisers and take safety precautions — including someone spotting me from below.
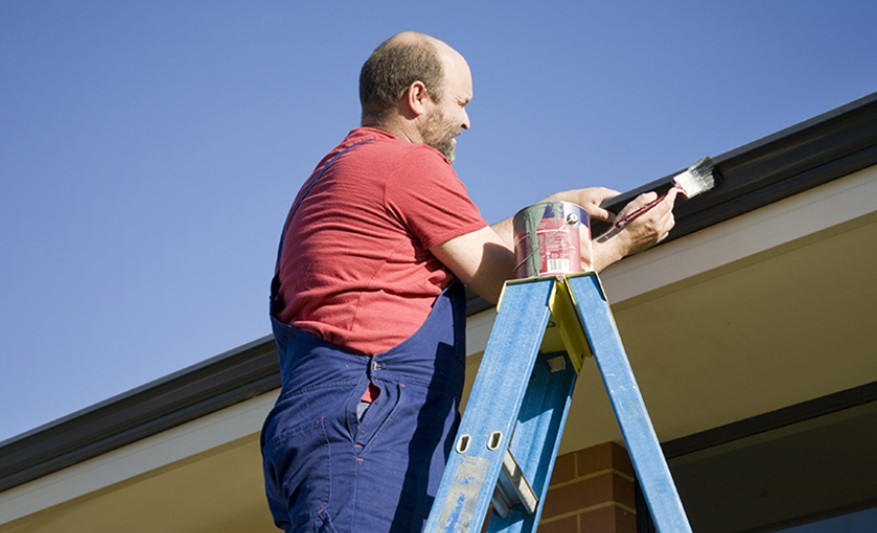
DIY vs Professional Gutter Cleaning: Which Should I Choose?
What are the pros and cons of DIY gutter cleaning?
I often clean my gutters myself, especially when I’ve got the time and the weather’s clear. It saves money and gives me the chance to inspect for damage. That said, it’s not always easy — it’s time-consuming, and there’s a safety risk if you’re not confident on a ladder.
When should I call in a professional?
If your gutters are difficult to reach, or if you’re unsure about what you’re doing, I’d definitely recommend hiring a professional. I usually do this at least once a year, just to make sure nothing’s been missed.
Comparing average gutter cleaning costs in the UK
| Service Type |
Average Cost (2025) |
| Single-storey home |
£60 – £90 |
| Two-storey home |
£90 – £150 |
| Gutter vacuum service |
£100 – £180 |
| Gutter and fascia cleaning |
£150 – £250 |
Prices can vary depending on your region and roof accessibility.
What Tools or Add-Ons Help Reduce Gutter Maintenance?
Do gutter guards or covers really help?
Yes — I installed gutter guards last year, and they’ve made a noticeable difference. They don’t eliminate cleaning entirely, but they drastically cut down the amount of debris that gets in.
When I do it myself, these are the tools I rely on:
- Telescopic gutter cleaning pole
- Sturdy ladder with stabiliser arms
- Gutter scoop and bucket
- Hose with pressure nozzle
- Work gloves and safety goggles
Seasonal Gutter Maintenance Checklist for UK Homeowners
I use this simple checklist to stay on top of things throughout the year:
Spring and Autumn Checklist:
- Remove leaves, moss, and visible debris
- Flush out downpipes with water
- Inspect joints for leaks or sagging
- Trim overhanging branches to reduce build-up
- Check for signs of nesting birds or insects
Keeping this list handy helps me stay consistent without overthinking it.
Conclusion: How I Keep My Gutters Flowing Year-Round
Maintaining clean gutters is one of those small tasks that prevent big problems. By cleaning mine every spring and autumn, and checking them after storms or windy days, I’ve managed to avoid costly repairs and water damage.
It doesn’t have to be a massive project. Whether you do it yourself or hire a pro, keeping your gutters clean protects your home — and your peace of mind. In a rainy country like ours, that’s a wise investment.
Related Article: How to Clean Rain Gutters from the Ground Without a Ladder?
FAQs About How Often Should Gutters Be Cleaned
1. Can I clean my gutters in winter?
I try to avoid it unless there’s a visible blockage, since winter conditions make roofs slippery and debris harder to remove. If you must do it, choose a mild, dry day and use extra caution.
2. How do I clean downspouts?
I disconnect the bottom section of the downpipe and flush it through with a hose. If that doesn’t work, a plumber’s snake or wet/dry vacuum usually does the trick.
3. How long does a gutter cleaning session usually take?
It depends on the house. For me, a single-storey property usually takes around 1–2 hours. A two-storey home might take twice that if you’re careful and thorough.

by Kanimozhi BV | Oct 16, 2025 | Garden, Exterior
Levelling a garden might sound like a daunting task, but after doing it myself, I found that it’s entirely manageable with the right plan and tools.
Whether you’re dealing with a sloping garden, bumpy patches, or poor drainage, I’ll walk you through exactly how to level a garden in the UK — based on my own hands-on experience.
Why Should I Level My Garden in the UK?
Before I picked up a spade, I had to ask myself: why even level a garden? In the UK, where we get our fair share of rain and variable soil types, an uneven garden can lead to:
- Water pooling in low areas
- Difficulties laying patios, sheds, or lawns
- Unsafe or awkward outdoor space
Level gardens are not just more practical; they also improve aesthetics and increase property value.
I personally wanted a level area for my children to play safely and to install a small patio — and fixing my garden’s drainage issues was a bonus.
Getting the right tools upfront made the job much smoother. Here’s what I used (and what you might consider):
- Spade or Shovel – for digging and shifting soil
- Turf Cutter – if you’re removing grass
- Landscape Rake – helps in evenly spreading and levelling soil
- Garden Roller – to compact the top layer
- Spirit Level or String Line – for checking accuracy
- Wheelbarrow – to move soil or turf
- Topsoil – for filling dips and levelling the surface
- Garden Hose – for lightly moistening the soil during compaction

| Tool |
Budget Option (£) |
Premium Option (£) |
| Spade/Shovel |
10 – 20 |
30 – 50 |
| Turf Cutter Rental |
30/day |
50/day |
| Landscape Rake |
15 – 25 |
35 – 60 |
| Spirit Level |
10 – 15 |
25 – 40 |
| Garden Roller |
25 – 40 |
60 – 100 |
How Do I Plan Before Starting to Level the Garden?
I learned quickly that planning makes all the difference. Here’s how I prepared:
- Measured the slope using a string line and spirit level
- Marked reference points with stakes and string
- Decided whether I needed retaining walls (I didn’t, but sloped gardens might)
Proper planning also helped me determine how much topsoil I’d need and whether water would flow away from my house — drainage is key.
Step-by-Step Guide: How to Level a Garden?
This is where the actual phase started. I split it down into quite easier, manageable steps.
Step 1: Remove Existing Turf or Grass
Using a turf cutter, I stripped away the existing lawn. You can also use a spade, but it’s more labour-intensive. I rolled up the turf and reused some in other parts of my garden.
Step 2: Measure the Area and Set Reference Points
I used pegs and string lines to create a grid across the garden, making it easier to visualise the high and low spots. This helped keep everything level and accurate.
Step 3: Adjust the Soil – Fill or Remove as Needed
I dug away soil from high areas and moved it to the lower patches. Where that wasn’t enough, I added topsoil to even it out. I used a wheelbarrow to move everything efficiently.
Step 4: Spread and Compact the Topsoil
Using a rake, I spread the topsoil evenly. Then I lightly watered the soil and used a garden roller to compact it, repeating the process twice for a firm, level base.
Step 5: Ensure Proper Drainage
I made sure the garden had a slight gradient (about 1–2% slope away from the house) to encourage water runoff. Garden grading is essential, especially in rainy UK climates.
Step 6: Rake and Level the Surface
Finally, I raked the surface smooth, checked levels again using a spirit level, and made small adjustments where needed.
Key Dos and Don’ts:
- Do check drainage before you start
- Do compact the soil in layers
- Don’t skip measuring and marking
- Don’t add too much topsoil without compacting
Table: Soil Depth Guidelines
| Garden Use |
Minimum Soil Depth |
| Lawn (grass) |
10 – 15 cm |
| Flower beds |
20 – 30 cm |
| Vegetable patches |
30 – 40 cm |
How to Level a Garden Without a Digger?
When I first started this project, I didn’t have access to a mini digger — nor did I want to rent one due to cost and the logistics of getting it into my small garden.
So, if you’re wondering how to level a garden without a digger, here’s exactly how I did it:
-
Shovel – for digging and removing soil
-
Pickaxe – handy for breaking compacted ground
-
Wheelbarrow – to transport soil from high spots to low ones
-
Rake – for spreading and smoothing
-
Garden roller – to compact manually
-
String line and stakes – to check level visually
My Process Without a Digger:
-
Marked high and low areas using pegs and string
-
Dug out high points with a spade, broke up compacted areas with a pickaxe
-
Moved excess soil using a wheelbarrow and filled in the dips
-
Spread topsoil across the surface and compacted in layers
-
Repeated the process slowly over a few weekends
It was more labour-intensive, but completely doable for a medium-sized garden. I saved hundreds of pounds by not hiring machinery, and honestly, the sense of achievement was worth the sweat!
Tip: If you’re working on a slope or larger area, break the job into small zones and level each one before moving on.
How Do I Know If the Garden Is Properly Levelled?
After raking and compacting, I used a spirit level on a straight plank to test different sections. You could also use a laser level if you’re aiming for precision.
If water pools after a light rain, it’s a sign of uneven spots that may need another layer of soil and compaction.
Should I Re-Turf or Seed After Levelling?
I had to decide between laying turf or sowing grass seed. Here’s how I approached it:
- Turf: Instant results, but more expensive
- Seed: Cheaper and easier to apply, but takes longer
I opted for turf in high-traffic areas and seed in others. Either way, water consistently and avoid walking on it for at least 2–3 weeks.
What Are the Common Mistakes When Levelling a Garden?
Here’s what I almost got wrong — and how I avoided it:
- Skipping drainage planning – water pooling can ruin your work
- Using poor-quality topsoil – always go for screened topsoil
- Not compacting properly – loose soil sinks and creates dips
- Levelling without marking reference points
Avoiding these saved me time and rework later.

How Much Does It Cost to Level a Garden in the UK?
The cost depends on garden size, soil needs, and tools. Here’s a rough idea:
Table: Estimated DIY Garden Levelling Costs
| Item/Service |
Estimated Cost (UK) |
| Topsoil (per m³) |
£40 – £80 |
| Turf Cutter Rental |
£30 – £50/day |
| Tools (buy or rent) |
£60 – £120 |
| Grass Seed or Turf |
£20 – £100+ |
| Optional Labour Help |
£100 – £300 |
Doing it myself saved a lot, but it took 2–3 weekends of effort.
Can I Level a Garden by Myself or Should I Hire Help?
If your garden is mildly uneven and you’re comfortable with manual work, it’s totally doable on your own. I did it solo with the help of some hired tools and a few YouTube tutorials.
For heavily sloped gardens, hiring a professional landscaper might be wiser — especially if retaining walls, drainage systems, or large turfing areas are involved.

Final Thoughts – My Experience with Garden Levelling
Looking back, I’m really proud of the result. It was hard work, but seeing a neat, level garden with good drainage and healthy grass made it all worthwhile. If you’re wondering how to level a garden, I’d say: plan well, use the right tools, and take your time. It’s absolutely worth the effort.
Frequently Asked Questions (FAQs) On How to Level a Garden
1. Can I level my garden without removing the turf?
Yes, but it depends on how uneven your garden is. For small dips, you can top-dress with soil and reseed. For larger changes, removing the turf is more effective.
2. How long does it take to level a garden in the UK?
For a standard-sized garden (around 50–100m²), it can take 2–3 days for prep and levelling, plus additional time for turfing or seeding and letting the soil settle.
3. Do I need planning permission to level my garden?
In most cases, no — unless you are significantly altering the elevation or adding structures like retaining walls over a certain height.
4. What type of topsoil is best for levelling?
Use screened topsoil, which is free from debris and ideal for lawns. Look for soil with a mix of sand and loam for better drainage and root growth.
5. Is it better to level a garden in spring or autumn?
Both seasons are suitable. I did mine in spring, which allowed for strong grass growth. Autumn also works well due to moist soil and cooler temperatures.

by Kanimozhi BV | Oct 14, 2025 | Pest Control
When I first noticed small holes in my wool jumper and itchy red marks on my skin, I immediately panicked—was it bed bugs?
After some digging (and a bit of a freak-out), I discovered that the real culprit wasn’t bed bugs at all—it was carpet beetles.
If you’re wondering “Do carpet beetles bite?” or “Are they harmful?”, you’re not alone. Let me walk you through everything I learned, based on my own experience, in this practical guide for UK households.
Are Carpet Beetles Harmful to My Health or Home?
The short answer? Yes—but not in the way you might think.
While carpet beetles don’t bite, their larvae can cause skin irritation. These tiny insects aren’t dangerous in the traditional sense (they don’t carry diseases), but they can wreak havoc in your home—and on your skin.

What Are the Health Effects of Carpet Beetles?
- I experienced small red, itchy bumps on my arms that looked like insect bites.
- After ruling out bed bugs and fleas, I discovered the real problem was carpet beetle larvae. The tiny hairs on their bodies can trigger allergic reactions, especially if you’re sensitive like I am.
How is Home Damage?
- They chewed holes through my wool clothing, a cotton cushion cover, and even started nibbling on a sheepskin rug.
- The worst part? I didn’t even notice until the damage was done.
Carpet beetles may be small, but the damage they can cause is big—both to your skin and your soft furnishings.
What Are Carpet Beetles and Why Are They in My Home?
Before this experience, I didn’t even know carpet beetles were a thing. Now I could even find one from all over the room.
What They Look Like?
- Adult carpet beetles are small (about 2–4 mm), oval-shaped, and often black with white, yellow, or brown patches.
- The larvae, which are the real troublemakers, are fuzzy, brownish, and slightly longer than the adults.
Where They Come From?
- I discovered they had entered through an open loft vent and made their way into my wardrobe.
- These beetles are attracted to natural fibres like wool, cotton, leather, and feathers.
Do Carpet Beetles Actually Bite?
Here’s the truth: carpet beetles don’t bite humans—but it sure can feel like it.
What Actually Happens?
- It’s the larvae, not the adults, that cause problems.
- They don’t bite or sting, but the microscopic hairs on their bodies can cause a skin reaction similar to bites. This is often called carpet beetle dermatitis.
I remember waking up with what I thought were bug bites, only to learn later they were allergic reactions caused by contact with larval hairs left on bedding and clothes.
What Does a Carpet Beetle Rash Look Like?
If you’re like me, you might confuse it with other insect bites at first. Here’s how I eventually told the difference:
What Are the Common Symptoms I Experienced?
- Red, itchy welts—mostly on arms, neck, or back
- Rash appeared in clusters or lines
- No new bites appeared after I washed bedding and cleaned the area

Table: Comparing Skin Reactions
| Symptom |
Carpet Beetle Rash |
Bed Bug Bite |
Flea Bite |
| Itchiness |
Moderate to high |
High |
Very high |
| Appearance |
Red rash, random patches |
Small red bumps, in rows |
Tiny red dots, ankles |
| Pain Level |
Mild |
Mild to moderate |
Moderate |
| Other Symptoms |
May cause dry skin or eczema |
Often inflamed |
Can scab over |
I ended up treating my rash with antihistamines and hydrocortisone cream, which gave me some relief.
How Do I Know If I Have a Carpet Beetle Infestation?
I didn’t spot them right away—and that’s the problem. They’re sneaky.
Here’s how I realised I had an infestation:
What are the Signs I Noticed?
- Tiny holes in natural-fibre clothing and rugs
- Shed larval skins in corners of drawers and under the bed
- Adult beetles near window sills
- Fuzzy larvae crawling near skirting boards
Carpet beetles tend to hide in dark, undisturbed places, making it easy for them to go unnoticed.
How to Get Rid of Carpet Beetles in the UK?
Once I realised what I was dealing with, I immediately started cleaning—and researching.
Here’s what worked for me:
What Are My Carpet Beetle Removal Strategy?
- Deep vacuuming – carpets, curtains, and under furniture
- Hot washing of all affected clothing and bedding
- Used insecticide sprays labelled for carpet beetles
- Sprinkled boric acid in corners and cracks (carefully, and kept pets away)
- Sealed cracks and fixed any open vents or window gaps
I tried to handle it myself, but honestly, calling in a pest control professional was the final step that gave me peace of mind.
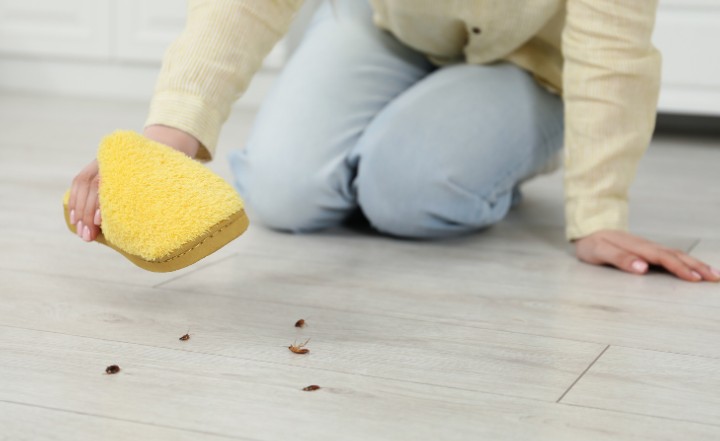
Table Summary of Key Facts
| Topic |
Fact |
| Do they bite? |
No – irritation comes from larvae hairs |
| Are they harmful? |
Yes – allergic reactions + property damage |
| Where are they found? |
Carpets, wardrobes, lofts, behind furniture |
| What do they damage? |
Wool, cotton, leather, feathers |
| How to remove them? |
Vacuuming, hot wash, insecticides, pest control |
Final Thoughts: My Experience With Carpet Beetles
Dealing with carpet beetles taught me that not all bugs that cause skin reactions actually bite. These pests are sneaky, silent, and damaging—but if you know what to look for and how to respond, they’re very manageable.
What worked for me was a combination of:
- Awareness of symptoms
- Careful cleaning and home sealing
- And when in doubt, getting professional help
So if you’re dealing with strange rashes and mystery holes in your clothes, don’t ignore it—you might be sharing your home with carpet beetles.
Frequently Asked Questions On Do Carpet Beetles Bite
1. Can carpet beetles live in beds?
Yes—but they don’t live on your mattress like bed bugs. They may crawl over bedding or hide in box springs and headboards.
2. Do carpet beetles bite pets?
They don’t bite, but their hairs can irritate pet skin, especially dogs or cats with sensitive skin.
3. Are carpet beetles seasonal pests in the UK?
Yes. I noticed the most activity in spring and early summer, which is when adult carpet beetles start flying indoors to lay eggs.

by Kanimozhi BV | Oct 13, 2025 | Pest Control
Rodents are among the most persistent pests in UK households, and if you’ve spotted signs like droppings, scratching sounds, or gnawed food packets, you’re probably wondering: how do rats get in your house?
In this guide, you’ll learn exactly how rats enter homes in the UK, what access points to check, the signs to look for, and how to prevent future infestations effectively.
Why Understanding Entry Points Is Key to Stopping Rats?
Rats aren’t just an inconvenience — they’re a genuine health and safety hazard. They can carry diseases, chew through electrical wiring, and cause damage to insulation, wood, and pipes.
In many UK homes, particularly older or terraced properties, rats take advantage of unnoticed weaknesses.
Knowing where to look and what to seal off can make all the difference between a one-time visit and a full-blown infestation.
How Do Rats Get in Your House in the UK?
Rats can enter your home through the smallest of gaps — as little as 15mm wide. Brown rats, the most common species in the UK, are excellent climbers, swimmers, and gnawers, giving them multiple routes into your property.
They tend to exploit:
- Uncovered drains or sewer access
- Gaps in brickwork or pipework
- Damaged vents and utility holes
- Lofts accessed via trees or fences
- Unsealed doors or windows
If your home offers warmth, food, and shelter — even if it’s clean — rats will take full advantage.
What Are the Most Common Rat Entry Points in UK Homes?
Based on UK pest control data and homeowner reports, the most frequent access points for rats include:
- Air bricks and vents: Especially if plastic or broken
- Drain pipes and sewers: Where damaged or without a non-return valve
- Roof gaps: Along loose tiles, soffits, or fascia boards
- Underside of external doors: Gaps without door brush seals
- Brickwork cracks or holes around pipes and cables
Older properties often have multiple vulnerabilities, particularly if modern upgrades haven’t included pest-proofing.

Can Rats Enter Through Drains or Sewer Systems?
Yes — and this is one of the most overlooked entry points. In the UK, rats often travel through connected drain systems, especially in older houses with clay pipes or shared drainage.
If your pipes are cracked, misaligned, or uncapped, rats can climb up and enter your kitchen or bathroom via waste pipes or even toilets. This is particularly common in terraced or semi-detached houses with interconnected underground systems.
When should you inspect drains for rats?
- You’ve seen rats but can’t find a surface entry point.
- There are bad smells or gurgling sounds from drains.
- You’ve had recurring infestations despite sealing above-ground access.
Installing non-return valves in sewer outlets is one of the most effective solutions.
Could Rats Be Getting In Through the Roof or Loft?
Absolutely. Rats are surprisingly agile and often enter through broken soffits, loose tiles, or gaps in fascia boards. Overhanging trees or vines give them easy roof access.
Once inside your loft, rats tend to nest in insulation, chew on wooden beams, or damage stored items. You may hear scratching, scurrying, or gnawing, especially at night.
Make sure your roofline is secure, and trim any trees or ivy that could serve as a “rat ladder” into your loft.

Are There Structural Gaps That Let Rats In?
One of the easiest ways for rats to enter is through gaps in brickwork, mortar joints, or areas around pipework. These may be tiny cracks — ones you wouldn’t think twice about — but to a rat, they’re an open door.
Common weak spots include:
- Cable entry points
- Water or gas pipe holes
- Crumbling brick mortar in older walls
Use cement or expanding foam rated for pest control to seal these gaps. If you can poke a pencil through a gap, a rat can probably squeeze through it.
Are Broken Vents and Utility Holes Giving Rats Access?
Air vents, extractor fan ducts, and utility service holes are often left unsealed or covered with thin plastic grilles that rats can chew through.
This is particularly common in renovations where trades have drilled entry holes for broadband, gas, or electric without sealing the gap around it.
Use rodent-proof mesh or metal vent covers to block access, and inspect the interior side of vent systems for signs of chewing or nesting.
What Are the Signs That Rats Are Already Inside?
It’s not always obvious that you have a rat problem — especially early on. But over time, certain signs become unmistakable.
Here’s what to watch for:
- Scratching or scurrying sounds, especially at night
- Droppings that are small, dark, and spindle-shaped
- Gnawed food packaging, pipes, or wiring
- Grease smears on walls and skirting boards
- A musky or ammonia-like odour, especially in confined spaces
Rats often travel the same routes repeatedly, leaving behind visual and scent trails.
How Can You Prevent Rats From Getting Into Your House?
Preventing rats involves more than just trapping them once they’re inside — it’s about cutting off every route they might take to get in.

What Are the Key Prevention Steps?
- Seal entry points using concrete, metal mesh, or pest-rated foam.
- Install door brush strips on all external doors.
- Cover vents and drains with rodent-proof grilles or one-way valves.
You should also reduce attractants by keeping bin lids tightly closed, cleaning up garden waste, and storing food securely inside.
Should You Call a Pest Control Professional?
If you’ve tried sealing access points and are still noticing signs of rats, it may be time to get help.
Professional pest control services in the UK can:
- Inspect your home thoroughly (including drains and lofts)
- Install traps and bait stations
- Identify hidden access points you may have missed
- Offer long-term proofing solutions
While some councils offer free or low-cost services, private pest control companies can provide quicker, more tailored support.
Conclusion: Stop Rats Before They Move In
Rats are clever, persistent, and highly adaptive. But once you know how do rats get in your house, you’re better equipped to shut them out — for good.
Start by inspecting the key areas: your drains, roofline, vents, brickwork, and utility entry points. Then seal those gaps, keep your environment less inviting, and stay vigilant — especially in colder months when rats are more likely to invade.
Taking these steps now could save you from the cost and stress of an infestation later.
FAQs – Common Questions About How Do Rats Get in Your House
1. Can rats climb walls or fences to reach my roof?
Yes. Rats can climb most vertical surfaces, including brick walls, downpipes, and fences, especially if there’s ivy or a rough texture.
2. When are rats most likely to enter homes in the UK?
Autumn and winter are peak seasons as rats look for warmth and shelter indoors.
3. Do rats return to the same house after removal?
If the entry points are not sealed, yes — rats may return to previously accessed homes.
4. What health risks do rats pose inside homes?
They can spread diseases like leptospirosis, salmonella, and hantavirus, and cause fires by gnawing on wiring.
5. How can I tell if the problem is from the drains?
If you hear noises near plumbing or smell sewage-like odours, or if pest sightings are concentrated in kitchens or bathrooms, the drain system may be involved.
