by Kanimozhi BV | Feb 24, 2025 | Appliances
In physics, work and time are two crucial factors that define how energy is transferred. When work is done, energy is used or transferred from one form to another. But what name is given to the amount of work done in a given time? That’s where the concept of Power comes in.
Power plays a fundamental role in physics, engineering, and even our daily lives. From measuring the performance of machines to understanding energy consumption in appliances, power helps us quantify how quickly work is performed.
In this guide, I’ll explain what power is, how it is calculated, its SI units, and its real-world applications. Let’s dive in!
What Name Is Given to the Amount of Work Done in a Given Time?
The correct term for the amount of work done in a given time is Power.
In simple terms, Power is the rate at which work is done. It tells us how quickly energy is transferred or how fast a task is completed in a specific period.
For example:
- A 100-watt light bulb consumes energy faster than a 40-watt bulb.
- A sports car accelerates faster than a truck because it has higher power.
Power is a key concept in mechanics, electrical systems, and thermodynamics, helping us understand efficiency and performance.
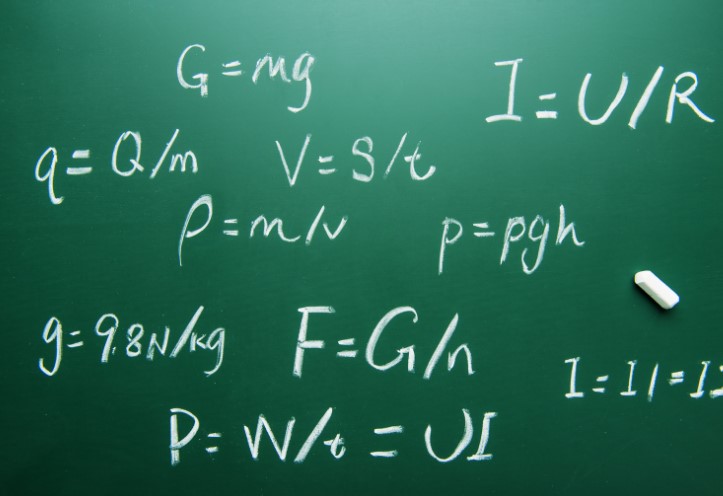
Power is mathematically defined as:
Power(P) = WorkDone(W) / TimeTaken(t)
Where:
- P is power (measured in Watts, W)
- W is work done (measured in Joules, J)
- t is time taken (measured in seconds, s)
This formula shows that the faster work is done, the higher the power.
Example Calculation:
Imagine lifting a 10 kg object to a height of 2 meters in 4 seconds.
- Work done = Force × Distance = (10 × 9.8) × 2 = 196 Joules
- Power = 196 J / 4 s = 49 Watts
Thus, the power required for this task is 49 W.
What Are the SI Units of Power?
Power is measured in Watts (W), named after James Watt, the inventor of the steam engine.
Unit Conversions:
- 1 Watt (W) = 1 Joule per second (J/s)
- 1 Kilowatt (kW) = 1,000 Watts
- 1 Horsepower (hp) ≈ 746 Watts
Other Units of Power:
| Unit |
Equivalent in Watts |
Used In |
| Watt (W) |
1 W |
General science & physics |
| Kilowatt (kW) |
1,000 W |
Electrical appliances |
| Horsepower (hp) |
746 W |
Automobiles & engines |
| Megawatt (MW) |
1,000,000 W |
Power plants & industry |
What Are Some Real-Life Applications of Power?
Power is an essential concept used in various fields. Some common applications include:
- Electrical Appliances – Light bulbs, televisions, and refrigerators consume electrical power measured in watts.
- Vehicles and Engines – Horsepower (hp) is used to measure the performance of cars and motorcycles.
- Sports and Athletics – Power is a key factor in sprinting, weightlifting, and other high-energy activities.
- Construction and Engineering – Machines like cranes and bulldozers use power to perform heavy tasks.
How Does Power Differ from Energy and Work?
Many people confuse power with energy and work. Here’s a simple comparison:
| Concept |
Definition |
SI Unit |
Formula |
| Work |
Energy transferred when force is applied over a distance |
Joule (J) |
W = F × d |
| Energy |
The capacity to do work |
Joule (J) |
E = P × t |
| Power |
Rate at which work is done |
Watt (W) |
P = W / t |
Key takeaway:
- Work and energy measure how much effort is exerted.
- Power measures how fast that effort is applied.
What are the Common Misconceptions About Power and Work?
There are several misunderstandings about power and work, such as:
- Power is not the same as energy – Energy is the capacity to do work, while power is the rate at which that work is done.
- More power doesn’t always mean more energy consumption – A high-power device may run for a shorter time, consuming less energy overall.
- Watt and horsepower are not interchangeable – Horsepower is used for engines, while watt is used for electrical power.
Conclusion
Power is a fundamental concept in physics, defining the rate at which work is done. Understanding power, its units, and applications helps us analyze mechanical and electrical systems efficiently.
From vehicles to household appliances,power plays a vital role in our everyday lives. By knowing how to measure and interpret power, we can make smarter decisions about energy usage and efficiency.
Related Article: A 15 W Electric Shaver Is Used for 3 Minutes. How Much Energy Does It Use?
FAQs On Power
1. What is the difference between power and energy?
Power is the rate of energy transfer, while energy is the total capacity to perform work.
2. Why is power important in physics?
Power helps us understand how efficiently work is done and how machines perform tasks over time.
3. What are practical examples of power in daily life?
Examples include electrical appliances (bulbs, microwaves), vehicles (engine horsepower), and even physical activities (running, lifting weights).
4. How is power measured in electrical appliances?
Power is measured in watts (W) or kilowatts (kW), calculated as P = Voltage × Current in electrical circuits.
5. What is the significance of horsepower in vehicles?
Horsepower measures an engine’s power output, helping determine speed and acceleration capabilities.
by Kanimozhi BV | Feb 21, 2025 | Washing Machine, Appliances
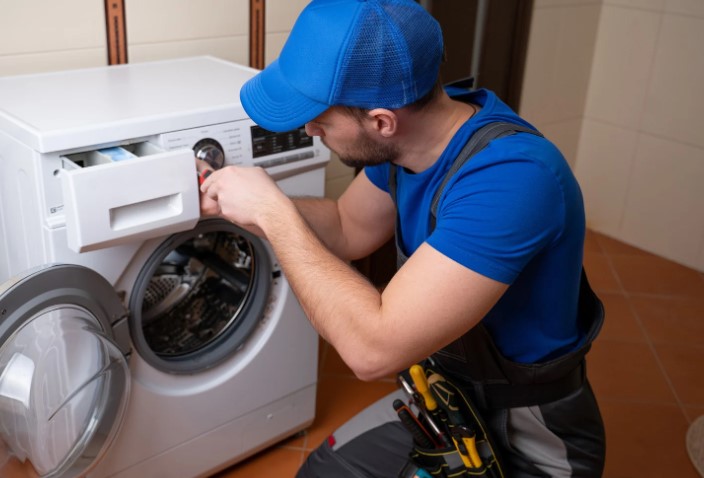
If your Bosch washing machine displays an E18 error code, it means your washer is having trouble draining water. This issue can interrupt your washing cycle, leave clothes soaking wet, and even cause water leakage if not fixed promptly.
The good news is that you can often resolve the E18 error at home without needing a technician. In this guide, I’ll explain:
- What the Bosch washing machine E18 error means
- The main causes of the error
- Step-by-step solutions to fix it
- How to prevent it from happening again
What is the E18 error in a Bosch washing machine?
The E18 error code on a Bosch washing machine indicates a drainage problem. This happens when the washer is unable to pump out water efficiently, causing a delay in the wash cycle.
Ignoring this error can lead to:
- Water not draining properly
- Clothes remaining wet after the cycle
- Potential damage to the drain pump
To fix this issue, it is important to understand what is causing it.

What causes the E18 error code?
Blocked Drain Filter
Over time, lint, hair, coins, and small debris can collect in the drain filter, blocking water flow.
Clogged Drain Hose
A twisted or clogged drain hose can prevent water from exiting the machine.
Drain Pump Issues
The drain pump can get clogged with dirt or become faulty, stopping water from being pumped out.
Plumbing or Installation Faults
If the drain hose is not installed correctly or if there is a blockage in the home’s drainage system, water may not drain properly.
How do I clear the fault code on my Bosch washing machine?
Once you fix the drainage problem, the E18 error should disappear automatically. However, if the error remains, try these steps:
- Turn off and unplug the washer for a few minutes.
- Clean the drain filter and drain hose.
- Run a quick and short rinse cycle to check whether the issue is resolved.
- Manually reset the machine (see reset instructions below).
If the error persists, it might indicate a deeper issue with the drain pump or plumbing.
Get to know about tap changing cost for a plumber with our comprehensive guide.
What is E18 water supply fault?
Many people confuse the E18 error with a water supply problem, but they are different.
| Error Code |
Issue Type |
Possible Causes |
| E18 |
Drainage issue |
Blocked filter, clogged hose, faulty pump |
| E17 |
Water supply issue |
Low water pressure, clogged inlet valve |
The E18 error is not related to water supply. It strictly relates to drainage problems.
How do you fix Bosch washing machine E18 error?
Step 1: Turn Off the Machine and Unplug It
Always unplug the washing machine before working on it for safety.
Step 2: Check and Clean the Drain Filter
- Locate the drain filter (usually at the bottom front of the washer).
- Place a towel or shallow container under the filter to collect all water.
- Unscrew the filter cap carefully remove any debris, such as lint, coins, or hair.
- Rinse the filter under running water and reinstall it securely.
Get to know why your washing machine leaking from bottom and fix with our solutions.
Step 3: Inspect and Clear the Drain Hose
- Locate the drain hose at the back of the machine.
- Disconnect it from the drain pipe.
- Check for clogs by running water through it or using a wire to remove blockages.
- Reattach the hose and ensure it is not bent or twisted.

Step 4: Examine the Drain Pump
- If the issue persists, the drain pump may be clogged.
- Remove the filter cap and check if the pump impeller moves freely.
- If the pump is making unusual noises, it may need replacement.
Step 5: Restart the Washing Machine
Plug the machine back in, run a short cycle, and check if the E18 error disappears.
How do I reset my washer after error code?
If the E18 error remains after fixing the issue, try these resetting method of a washing machine:
Method 1: Power Reset
- Turn off the washer and unplug it for five to ten minutes.
- Plug it back in and restart the cycle.
Method 2: Reset via Control Panel
- Press and hold the “Start” button for 3-5 seconds.
- If your model has a reset function, follow the instructions in the manual.

How to prevent E18 error in the future?
- Clean the drain filter every one to two months.
- Check the drain hose regularly for kinks or clogs.
- Avoid washing items with loose threads or excessive lint.
- Run a maintenance cycle with vinegar or descaler every few months.
Conclusion
The Bosch washing machine E18 error is a common drainage issue caused by a clogged filter, blocked drain hose, or faulty drain pump. Thankfully, it is usually easy to fix by cleaning the filter, checking the hose, and resetting the machine.
Regular maintenance, such as cleaning the filter monthly and ensuring the drain hose is clear, can help prevent this issue. If the error persists after troubleshooting, it may indicate a more serious problem requiring professional assistance. Addressing the E18 error promptly ensures your washing machine runs efficiently and avoids further complications.
Most Common Questions About Bosch Washing Machine E18
1. Can I fix the E18 error myself, or do I need a technician?
Most E18 errors can be fixed at home by cleaning the drain filter and hose. If the issue continues, professional help may be required.
2. How often should I clean the drain filter?
It is recommended to clean the filter every one to two months to prevent blockages.
3. Will the E18 error code disappear after fixing the issue?
Yes, but some Bosch washing machines may require a manual reset.
4. Can detergent buildup cause the E18 error?
Yes, too much detergent in drawer can create soap scum, leading to drain blockages.
5. What if my washing machine still shows E18 after fixing it?
- Double-check the drain filter and hose.
- Ensure the drain pump is working.
- If the issue persists, contact Bosch customer support.
by Kanimozhi BV | Feb 19, 2025 | Interior, DIY Ideas
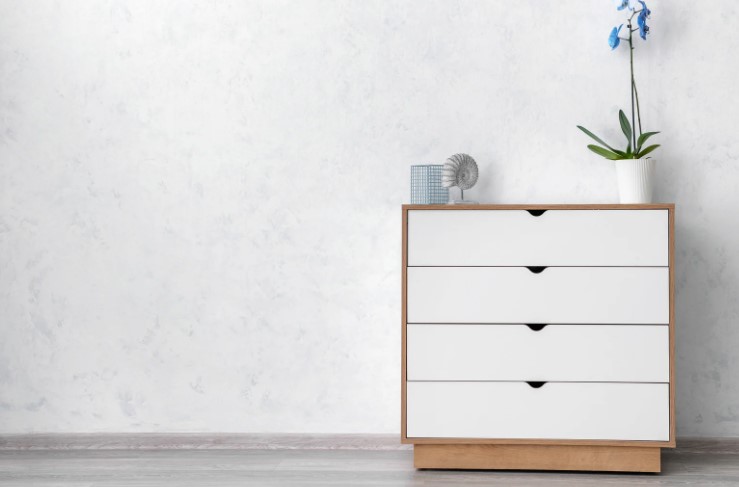
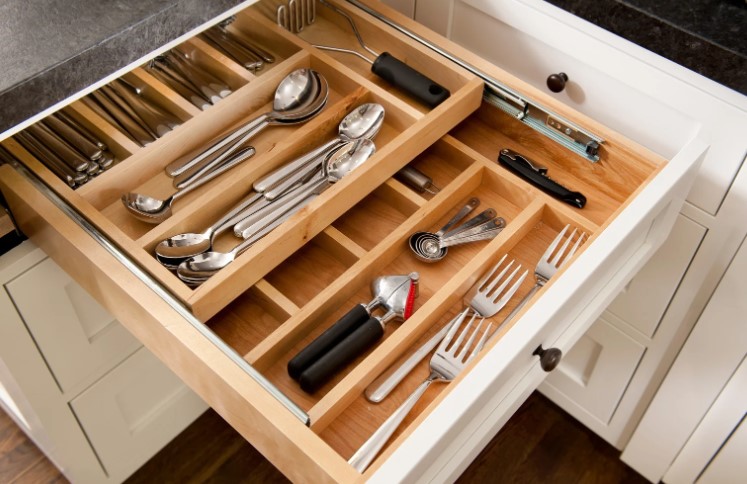
Drawers with metal glides and no levers can be tricky to remove, especially if you’re used to drawers with a quick-release mechanism. If you’ve ever tried pulling out a drawer only to find it stuck at a certain point, don’t worry—you’re not alone!
In this guide, I’ll walk you through how to remove drawers with metal glides and no levers safely without causing any damage. By the end, you’ll be able to slide out your drawers effortlessly and even troubleshoot common issues.
Metal drawer glides are tracks installed on the sides, center, or bottom of a drawer to allow smooth sliding in and out of a kitchen cabinet or dresser. They are durable, stable, and commonly found in modern furniture.
There are three common types of metal drawer slides:
| Type of Glide |
Location |
Removal Difficulty |
| Side-Mounted |
On the sides of the drawer |
Moderate |
| Center-Mounted |
One metal track in the middle |
Easy |
| Under-Mounted |
Attached underneath the drawer |
Moderate to Hard |
Why Do Some Drawers Have No Levers?
Some drawers come with quick-release levers, allowing for easy removal. However, not all manufacturers include this feature. Reasons why some drawers lack levers include:
- Cost-saving design – Simpler construction without extra parts.
- Older furniture models – Many traditional dressers and cabinets don’t use levers.
- Tighter fit for stability – Some brands prefer to keep drawers securely in place without a release mechanism.
Before you start, it’s a good idea to gather a few tools to make the process easier.
- Flashlight – To inspect the drawer track clearly.
- Screwdriver – In case there are screws securing the drawer.
- Gloves – To improve grip and avoid scratches.
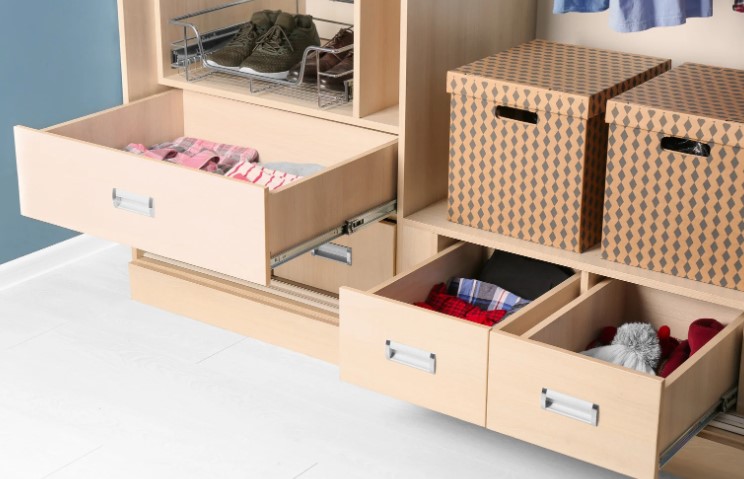
Checking the Drawer Mechanism
- Fully extend the drawer to inspect the tracks.
- Look for screws, built-in stops, or brackets that may be preventing removal.
- Identify whether it has side-mounted, center-mounted, or under-mounted glides.
Step 1 – Open the Drawer Fully
Pull the drawer as far as it will go without applying too much force. If it stops, don’t yank it—this could damage the rails.
Step 2 – Lift or Tilt the Drawer
Many drawers with no levers require lifting slightly to remove them. Try:
- Lifting the front slightly upwards to release the drawer.
- Tilting the drawer at a slight angle while pulling forward.
Step 3 – Apply Gentle Force
If the drawer resists, try wiggling it slightly side to side as you pull. Be patient—some drawers may need a gentle rocking motion to disengage from the rails.
Step 4 – Check for Screws or Stops
- Some metal glides have small screws or plastic stoppers that prevent the drawer from coming out completely.
- If screws are present, remove them with a screwdriver before attempting to pull the drawer out again.
Step 5 – Pull the Drawer Out Completely
Once the drawer is free from the glides, slide it out carefully and evenly to avoid damaging the tracks.
Troubleshooting Common Issues When Removing Drawers
Drawer Feels Stuck – What to Do?
- Check for debris – Sometimes, dirt or objects inside the track can block movement.
- Apply lubrication – A little WD-40 or silicone spray can help.
The Drawer Won’t Lift or Tilt – Alternative Methods
- Press the sides inward slightly while pulling.
- Use a rubber mallet or gentle tapping to loosen tight glides.
How to Reinsert the Drawer After Removal?
- Hold the drawer level and line up the glides with the tracks.
- Gently push it back in, ensuring both sides enter at the same time.
Checking for Smooth Operation
- Slide the drawer in and out a few times to make sure it’s aligned properly.
- If it sticks, reposition the tracks or apply lubricant.

What are the Tips to Maintain Drawers with Metal Glides?
Regular Cleaning
- Use a dry cloth or compressed air to remove dust and debris.
Lubricating the Tracks for Smooth Sliding
- Apply silicone-based lubricant or WD-40 to keep glides moving smoothly.
Checking for Loose Screws or Damaged Glides
- Tighten any loose screws with a screwdriver.
- If glides are bent or broken, consider replacing them.
Conclusion
Removing drawers with metal glides and no levers may seem tricky, but with the right technique, it’s actually quite simple.
By following this guide on how to remove drawers with metal glides and no levers, you can safely remove your drawers without damaging the tracks or furniture.
If you ever find a drawer stuck or difficult to remove, don’t force it—just try lifting, tilting, or checking for hidden stops. And remember, regular maintenance will keep your drawers sliding smoothly for years to come.
Related Article: How to Clean Washing Machine Drawer? Easy Home Remedies
- Look on the sides, bottom, or center of the drawer for metal tracks.
- If the drawer slides smoothly on a rail, it likely has metal glides.
2. What if my drawer is stuck and won’t budge?
- Pull both sides evenly to avoid tilting.
- Use a flashlight to check for obstructions or screws.
- Yes! In most cases, you can remove them by lifting and tilting.
- If screws are holding the drawer, a screwdriver may be needed.
4. How do I prevent my drawers from getting stuck again?
- Clean the tracks regularly.
- Apply lubrication to prevent friction.
- Yes, you can buy replacement metal glides at hardware stores.
- Use a screwdriver to remove old glides and install new ones.

by Kanimozhi BV | Feb 19, 2025 | Garden, Exterior
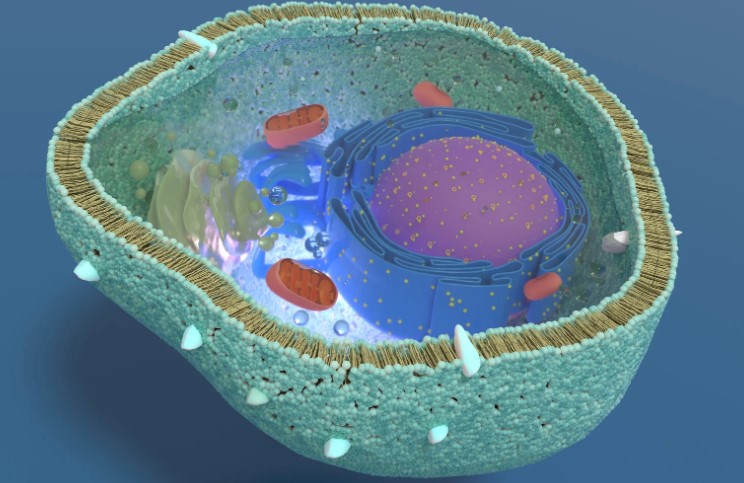
Cells are the fundamental building blocks of life, but not all cells are the same. Depending on the organism, cells can have distinct structures that define their function and complexity.
In this blog, I will explore what structure is present in both plant and yeast cells, but not in a bacterial cell? and explain why this difference is essential in biology.
By understanding these cellular differences, we gain insights into how organisms grow, reproduce, and interact with their environments.
What Makes Plant and Yeast Cells Similar?
Both plant cells and yeast cells are classified as eukaryotic cells, meaning they have a true nucleus and membrane-bound organelles. This makes them more advanced compared to bacterial cells, which are prokaryotic and lack these features.
Key Similarities Between Plant and Yeast Cells:
- Presence of a nucleus – DNA is enclosed within a membrane.
- Membrane-bound organelles – Includes mitochondria, Golgi apparatus, and endoplasmic reticulum.
- Cell wall – Both have a protective outer layer (though made of different materials).
- Ability to reproduce – Both undergo cell division, though yeast primarily reproduces through budding.

What Structure Is Present in Both Plant and Yeast Cells, but Not in a Bacterial Cell?
The key structure present in plant and yeast cells but absent in bacterial cells is the nucleus.
Why Is the Nucleus Important?
- Contains genetic material (DNA) – Unlike bacteria, where DNA floats freely in the cytoplasm, plant and yeast cells store their DNA within a nuclear membrane.
- Controls cell activities – The nucleus regulates gene expression, growth, and reproduction.
- Separates transcription from translation – In bacteria, these processes happen simultaneously, whereas in eukaryotic cells, they occur separately, allowing for more complex regulation.
Since bacterial cells lack a nucleus, they are classified as prokaryotic, while plant and yeast cells are eukaryotic.
How Does the Cell Wall Differ Between Plants, Yeast, and Bacteria?
Although all three cell types have a cell wall, their composition is different:
| Cell Type |
Cell Wall Composition |
Function |
| Plant Cells |
Cellulose |
Provides rigidity and support |
| Yeast Cells |
Chitin |
Offers protection and structural integrity |
| Bacterial Cells |
Peptidoglycan |
Helps maintain shape and prevent bursting |
This difference in composition affects how these cells respond to antibiotics, environmental stress, and structural needs.
What Other Differences Exist Between These Cells?
Besides the presence of a nucleus, plant, yeast, and bacterial cells differ in various ways:
Organelles
- Plant and yeast cells have mitochondria, Golgi bodies, and other organelles, while bacteria do not.
Reproduction
- Plant cells reproduce sexually and asexually.
- Yeast cells reproduce mainly by budding.
- Bacteria reproduce by binary fission, a simple asexual process.
- Plants perform photosynthesis using chloroplasts.
- Yeast cells undergo fermentation, especially in anaerobic conditions.
- Bacteria have diverse metabolic strategies, including photosynthesis, fermentation, and nitrogen fixation.
How Does a Bacterium Differ from a Plant Cell?
A bacterial cell and a plant cell have many structural differences, as shown in the table below:
| Feature |
Bacterium (Prokaryotic) |
Plant Cell (Eukaryotic) |
| Nucleus |
Absent (DNA floats in cytoplasm) |
Present (membrane-bound) |
| Cell Wall |
Peptidoglycan |
Cellulose |
| Chloroplasts |
Absent |
Present (for photosynthesis) |
| Membrane-bound Organelles |
Absent |
Present (e.g., mitochondria, Golgi apparatus) |
| Size |
Smaller (0.1 – 5 µm) |
Larger (10 – 100 µm) |
This table highlights how plant cells are more complex and structurally advanced than bacterial cells.
Which Is the Smallest Cell – a Plant Cell, a Yeast Cell, or a Bacterial Cell?
The smallest cell among the three is the bacterial cell.
| Cell Type |
Size Range |
| Bacterial Cell |
0.1 – 5 µm |
| Yeast Cell |
3 – 10 µm |
| Plant Cell |
10 – 100 µm |
Bacterial cells are much smaller than yeast or plant cells, allowing them to multiply rapidly and adapt to various environments.

Name One Structure Found in Plant Cells but Not in Bacterial Cells?
One of the most notable structures found in plant cells but absent in bacterial cells is the chloroplast.
What Is the Function of Chloroplasts?
- Chloroplasts enable photosynthesis which allows plants to convert sunlight into energy.
- They contain chlorophyll, giving plants their green pigment.
- Bacterial cells do not have chloroplasts and rely on other methods for energy production.
Why Does This Difference Matter in Biology?
The presence of a nucleus and organelles in plant and yeast cells affects their genetic control, energy production, and cellular processes. These differences are crucial in:
- Medical research – Antibiotics target bacterial cells but not eukaryotic cells.
- Biotechnology – Yeast is used in fermentation for food, beverages, and biofuel production.
- Agriculture – Understanding plant cell structures helps improve crop growth and resistance.
Conclusion
To summarize:
- Plant and yeast cells have a nucleus, while bacterial cells do not.
- Bacterial cells are much smaller and lack membrane-bound organelles.
- Cell walls differ in composition across these three cell types.
- Chloroplasts are unique to plant cells and play a crucial role in photosynthesis.
Understanding these cellular differences is essential in biology, medicine, and biotechnology. Whether studying antibiotics, fermentation, or plant growth, knowing the fundamental structures of cells helps us better understand life at the microscopic level.
Frequently Asked Questions (FAQs)
1. Do yeast cells have chloroplasts like plant cells?
No, yeast cells do not have chloroplasts because they do not perform photosynthesis.
2. How are yeast cells more similar to plants than bacteria?
Yeast cells share a nucleus, mitochondria, and other organelles with plant cells, making them more similar to plants than bacteria.
3. Why don’t bacterial cells have a nucleus?
Bacteria are prokaryotic, meaning their DNA is free-floating in the cytoplasm rather than enclosed in a nucleus.
4. What is the function of the nucleus in plant and yeast cells?
The nucleus stores DNA and controls gene expression, cell growth, and reproduction.

by Kanimozhi BV | Feb 18, 2025 | Appliances
Electric shavers are a common household device, offering convenience and efficiency for grooming. But have you ever wondered how much energy a 15W electric shaver consumes when used for just 3 minutes?
While it may seem like a small device, every electrical appliance contributes to your energy bill.
In this blog, we’ll answer the key question:
- A 15 W electric shaver is used for 3 minutes. How much energy does it use?
- How much does it cost to use?
- How efficiently can you save money and energy?
Understanding the Basics of Electrical Energy Consumption
What is Power (Watt) in Electrical Devices?
Power, measured in watts (W), refers to the rate at which an electrical device consumes energy. The higher the wattage, the more electricity the appliance uses per second.
For example:
- 10W LED bulb – Low energy consumption
- 15W electric shaver – Small power usage
- 2000W hairdryer – High energy consumption
To calculate how much energy a device uses, we use this simple formula:
Energy (Wh) = Power (W) × Time (hours)
Where:
- Energy is measured in watt-hours (Wh) or kilowatt-hours (kWh).
- Power is measured in watts (W).
- Time must be converted into hours before applying the formula.

A 15 W Electric Shaver Is Used For 3 Minutes. How Much Energy Does It Use?
Let’s calculate step by step:
Step 1: Convert Minutes to Hours
3 minutes = 3 / 60 hours = 0.05 hours
Energy = 15W × 0.05 hours
Energy = 0.75 Wh
Step 3: Convert Wh to Joules and kWh
Since:
- 1 Wh = 3600 Joules,
- 1 kWh = 1000 Wh,
We can convert:
0.75 × 3600 = 2700 Joules (J)
0.75 ÷ 1000 = 0.00075 kWh
Final Answer:
A 15W electric shaver used for 3 minutes consumes:
- 0.75 Wh (Watt-hours)
- 2700 J (Joules)
- 0.00075 kWh (Kilowatt-hours)
How Much Does It Cost to Use a 15 W Electric Shaver for 3 Minutes?
To calculate the cost, we use:
Cost = Energy Used (kWh) × Electricity Tariff (per kWh)
From our previous calculation:
- Energy used = 0.00075 kWh
- UK average electricity price = £0.30 per kWh
Cost = 0.00075 × 0.30 = £0.000225
Final Cost:
Using a 15W electric shaver for 3 minutes costs approximately £0.0002 (0.02p).
If used every day for a whole year, the total cost would be:
0.000225 × 365 = £0.08 (or 8p per year)
Conclusion: The cost of using an electric shaver is extremely low and has a minimal impact on your electricity bill.

Energy Usage Comparison with Other Household Devices
How does an electric shaver’s energy consumption compare to other devices?
| Device |
Power (W) |
Usage Time |
Energy Used (Wh) |
Energy Used (kWh) |
| Electric Shaver |
15W |
3 min |
0.75 Wh |
0.00075 kWh |
| Hair Dryer |
1800W |
5 min |
150 Wh |
0.15 kWh |
| LED Bulb |
10W |
1 hour |
10 Wh |
0.01 kWh |
| Microwave Oven |
1000W |
10 min |
166.67 Wh |
0.167 kWh |
As seen in the table, an electric shaver uses very little energy compared to high-power appliances.
How Efficiently Can I Save Money and Energy While Using an Electric Shaver?
- Use a Rechargeable Shaver
Battery-powered shavers store energy more efficiently, reducing electricity usage.
- Avoid Leaving the Charger Plugged In
Even when not in use, chargers consume standby power. Unplug them when the shaver is fully charged.
- Choose an Energy-Efficient Model
Newer electric shavers use advanced battery technology, consuming less power.
- Reduce Shaving Time
The shorter the shaving time, the less energy you use. Try to finish in under 3 minutes.
- Use Solar-Powered or USB-C Charging Shavers
Some shavers can charge via solar panels or USB-C, reducing dependency on mains electricity.

Conclusion
To sum up:
- A 15W electric shaver used for 3 minutes consumes 0.75 Wh or 2700 Joules.
- The cost of usage is nearly 0.02p per shave, or just 8p per year.
- Compared to other household devices, it is highly energy-efficient.
- Simple habits like unplugging chargers and using rechargeable shavers can save even more energy.
While electric shavers are not a major contributor to high energy bills, being aware of their consumption helps us make smarter energy choices. Small savings add up over time!
FAQs (Frequently Asked Questions)
1. How much electricity does an electric shaver use per year?
If used for 3 minutes daily, a 15W shaver consumes 0.75 Wh per use. Over a year:
0.75 × 365 = 273.75 Wh = 0.27375 kWh
At £0.30 per kWh, the cost is £0.08 (8p per year).
2. Do electric shavers increase electricity bills significantly?
No, electric shavers consume very little power, typically under £0.10 per year for daily use.
3. Is it better to use a rechargeable shaver instead of a plug-in model?
Yes! Rechargeable shavers store energy efficiently and reduce standby power waste.
4. How can I reduce energy consumption while using an electric shaver?
- Use a rechargeable model.
- Unplug when fully charged.
- Use an energy-efficient model.
- Shave efficiently to reduce runtime.
5. Can I use a solar-powered shaver?
Yes, some solar-powered and USB-C shavers are available, which use renewable energy instead of grid electricity.
