
by Kanimozhi BV | Feb 17, 2025 | Appliances
Electrical appliances play a crucial role in our daily lives, from lighting up our homes to powering kitchen devices. But have you ever wondered what is the name for the amount of energy transferred every second by an electrical appliance?
The correct answer is power. Power is an essential concept in physics and electrical engineering because it measures how efficiently an appliance transfers electrical energy into other useful forms such as heat, motion, or light.
Understanding power and energy transfer is important for managing electricity consumption, improving efficiency, and making informed decisions about which appliances to use.
Now, let’s explore this concept in detail.
What Is the Name for the Amount of Energy Transferred Every Second by an Electrical Appliance?
The correct term is power.
Power is the rate at which energy is transferred from one form to another. In electrical appliances, it represents how quickly electrical energy is converted into other forms such as heat, light, or motion.
Power is measured in watts (W), where:
1 watt = 1 joule per second
This means if an appliance has a power rating of 100W, it transfers 100 joules of energy every second.

Why Is “Power” the Correct Answer?
Power Measures Energy Transfer per Second
The question specifically asks for the energy transferred every second. This directly relates to power, which is calculated using the formula:
Power(W) = Energy Transferred(J) / Time(s)
This formula shows that power is the correct measurement for energy transfer per second.
The SI Unit of Power: Watt (W)
Power is measured in watts, which are directly linked to joules and time:
1W = 1J/s
If an appliance uses 500W, it transfers 500 joules of energy every second.
Power Helps Compare Appliance Efficiency
Appliances have power ratings that indicate how fast they transfer energy. Here’s a table with common examples:
A higher power rating means faster energy transfer per second.
How Is Energy Transferred in Electrical Appliances?
Electrical appliances operate by converting electrical energy into other forms of energy. This energy transfer happens through different processes depending on the purpose of the appliance. Below are the main ways energy is transferred in electrical devices:
Energy Transfer in Heating Appliances
Some appliances are designed to generate heat by converting electrical energy into thermal energy. These appliances typically use resistive elements to produce heat. Examples include:
- Electric heaters – Convert electrical energy directly into heat to warm a room.
- Kettles – Use an electric heating element to boil water.
- Toasters – Convert electrical energy into heat to brown bread.
Energy Transfer in Motion-Based Appliances
Certain appliances transfer electrical energy into kinetic energy to create movement. These appliances often contain electric motors that drive motion. Examples include:
- Fans – Convert electrical energy into kinetic energy to circulate air.
- Washing machines – Use motors to spin washing machine and clean clothes.
- Electric drills – Convert electrical energy into rotational motion for drilling holes.
Energy Transfer in Lighting and Sound-Producing Appliances
Some appliances convert electrical energy into light or sound. These are often used for illumination, communication, or entertainment. Examples include:
- Light bulbs – Convert electrical energy into light energy, with some energy lost as heat.
- Speakers – Convert electrical energy into sound waves through vibrations.
- Televisions – Convert electrical energy into both light and sound energy.
Energy Transfer Efficiency and Energy Loss
During energy transfer, some energy is always lost, usually in the form of heat due to resistance in electrical components. This is why energy efficiency is an important consideration when designing electrical appliances. More efficient appliances convert a greater proportion of electrical energy into useful work while minimizing waste.
What Is the Unit for Energy Transferred?
The unit for energy transferred is the joule (J). Since power is measured in watts (W), we can express energy transfer as:
Energy(J) = Power(W) × Time(s)
For example, if a 100W bulb is on for 5 seconds, the total energy transferred is:
100W × 5s = 500J
In electricity bills, energy is measured in kilowatt-hours (kWh):
1kWh = 1000W × 1 hour
What Units Are Used for Work Done?
The unit for work done is also joules (J), since work and energy are closely related.
The formula for work done is:
Work Done = Force × Distance
Examples of work done in daily life:
- Lifting a box – Work is done against gravity.
- Pushing a trolley – Work is done by applying force over a distance.
Since electrical appliances transfer energy to do work, they also follow the same principle.
How Do You Calculate the Power of an Electrical Appliance?
Power can also be calculated using voltage (V) and current (I):
P = VI
Where:
- P = Power (W)
- V = Voltage (V)
- I = Current (A)
For example, if a device runs on 230V (UK mains voltage) and draws 2A of current:
P = 230V × 2A = 460W
This means it transfers 460 joules per second.
The Power of an Electrical Appliance Is a Measure of How Quickly It Transfers… What?
The power of an electrical appliance measures how quickly it transfers energy.
- Higher power rating → Faster energy transfer
- Lower power rating → Slower energy transfer
For example:
✔ A 2000W kettle boils water faster than a 700W kettle.
✔ A 100W bulb is brighter than a 40W bulb.
What Are Some Examples of Energy Transfers in Everyday Appliances?
Here are examples of energy transfers in common electrical appliances:
| Appliance |
Energy Transfer |
| Electric Heater |
Electrical → Thermal (heat) |
| Light Bulb |
Electrical → Light + Thermal |
| Speaker |
Electrical → Sound + Some Thermal Loss |
| Fan |
Electrical → Kinetic (motion) + Some Thermal Loss |
| TV |
Electrical → Light + Sound + Some Thermal Loss |
Energy is never lost, only converted into different forms.
Conclusion
- The amount of energy transferred per second is called power.
- Power is measured in watts (W), where 1W = 1 joule per second.
- Electrical appliances convert energy at different rates, which determines their efficiency.
- Understanding power ratings helps manage energy consumption.
Next time you use an electrical device, remember: you’re witnessing energy transfer in action!
Frequently Asked Questions (FAQs)
1. What is the SI unit of power?
The SI unit of power is the watt (W), which equals 1 joule per second.
2. How is power different from energy?
Power measures energy transfer per second (watts), while energy is the total amount transferred (joules).
3. How can I reduce my energy consumption?
- Use energy-efficient appliances like LED bulbs.
- Turn off devices when not in use.
- Unplug chargers to prevent standby energy loss.
by Kanimozhi BV | Feb 16, 2025 | Washing Machine, Appliances
Keeping the washing machine detergent drawer clean is essential for maintaining hygiene and preventing unpleasant odours. Over time, detergent residue, fabric softener buildup, and moisture can lead to mould growth, mildew, and clogged compartments.
In this guide, I will walk you through several effective home remedies on how to clean washing machine drawer.
From natural solutions like vinegar and bicarbonate of soda to stronger methods like bleach, you will find the best way to keep your washing machine drawer spotless.
Why Does the Washing Machine Drawer Get Dirty?
What are the Common Causes of Dirt and Mould Build-up?
- Detergent residue accumulation – Powdered detergents tend to leave more buildup than liquid detergents.
- Moisture retention – A damp environment encourages mould and mildew growth.
- Fabric softener deposits – These can clog compartments and create a sticky film inside the drawer.
- Poor ventilation – Lack of airflow inside the drawer compartment allows bacteria and bad odours to develop.
How to Remove the Detergent Drawer from a Washing Machine?
What is the Step-by-Step Guide to Remove the Drawer Safely?
- Pull the drawer out as far as possible.
- Locate and press the release clip, usually in the middle or side of the drawer.
- Gently slide the drawer out completely without forcing it.
- Remove any separate compartments such as the fabric softener dispenser.
- Check the user manual if you are unsure about how to remove your washing machine drawer.
If the drawer is stuck due to detergent buildup, gently wiggle it while pulling to loosen it.

How to Clean Washing Machine Drawer? – Step-by-Step Guide
Step 1: Pre-Soak the Drawer to Loosen Residue
- Fill a bowl with warm water and vinegar in a 1:1 ratio.
- Soak the drawer for 15-30 minutes to break down detergent and softener buildup.
Step 2: Scrub the Drawer Thoroughly
- Use a toothbrush or scrubbing brush for hard-to-reach areas.
- Focus on removing mould spots, soap residue, and fabric softener buildup.
Step 3: Clean the Inside of the Drawer Slot
- Dampen a cloth with vinegar solution and wipe the slot inside the washing machine.
- Use cotton swabs to clean tight corners where dirt and mould collect.
Step 4: Rinse and Dry the Drawer Completely
- Rinse the drawer under warm running water to remove any remaining debris.
- Let it air dry fully before reinserting it into the machine.
Never put the drawer back while it is still damp, as this can encourage mould growth.
How to Clean a Washing Machine Drawer with Bicarbonate of Soda?
Why Use Bicarbonate of Soda?
- Removes stubborn stains without the use of harsh chemicals.
- Neutralises bad odours and prevents future buildup.
- Acts as a mild abrasive for scrubbing detergent residue.
What are the Steps for Cleaning with Bicarbonate of Soda?
- Make a cleaning paste by mixing 2 tablespoons of bicarbonate of soda with a little water.
- Apply the paste inside the drawer and scrub using a toothbrush.
- Soak the drawer in warm water and bicarbonate of soda for 15-20 minutes.
- Rinse thoroughly and dry before reinserting into the washing machine.
How to Clean a Washing Machine Drawer with White Vinegar?
Why Is White Vinegar Effective for Cleaning?
- Breaks down detergent residue and limescale.
- Kills bacteria and removes bad odours.
What are the Steps for Cleaning with White Vinegar?
- Soak the drawer in warm water and vinegar (1:1 ratio) for 30 minutes.
- Scrub with a brush to remove remaining dirt and mould.
- Wipe the inside of the drawer slot with a cloth soaked in vinegar solution.
- Rinse and air dry before reinserting.
To keep your machine fresh, add half a cup of vinegar to the detergent drawer and run an empty hot wash cycle once a month.
How to Clean a Washing Machine Drawer Using Lemon Juice?
What are the Benefits of Lemon Juice for Cleaning?
- Natural antibacterial and antifungal properties.
- Removes limescale and hard water stains.
- Leaves a fresh citrus scent.
What are the Steps to Clean with Lemon Juice?
- Squeeze fresh lemon juice into a cup of warm water.
- Dip a cloth or brush in the solution and scrub the drawer.
- Soak for 15 minutes for extra freshness.
- Rinse and dry thoroughly before reinserting.
For an extra powerful natural cleaner, mix lemon juice with bicarbonate of soda.

How to Clean a Washing Machine Drawer Using Bleach?
When to Use Bleach for Cleaning?
- Only when deep mould buildup is present.
- Use caution, as bleach is a strong chemical.
- Always wear gloves and ventilate the area.
What are the Steps to Clean with Bleach?
- Dilute one part bleach with four parts water in a bucket.
- Soak the drawer in the solution for 10 minutes.
- Scrub with a brush to remove mould.
- Rinse thoroughly to remove all traces of bleach.
Never mix bleach with vinegar, as it creates toxic fumes.
How to Clean a Washing Machine Drawer with Dish Soap?
When to Use Dish Soap for Cleaning?
- If you don’t have vinegar or bicarbonate of soda.
- If your drawer has light detergent buildup but no mould.
What are the Steps for Cleaning with Dish Soap?
- Fill a basin with warm soapy water.
- Soak the detergent drawer for 15-20 minutes.
- Scrub with a soft brush or sponge.
- Rinse thoroughly and dry before putting it back.
Choose eco-friendly dish soap to avoid chemical residue.
How to Clean a Washing Machine Drawer with Hydrogen Peroxide?
Why Use Hydrogen Peroxide?
- Disinfects and kills mould effectively.
- Removes stubborn stains without damaging plastic.
- Eco-friendly alternative to bleach.
What are the Steps for Cleaning with Hydrogen Peroxide?
- Apply hydrogen peroxide directly to the mouldy areas.
- Let it sit for about 10 to 15 minutes to break down stains.
- Scrub with an old toothbrush.
- Rinse with warm water and dry completely.
Mix hydrogen peroxide with baking soda to create a thick cleaning paste for tough stains.
My Recommendation: What’s the Best Cleaning Method?
After testing different cleaning methods, the best and most effective way to clean a washing machine drawer is:
- Soak the drawer in white vinegar and warm water for 30 minutes.
- Scrub with bicarbonate of soda paste for deep cleaning.
- Wipe the drawer slot with vinegar solution to remove hidden dirt.
- Dry completely before reinserting.
This method is natural, safe, and highly effective, as vinegar dissolves detergent buildup while bicarbonate of soda scrubs away stains and neutralises odours.

Conclusion
Regular cleaning of your washing machine drawer is essential to prevent mould, odours, and detergent buildup. Using natural home remedies like vinegar, bicarbonate of soda, and lemon juice provides an effective, safe, and eco-friendly cleaning solution.
Follow these tips on how to clean washing machine drawer and with consistent cleaning routine, your washing machine will stay fresh, hygienic, and perform at its best for years to come.
What are the FAQs – Answering Common Questions
1. Can I put my washing machine drawer in the dishwasher?
Some plastic drawers are dishwasher-safe, but check the user manual first.
2. Why does my washing machine drawer smell bad?
The smell is usually caused by mould, detergent residue, or stagnant water. Cleaning with vinegar and bicarbonate of soda will help eliminate odours.
3. How can I prevent detergent buildup in the drawer?
- Use liquid detergent instead of powder.
- Wipe the drawer dry after each wash.
- Run a hot wash with vinegar once a month.
4. How do I stop mould from coming back?
- Leave the drawer open after every wash.
- Use a tea tree oil spray to prevent mould regrowth.
- Clean once a month to keep it fresh.
by Kanimozhi BV | Feb 14, 2025 | Washing Machine, Appliances
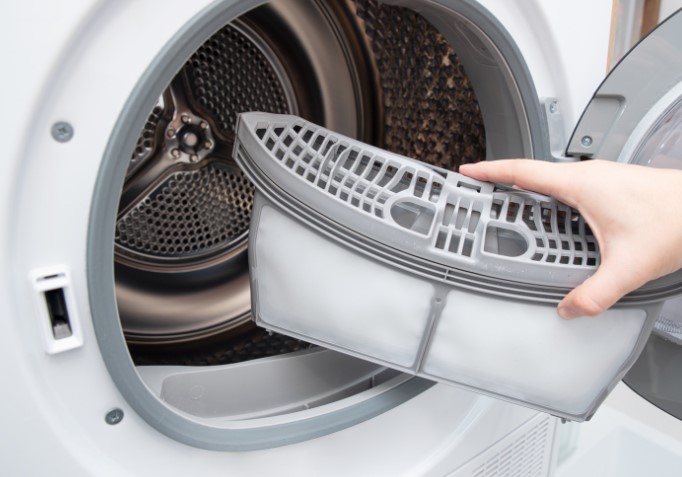
A washing machine is one of the most frequently used household appliances, yet many people neglect a crucial part of its maintenance-cleaning the filter.
Over time, lint, detergent residue, dirt, and even small objects like coins or buttons can accumulate in the washing machine filter, leading to reduced efficiency and potential breakdowns.
Many homeowners often ask, “How do I know if my washing machine filter is clogged?” The most common signs include slow water drainage, an unpleasant smell coming from the washing machine, and clothes not being properly cleaned after a wash.
In this guide, I will walk you through how to clean washing machine filter, how often it should be done, different DIY cleaning methods, and a step-by-step approach to ensure your appliance remains in top condition.
Whether you have a front-load or top-load washing machine, this guide will help you maintain its efficiency and prolong its lifespan.
Why Is Cleaning the Washing Machine Filter Important?
One of the most frequently asked questions is, “What happens if I don’t clean my washing machine filter?” The answer is straightforward—neglecting this simple maintenance step can lead to multiple issues, such as inefficient cleaning, clogged drainage, and even damage to the washing machine’s motor.
Here are some key reasons why regular filter cleaning is essential:
- Prevents drainage issues – A clogged filter traps lint, hair, and detergent residue, preventing proper water drainage and causing standing water inside the drum.
- Eliminates unpleasant odours – If the filter is not cleaned regularly, stagnant water and accumulated debris can lead to a musty or mildew-like smell.
- Improves washing machine efficiency – A clean filter allows water to flow freely, ensuring that detergent from the drawer compartment is effectively rinsed from clothes and improving overall wash performance.
- Reduces the risk of damage – A blocked filter puts extra strain on the washing machine’s pump, increasing the chances of costly repairs.
- Extends the lifespan of the washing machine – Regular maintenance prevents unnecessary wear and tear, helping your appliance function efficiently for years.
Cleaning the filter is a simple yet effective way to maintain your washing machine’s performance and avoid costly repairs.
How Often Should You Clean the Washing Machine Filter?
The frequency of cleaning merrily depends upon how often you use your washing machine.
| Washing Frequency |
Recommended Cleaning Interval |
| Heavy use (large family) |
Once a month |
| Regular use (average household) |
Every 3 months |
| Light use (occasional washing) |
Twice a year |
A common question is, “How do I know if my washing machine filter is clogged?” The best way to determine whether your filter needs cleaning is to look for the following signs:
- Slow or incomplete water drainage – If water remains in the drum after a wash cycle, it could indicate a blockage.
- Unpleasant odours – A musty or mildew smell often means dirt and residue are trapped in the filter.
- Dirty clothes after washing – If your clothes come out still dirty or with lint stuck to them, the filter may not be allowing proper water circulation.
- Unusual noises from the machine – A clogged filter can cause the pump to work harder, leading to excessive noise.
If you notice any of these issues, it’s a clear sign that your washing machine filter needs to be cleaned.
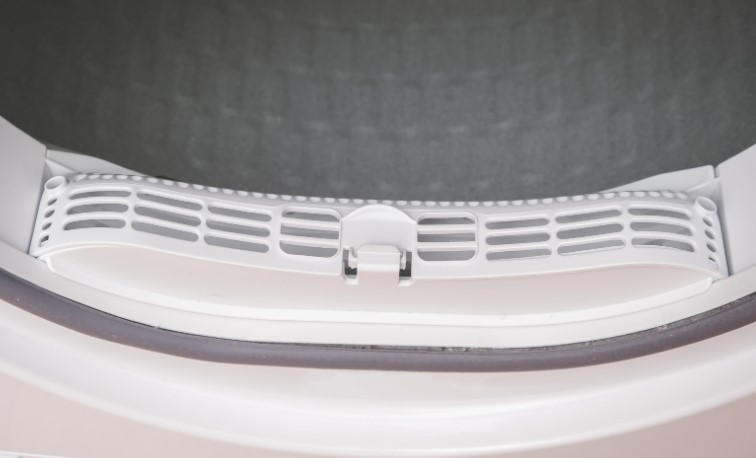
Where Is the Washing Machine Filter Located?
Many people ask, “Do all washing machines have a filter?” While most models do, some modern high-efficiency washing machines come with self-cleaning filters. If you’re unsure, it’s always best to check the user manual.
For machines that have a removable filter, here’s where to find it:
- Front-load washing machines: The filter is typically located at the bottom front, behind a small panel or cover.
- Top-load washing machines: The filter is often inside the drum near the agitator or at the back of the machine.
If you’re unable to locate the filter, refer to the manufacturer’s manual or look for an access door near the base of the machine.
Best DIY Ways on How To Clean Washing Machine Filter
A commonly asked question is, “Can I clean my washing machine filter without removing it?” While some models allow for rinsing the filter in place, removing it ensures a much deeper clean. Below are five effective DIY cleaning methods:
1. Warm Soapy Water Method (Quick & Easy)
This method is ideal for regular maintenance and light dirt buildup.
- Remove the filter and soak it in warm water with dish soap for 10–15 minutes.
- Use an old toothbrush to scrub off any stuck-on dirt and lint.
- Rinse thoroughly under running water before reinstalling.
2. White Vinegar & Baking Soda Method (Deep Cleaning)
For stubborn residue and odour removal, try this method:
- Mix the same amount of white vinegar and warm water in a bowl.
- Soak the filter for 20–30 minutes to break down grime.
- Scrub with a soft brush and sprinkle baking soda for extra cleaning power.
3. Bleach Solution (For Mould & Bad Odour)
If your filter has mould buildup, bleach is an effective disinfectant:
- Mix one part bleach with four parts water and soak the filter for 15 minutes.
- Scrub gently to remove mould and bacteria.
- Rinse thoroughly to ensure no bleach residue remains.
4. Boiling Water Rinse (For Heavy Dirt & Grease)
For filters clogged with grease and detergent residue:
- Pour boiling water over the filter to loosen dirt.
- Scrub with a sponge or brush for a deep clean.
5. Toothbrush & Toothpaste Hack (For Stubborn Buildup)
Toothpaste can be used as a mild abrasive for cleaning:
- Apply toothpaste to an old toothbrush and scrub the filter.
- Rinse thoroughly before reinserting.
Step-by-Step Guide to Cleaning a Washing Machine Filter
Step 1: Turn Off the Machine and Locate the Filter
- Unplug the washing machine to prevent electrical hazards.
- Place a towel or tray under the filter area to catch spills.
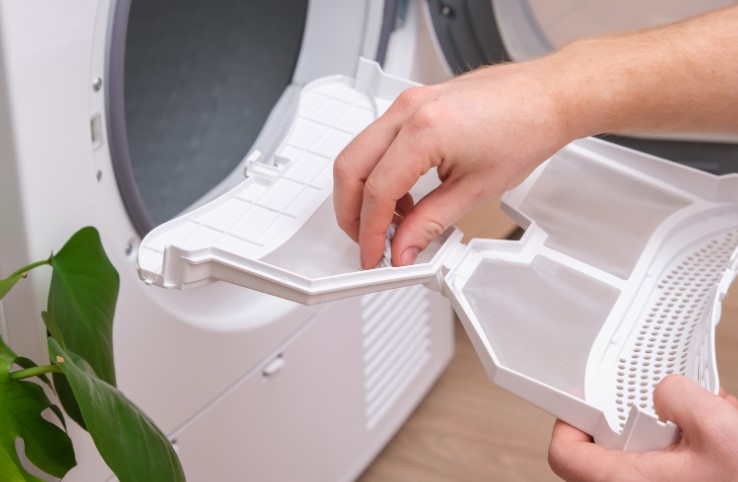
Step 2: Remove and Clean the Filter
- Carefully twist and remove the filter.
- Use your fingers or a brush to remove any lint, hair, or debris.
- Use one of the DIY cleaning methods above.
Step 3: Clean the Filter Housing & Drain Area
- Wipe down the filter housing with a wet cloth.
- Check for blockages in the drain pump and remove any obstructions.
Step 4: Reinstall the Filter & Test the Machine
- Make sure the filter is fully dry before reattaching it.
- Secure it properly to prevent leaks.
- Run a short rinse cycle to check if the machine drains properly.
Common Problems & Troubleshooting
| Issue |
Possible Cause |
Solution |
| Water not draining |
Clogged filter |
Clean the filter |
| Bad odour |
Dirt, mould in filter |
Use vinegar and warm water |
| Machine vibrating |
Filter not secured properly |
Reattach correctly |
| Slow washing cycle |
Blocked filter |
Clean regularly |
Conclusion
Cleaning the washing machine filter is a simple yet essential maintenance task that ensures better wash performance, prevents drainage problems, and extends the life of your appliance.
By following this step-by-step guide on how to clean washing machine filter and incorporating regular cleaning into your routine, you can keep your washing machine running efficiently and avoid costly repairs.
By dedicating just a few minutes every few months to cleaning the filter, you can prevent unnecessary breakdowns and ensure that your washing machine continues to perform at its best.
Related Article: Washing Machine Leaking From Bottom

by Kanimozhi BV | Feb 14, 2025 | Washing Machine, Appliances
If your Candy washing machine is showing the E03 error code, it means that the water is not draining properly. This issue is commonly caused by a blocked drain filter, a clogged or kinked drain hose, a faulty drain pump, or a malfunctioning water level sensor which are similar to Hoover Washing Machine E03 Error.
A washing machine that cannot drain water will stop mid-cycle, leaving clothes soaked and potentially damaging the appliance over time. Fortunately, there are several ways to troubleshoot and fix this issue at home before calling a professional.
In this guide, I will explain what the Candy washing machine E03 error means, why it happens, and step-by-step solutions to fix it. If the error persists even when there is no blockage, I will also cover advanced troubleshooting steps.
What Does E03 Mean on a Candy Washing Machine?
The E03 error code on a Candy washing machine indicates a drainage problem. This means the machine is unable to empty the water from the drum within the expected time.
What are the Common Causes of the E03 Error?
- Blocked drain filter – Lint, hair, and small objects like coins can clog the filter, preventing water from draining.
- Clogged or kinked drain hose – A blockage in the hose can stop water from flowing out.
- Faulty drain pump – The pump might be obstructed or malfunctioning.
- Malfunctioning water level sensor – If the sensor is faulty, the machine might not detect that it needs to drain.
Why is my Candy washing machine not draining?
If your machine is stuck with water inside, it’s likely due to one of these common drainage issues.

How Do I Fix E03 on My Washing Machine?
If you see the E03 error code, follow these step-by-step troubleshooting methods to resolve the issue.
Step 1: Check for a Blocked Drain Filter
A clogged drain filter is one of the most common causes of the E03 error. If small objects or lint build up in the filter, the machine cannot drain water properly.
How to Clean the Drain Filter?
- Turn off the washing machine and unplug it.
- Locate the filter panel – This is usually at the bottom front of the machine.
- Place a towel or tray underneath – Some water will spill when opening the filter.
- Twist the filter cap in counterclockwise direction & pull it out.
- Remove any debris such as lint, coins, or fabric strands.
- Rinse the filter under warm water and scrub it with a brush.
- Reinsert the filter, tighten it, and close the panel.
- Turn the washing machine back on and run a short cycle to test.
Where is the filter on my Candy washing machine?
The drain filter is usually located at the bottom front panel of the machine.

Step 2: Inspect the Drain Hose for Blockages
If the filter is clear but the machine still won’t drain, the next step is to check the drain hose. A kinked or blocked drain hose will protect water from flowing out.
How to Check & Unclog the Drain Hose?
- Turn off the washing machine and unplug it.
- Find the drain hose – It’s usually attached to the back of the machine.
- Check for kinks or bends – If the hose is twisted, straighten it.
- Detach the hose from the washing machine and sink.
- Flush warm water through the hose to clear any blockages.
- Reattach the hose securely and ensure it’s positioned correctly.
- Run a test wash cycle to check if the error is resolved.
How do I check my washing machine drain hose?
Remove the hose and inspect it for clogs, bends, or detergent residue.
Step 3: Test the Drain Pump for Malfunctions
If both the filter and hose are clear, the issue might be with the drain pump. The pump is responsible for pushing water out of the machine, and it can become blocked or fail over time.
How to Check the Drain Pump?
- Turn off the machine and unplug it.
- Remove the lower front panel to access the drain pump.
- Look for visible blockages – Small socks or debris may be stuck inside.
- Check if the pump makes a humming sound – If the pump hums but doesn’t drain, it may be faulty.
- If the pump is broken, a replacement may be necessary.
How do I know if my drain pump is broken?
If the pump is humming but not draining, it may need to be replaced.
How to Reset a Candy Washing Machine After Fixing the E03 Error?
Once you’ve cleaned the filter, checked the hose, and inspected the pump, resetting the washing machine can help clear the error.
What are the Steps to Reset the Machine?
- Turn off the washing machine and unplug it.
- Press and hold the Start/Pause button for 5–10 seconds.
- Plug the machine back in.
- Run an empty rinse cycle to check if the error is gone.
Related Article: How to Reset Beko Washing Machine?

Candy Washing Machine E03 No Blockage – What Next?
If your machine still shows the E03 error despite no visible blockages, the issue might be:
- A malfunctioning water level sensor
- A faulty electronic control board
- A drain pump failure
In this case, you may need to contact a technician for further diagnosis.
Why is my Candy washing machine showing E03 when nothing is blocked?
A sensor or control board issue could be preventing the machine from detecting proper drainage.
How To Prevent the Candy Washing Machine E03 Error in the Future?
To avoid future drainage issues, follow these maintenance tips:
- Clean the drain filter every month to prevent lint buildup.
- Check the drain hose regularly for clogs or bends.
- Use the appropriate amount of detergent to prevent residue buildup.
- Avoid overloading the washing machine, as excess weight can strain the pump.
- Keep the door slightly open after washes to prevent mould growth.

What Are The Common Problems & Troubleshooting Table?
| Issue |
Possible Cause |
Solution |
| Water not draining |
Blocked drain filter |
Clean the filter |
| Error code E03 |
Clogged hose or drain pump |
Check and clean the hose and pump |
| Loud noise when draining |
Drain pump issue |
Inspect or replace the drain pump |
| Error persists after troubleshooting |
Faulty sensor |
Reset machine or call a technician |
The E03 error on a Candy washing machine is usually caused by a clogged filter, blocked hose, or faulty drain pump. By following the step-by-step guide, you can diagnose and fix the issue at home.
If your washing machine is still showing the error despite no visible blockages, a faulty water level sensor or control board may be the cause, and professional help may be required.
Regular maintenance and cleaning can prevent drainage issues and keep your washing machine working efficiently.
Related Article: Hoover Washing Machine Error Codes

by Kanimozhi BV | Feb 13, 2025 | Washing Machine, Appliances
Washing machines are an essential part of modern households, but many people wonder how long should a washing machine last. Whether you’re considering buying a new one or maintaining your current machine, understanding its lifespan can help you make informed decisions.
The average washing machine lasts 10-15 years, but this depends on factors such as usage, maintenance, and brand quality.
In this guide, I’ll cover the typical lifespan of washing machines, factors that affect durability, signs of wear and tear, and tips to extend your machine’s life.
What Is the Average Lifespan of a Washing Machine?
How Many Years Does a Washing Machine Last?
A standard washing machine lasts 10-15 years, depending on the following:
- High-end models (Miele, Bosch) can last 15-20 years.
- Mid-range machines (Samsung, LG) typically last 10-15 years.
- Budget brands may only last 7-10 years with heavy use.
Proper maintenance and correct usage can help maximize your machine’s lifespan.
Does the Type of Washing Machine Affect Its Lifespan?
Yes, different types of washing machines have varying lifespans:
| Washing Machine Type |
Average Lifespan |
| Front-Load Washing Machine |
12-15 years |
| Top-Load Washing Machine |
10-12 years |
| Semi-Automatic Machine |
8-10 years |
| Fully Automatic Machine |
10-15 years |
Front-load machines generally last longer due to efficient motors and gentler drum movements.

What Brand of Washing Machine Lasts the Longest?
In the UK, the most reliable washing machine brands include:
- Miele – Known for high-end durability, lasting 20+ years.
- Bosch & AEG – German-engineered, typically lasting 12-15 years.
- Samsung & LG – Mid-range brands with advanced technology and good lifespan.
- Beko & Hotpoint – Budget-friendly, lasting around 7-12 years.
Factors That Affect Washing Machine Longevity
What Affects the Lifespan of a Washing Machine?
Many factors has impact on how long a washing machine lasts:
- Build quality – Machines with stainless steel washing drums and inverter motors last longer.
- Frequency of use – More loads per week can shorten lifespan.
- Water quality – Hard water causes mineral buildup, reducing efficiency.
- Proper maintenance – Regular cleaning and descaling help extend life.
How Often Should I Use My Washing Machine?
- Using a washing machine 3-5 times per week ensures a longer lifespan.
- Running 8+ loads per week may lead to faster wear and tear.
- Overloading frequently damages the motor, bearings, and drum.
How Can I Prevent My Washing Machine from Breaking Down?
- Use the correct detergent – Avoid excessive soap buildup.
- Clean the drum, filters, and rubber seals every month.
- Replace hoses every 3-5 years to prevent leaks.
- Run an empty hot wash with vinegar or machine cleaner to remove limescale.
Signs That Your Washing Machine Is Wearing Out
What Are the Signs That a Washing Machine Is Dying?
- Loud noises or excessive vibration – Could indicate drum or motor issues.
- Water leakage – Broken seals or cracked hoses.
- Long or Incomplete wash cycles – Sensor or heating element failure.
- Higher electricity and water bills – Reduced efficiency over time.

When Should I Replace My Washing Machine?
- If it is over 10 years old and experiencing frequent problems.
- If repair costs exceed 50% of the price of a new machine.
- If it no longer washes clothes effectively despite proper settings.
How to Extend the Life of Your Washing Machine?
What Maintenance Helps a Washing Machine Last Longer?
- Clean the detergent drawer to prevent clogging.
- Check and clean the lint filter monthly.
- Inspect hoses for leaks or cracks regularly.
- Avoid slamming the door shut, which could damage the seals.
What Is the Best Way to Use a Washing Machine for Longevity?
- Avoid overloading – It strains the motor and bearings.
- Use correct wash cycles – Avoid excessive wear on components.
- Leave the door open after use – Prevents mould and bad odours.
Is It Worth Repairing an Old Washing Machine?
How Much Does It Cost to Repair a Washing Machine?
- Minor repairs (filters, seals, belts) cost £50-£150.
- Major repairs (motor, drum, PCB) can cost £200-£400.
When Should I Repair Instead of Replace?
- If the repair is affordable and simple.
- If the machine is less than 7 years old.
- If it’s still covered under warranty or service plans.
When Should I Replace Instead of Repair?
- If the washing machine is over 10 years old.
- If it has recurring drum or motor issues.
- If repair costs exceed half the actual cost of a new machine.

Which Washing Machine Brands Last the Longest?
Most Reliable Washing Machine Brands in the UK
| Brand |
Estimated Lifespan |
Warranty |
| Miele |
15-20 years |
10 years |
| Bosch |
12-15 years |
5 years |
| AEG |
12-15 years |
5 years |
| Samsung |
10-15 years |
5 years |
| LG |
10-15 years |
5 years |
| Beko |
7-12 years |
2 years |
| Hotpoint |
7-12 years |
2-5 years |
Are Expensive Washing Machines More Durable?
- Premium machines last longer due to better materials and components.
- Inverter motors are quieter and last longer than traditional motors.
- High-end machines come with longer warranties for peace of mind.
Conclusion
- Most washing machines last 10-15 years, but proper maintenance can extend their lifespan.
- Brand, usage frequency, and care habits play a major role in longevity.
- If your machine is over 10 years old and requires frequent repairs, replacement may be a better option.
By following these tips, you will get answers for how long should a washing machine last, and you can keep your washing machine in top condition for years to come.
FAQs – Answering Common Questions About How Long Should a Washing Machine Last
1. How long do front-load and top-load washing machines last?
- Front-load machines last 12-15 years.
- Top-load machines last 10-12 years, depending on use.
2. Can a washing machine last 20 years?
Yes, but only high-end models like Miele with proper maintenance.
3. What causes a washing machine to break down quickly?
Overloading, hard water, and lack of maintenance.
4. What is the most common washing machine fault?
Drainage issues, spinning problems, and electrical faults.
5. How can I make my washing machine last longer?
Regular cleaning, avoiding overloading, and correct detergent use.
