by Kanimozhi BV | Feb 13, 2025 | Refrigerator, Appliances
Resetting a Beko fridge freezer is sometimes necessary to resolve minor issues such as temperature fluctuations, error codes, or power outages. Knowing how to properly reset your appliance can help restore its functionality without requiring professional assistance.
In this guide, I will walk you through the step-by-step process on how to reset Beko fridge freezer, troubleshooting common problems, and understanding when a reset is needed. I will also cover temperature settings, cooling issues, lifespan, and whether Beko is a reliable brand for freezers.
When Should You Reset Your Beko Fridge Freezer?
Common Reasons for Resetting
- Power outage or electrical fluctuations causing the fridge to stop cooling properly.
- Incorrect temperature settings leading to the fridge being too warm or too cold.
- Error codes or flashing lights displayed on the control panel.
- Resetting after defrosting to ensure the appliance runs efficiently.
- Compressor not running properly, affecting cooling performance.

How to Reset Beko Fridge Freezer? – Step-by-Step Guide
Step 1: Turn Off and Unplug the Fridge
- Locate the power switch or unplug the fridge from the wall socket.
- Leave the appliance powered off for at least five minutes to allow the system to reset.
Step 2: Restart the Fridge Freezer
- Plug the fridge back in.
- Turn on the power switch if applicable.
Step 3: Reset the Temperature Settings
- Locate the temperature control panel inside the fridge or on the front display.
- Set the fridge temperature to 3-5°C and the freezer to -18°C.
Step 4: Check the Control Panel for Errors
- Look for any flashing lights or error codes.
- If errors persist, refer to the Beko fridge freezer manual for further instructions.
How Do You Reset the Temperature on a Beko Refrigerator?
Step-by-Step Temperature Reset
- Locate the temperature control panel inside the fridge or on the digital display.
- Adjust the temperature settings:
- Set the fridge to 3-5°C.
- Set the freezer to -18°C.
- Press and hold the temperature button for a few seconds to confirm the change.
- Wait a few hours for the fridge to stabilize at the new temperature.
If the fridge is still not cooling properly after adjusting the settings, performing a manual reset by unplugging and restarting the appliance may be necessary.
How to Reset Beko Fridge Freezer Control Panel?
- Some Beko models have a reset button on the control panel.
- If there is no reset button, hold down the power button for 10 seconds.
- If the display is flashing, perform a manual reset by unplugging the fridge for five minutes and turning it back on.
How to Reset Beko Fridge Freezer After a Power Cut?
What Happens to the Fridge After a Power Cut?
- The fridge may enter standby mode.
- Some models may display error codes or stop cooling properly.
Steps to Reset After a Power Cut
- Unplug the fridge and wait for five to ten minutes.
- Plug it back in and switch it on.
- Check temperature settings and adjust if necessary.
- Ensure the compressor is running by listening for a humming sound.
How to Reset a Beko Fridge Freezer with Error Codes?
- E1/E2 errors indicate a sensor failure; try a reset before calling a technician.
- E3 error relates to a temperature sensor issue, which a reset may help resolve.
- Flashing lights often indicate an internal error; perform a full reset.
- If error codes persist after a reset, contact Beko customer support.

How to Reset a Beko Frost-Free Fridge Freezer?
- Manually defrost the fridge before resetting.
- Follow the standard reset procedure: turn off, unplug, wait, and restart.
- If frost builds up frequently, check the door seals and ventilation for blockages.
Why Is My Beko Fridge Freezer Not Cooling?
Common Reasons and Fixes
- Power Supply Issues – Ensure the fridge is plugged in and the power socket is working.
- Incorrect Temperature Settings – Reset the temperature to 3-5°C for the fridge and -18°C for the freezer.
- Blocked Air Vents – Overloading the fridge can block airflow, preventing proper cooling.
- Dirty Condenser Coils – Dust and dirt on the coils can affect cooling efficiency. Clean them with a brush or vacuum.
- Faulty Thermostat or Compressor – If the compressor is not running, the fridge may need professional repair.
- Demo Mode Activated – Some Beko models may enter Demo Mode, where the fridge appears on but does not cool. To exit, hold the Function or Mode button for 10 seconds.
If none of these steps work, reset the fridge by unplugging it for five to ten minutes, then turning it back on.
What Is the Lifespan of a Beko Fridge Freezer?
Average Lifespan
- A Beko fridge freezer typically lasts 10-15 years with proper maintenance.
Factors Affecting Lifespan
- Regular maintenance, including cleaning condenser coils and defrosting when necessary.
- Proper ventilation, ensuring good airflow around the fridge.
- Power fluctuations, which can be managed by using a surge protector.
- Frequency of use, as overloading or frequent opening and closing can put stress on the compressor.
With proper care, a Beko fridge freezer can last well over a decade.

Is Beko a Good Brand for Freezers?
Pros of Beko Freezers
- Energy-efficient, with many models rated A+ or higher.
- Frost-free technology prevents ice buildup and reduces maintenance.
- Affordable pricing, offering good value for money compared to premium brands.
- Innovative features such as Fast Freeze, NeoFrost, and EverFresh+ technology.
- Decent durability, typically lasting 10+ years with proper care.
Cons of Beko Freezers
- Some models may have plastic shelves instead of glass.
- Higher-end brands such as Bosch or Samsung may offer more advanced cooling technology.
Overall, Beko freezers are a solid choice for those looking for an affordable, reliable, and energy-efficient appliance.
My Recommendation – Best Way to Reset a Beko Fridge Freezer
- Turn off and unplug the fridge for at least five minutes.
- Restart the appliance and check the control panel for errors.
- Set the correct temperature (fridge: 3-5°C, freezer: -18°C).
- Listen for the compressor to ensure it starts running.
This method works for most common issues and is the best way to reset your Beko fridge freezer safely.
Conclusion
- Resetting a Beko fridge freezer is a simple but effective way to fix minor issues.
- Unplugging and restarting the appliance is the best way to perform a reset.
- If the problem persists, checking error codes, temperature settings, and airflow can help diagnose the issue.
- Regular maintenance can prevent the need for frequent resets.
By following these steps, you can ensure your Beko fridge freezer runs efficiently for years to come.
by Kanimozhi BV | Feb 12, 2025 | Washing Machine, Appliances, DIY Ideas
A Beko washing machine can sometimes stop working due to power surges, error codes, or unresponsive controls. In many cases, a simple reset can help restore normal functionality without the need for professional repair.
This guide will walk you through step-by-step methods on how to reset beko washing machine, troubleshoot common problems, and prevent future issues.
When Should You Reset Your Beko Washing Machine?
Resetting a Beko washing machine can help fix various issues, including:
- After a power cut – The machine may stop responding due to a sudden power surge.
- If the machine is stuck mid-cycle – A reset can restart a frozen program.
- When the machine won’t start – Unresponsive controls or a locked door may require a reset.
- To clear error codes – Some Beko washing machine error codes can be removed with a reset.
- After replacing or repairing parts – If you’ve changed components like the door lock or motor, a reset may be necessary.

How to Reset Beko Washing Machine?
1. Soft Reset (Basic Restart Method)
A soft reset is the easiest way to restore the washing machine’s functions.
Follow these steps for Soft Reset
- Turn off the washing machine with the help of power button.
- Unplug the machine from the power socket.
- Wait for 5–10 minutes to permit the system to reset.
- Plug the machine back in & turn it on.
- Select a wash program and press start.
This method can help clear minor glitches and restore normal operation.
2. Hard Reset (Factory Reset Method)
If the soft reset doesn’t work, you may need to perform a hard reset.
Here’s how to do it for Hard Reset
- Turn off the washing machine & unplug it from the power source.
- Press and hold the start/pause button for about 5 seconds.
- While holding the button, plug the machine back in.
- Release the button and turn the machine on.
- The machine will now be reset to factory settings.
This method is useful when the washing machine remains unresponsive or displays persistent error codes.
3. Resetting the Control Panel
If the control panel is frozen or buttons are unresponsive, try this method:
- Hold down both the start/pause button and the cancel button at the same time.
- Keep holding for 3–5 seconds until the panel resets.
- Release the buttons and restart the machine.
This can help fix touchscreen malfunctions or control panel glitches.
4. Resetting a Beko Washing Machine After an Error Code
If your Beko washing machine shows an error code, a reset can sometimes clear the issue.
Common Error Codes & Reset Solutions
| Error Code |
Meaning |
Reset Solution |
| E01 |
Door lock problem |
Ensure the door is properly closed, try a soft reset |
| E02 |
Water supply issue |
Check water inlet, perform a reset |
| E03 |
Drainage issue |
Clean drain filter, restart washer |
| E10 |
Control panel failure |
Try a hard reset |
| E18 |
Motor or drum issue |
Perform a soft reset before calling a technician |
If these common error codes persists after resetting, further troubleshooting may be required.

What If Resetting Doesn’t Work?
If your Beko washing machine still doesn’t function after a reset, consider checking the following:
- Power Supply: Ensure the machine is properly plugged in and the socket is working.
- Door Lock: If the door doesn’t close properly, the machine may not start.
- Drainage System: A clogged drain filter or hose can prevent the machine from running.
- Water Supply: Make sure the water inlet valve is open and the hose is not blocked.
- Control Board Issues: If the display remains unresponsive, it may need professional repair.
If none of these fixes work, it’s best to contact Beko customer support or call a professional technician.
Preventing the Need for Frequent Resets of Beko Washing machine
To avoid repeated washing machine failures and the need for frequent resets, follow these maintenance tips:
- Regularly clean the drain filter to prevent blockages.
- Check the power supply and plug for loose connections.
- Avoid overloading the washing machine, as this overloading could strain the motor.
- Use the correct detergent to prevent residue buildup in the pipes.
- Keep the control panel dry to avoid malfunctions.
Following these tips can help extend the lifespan of your Beko washing machine and reduce the need for frequent resets.

Conclusion
Resetting a Beko washing machine is a simple but effective way to fix common issues such as power failures, error codes, and frozen cycles. A soft reset usually works for minor problems, while a hard reset may be needed for more persistent issues.
If a reset does not solve the problem, further troubleshooting or professional repair may be required. Regular maintenance can help prevent future issues and keep your washing machine running smoothly.
By following this step-by-step guide on how to reset beko washing machine, you can reset your Beko washing machine with ease and avoid unnecessary service calls.
by Kanimozhi BV | Feb 10, 2025 | Washing Machine, Appliances
If your Hoover washing machine is displaying the E08 error code, it means there’s a problem with the motor or drum speed sensor. This error often prevents the machine from spinning properly, which can be frustrating, especially if your laundry is left soaking wet after a cycle.
In this guide, I will explain what the Hoover washing machine E08 error means, why it happens, and how to fix it step by step.
Whether you’re dealing with a minor issue like an overloaded drum or a more serious motor fault, this troubleshooting guide will help you get your washing machine running again.
What Is the E08 Error on a Hoover Washing Machine?
The E08 error is related to the motor and drum speed sensor. It usually indicates that the washing machine has detected an issue with the spin cycle, which may be caused by a motor malfunction, a faulty speed sensor, or wiring issues.
When the error appears, your washing machine may:
- Fail to spin properly or stop mid-cycle.
- Make unusual noises during the spin cycle.
- Display the E08 error code on the control panel.
Now, let’s explore the possible causes of the E08 error.

What are the Causes of the Hoover Washing Machine E08 Error?
1. Motor Fault
The motor is responsible for rotating the drum during the wash and spin cycles. If the motor is worn out or faulty, it can trigger the E08 error.
What are the Signs of a motor problem?
- The drum doesn’t spin or spins slowly.
- A burning smell comes from the machine.
- The washer makes a humming noise but does not turn.
2. Drum Speed Sensor Malfunction
The Hall Effect sensor monitors the drum’s speed. If it stops working or becomes misaligned, the washing machine cannot detect the correct speed, triggering the E08 error.
What are the Signs of a faulty speed sensor?
- The washing machine starts spinning but stops suddenly.
- The drum spins at irregular speeds.
3. Faulty Wiring or Loose Connections
If there is a loose connection or damaged wire between the motor, control board, or sensor, the washing machine may display the E08 error.
How wiring issues occur?
- Wires can become loose due to vibration over time.
- Electrical damage may occur if the washer has experienced a power surge.
4. Control Board (PCB) Malfunction
The control board (PCB) is the brain of the washing machine. If it fails to send the correct signals to the motor or speed sensor, it can result in the E08 error.
What are the Possible control board issues?
- Burned or damaged components.
- Corrupt software preventing proper communication.
5. Overloading the Washing Machine
If you overload the drum, it can strain the motor and cause an imbalance, triggering the E08 error.
How to avoid overloading?
- Follow the maximum weight capacity in your user manual.
- Distribute clothes evenly inside the drum.
How to Fix the Hoover Washing Machine E08 Error?
1. Reset the Washing Machine
Sometimes, a simple reset can clear the error. Get to know how to reset along with the common hoover washing machine error codes. Even after restarting the washing machine, if the error code returns then move on to the next steps.
2. Check for Overloading and Unbalanced Loads
- Remove some clothes and redistribute the load inside the drum.
- Try running the spin cycle without any clothes to see if the error disappears.
3. Inspect and Test the Drum Speed Sensor
If the Hall Effect sensor is faulty, the washing machine won’t detect the correct spin speed.
How to check the speed sensor?
- Locate the speed sensor (usually near the motor).
- Inspect it for visible damage or misalignment.
- Use a multimeter to test if it’s working properly.
- If the sensor is faulty, make a replacement with a new one.
4. Examine the Motor for Faults
- Open the back panel of the washing machine.
- Inspect the motor for burn marks, loose wires, or overheating.
- Test the motor using a multimeter to check for electrical faults.
- If the motor is faulty, then it might need to be replaced.
5. Check Wiring and Connections
- Inspect all wires connecting the motor, control board, and speed sensor.
- Tighten any loose connections and replace damaged wires.
6. Inspect the Control Board (PCB)
If the control board is malfunctioning, it may not be sending the correct signals to the motor and sensor.
- Check for burn marks or damaged components on the PCB.
- If the PCB is faulty, it may need to be repaired or replaced.

How to Prevent the E08 Error in the Future?
To avoid encountering the E08 error again, follow these maintenance tips:
- Do not overload the drum – Always follow the machine’s weight limit.
- Perform regular maintenance – Clean the drum, filter, and hoses monthly.
- Check wiring and connections – Ensure all electrical connections remain secure.
- Use the correct detergent – Too much detergent can cause excessive foam, affecting performance.
When to Call a Professional?
If the E08 error persists after troubleshooting, you may need professional repair.
You should call a technician if:
- The washing machine won’t spin at all.
- You notice burned wires or a damaged control board.
- The motor is completely unresponsive.
- You have tried resetting the machine, but the E08 error keeps appearing.
The cost of repairs would depend on the particular issue. Motor and PCB replacements tend to be more expensive, while sensor and wiring fixes are usually cheaper.
Conclusion
The Hoover washing machine E08 error is often caused by motor issues, a faulty speed sensor, or wiring problems. By following the step-by-step troubleshooting guide, you can diagnose and fix the problem yourself in many cases.
Regular maintenance and proper usage will help prevent future errors, keeping your Hoover washing machine in top condition. If the issue persists, consider seeking professional repair assistance.
I hope this guide helps you fix your washing machine and get back to hassle-free laundry days.
Related Article: Hoover Washing Machine E20 Error
What Are the FAQs on the Hoover Washing Machine E08 Error?
1. Can I fix the E08 error myself, or do I need a technician?
Many issues, such as overloading, wiring problems, and faulty sensors, can be fixed at home. However, motor or PCB failures often require a technician.
2. How much does it cost to repair an E08 error?
- Sensor replacement: £30–£80
- Motor replacement: £100–£200
- Control board repair/replacement: £120–£250
3. Will resetting my washing machine clear the E08 error?
A reset can clear the error if it was caused by a minor glitch. However, if the issue is related to hardware damage, the error will return.
4. What should I do if my Hoover washer still shows E08 after troubleshooting?
If you’ve tried resetting, checking wiring, and inspecting the motor/sensor, but the error persists, it’s best to contact a Hoover repair specialist.

by Kanimozhi BV | Feb 10, 2025 | Washing Machine, Appliances
A Hoover washing machine is a reliable home appliance, but like any device, it can experience occasional malfunctions. When something goes wrong, your machine will display error codes to indicate the issue.
Understanding these codes can help you diagnose problems quickly and potentially fix them without needing professional assistance. In this guide, I will walk you through the most common Hoover washing machine error codes, explain their causes, and provide step-by-step solutions.
Whether your washer isn’t draining, spinning, or filling with water, this troubleshooting guide will help you get your appliance back in working order.
What are the Common Hoover Washing Machine Error Codes & Fixes?
What Do Hoover Washing Machine Error Codes Mean?
Hoover washing machines have a built-in diagnostic system that detects faults and displays corresponding error codes. These codes appear on the digital display (if your model has one) or may be indicated by flashing LED lights.
Each error code corresponds to a specific problem, such as water supply issues, drainage problems, motor faults, or door lock failures. By identifying the error code, you can determine the best way to fix the issue.
How to Identify Error Codes on a Hoover Washing Machine?
To read an error code, follow these steps:
- Check the display panel for an alphanumeric code (e.g., E01, E03).
- If your model doesn’t have a screen, observe the flashing LED lights and refer to your user manual for their meaning.
- Note the error code and compare it with the list below to understand the problem.
Now, let’s go through the complete list of Hoover washing machine error codes and their solutions.
Complete List of Hoover Washing Machine Error Codes & Solutions
| Error Code |
Issue |
Cause |
Solution |
| E01 |
Door lock problem |
Faulty door lock or latch |
Check the door lock, clean the latch, reset the washer |
| E02 |
Water supply issue |
Low water pressure, clogged inlet hose |
Ensure water supply is on, clean filters, check for hose blockages |
| E03 |
Drainage problem |
Blocked drain pump, clogged hose |
Clean the drain filter, check hoses, inspect drain pump |
| E04 |
Water overflow |
Faulty water level sensor, excessive detergent use |
Reduce detergent, clean water level sensor, reset the machine |
| E05 |
Temperature sensor error |
Faulty thermostat, heating element issue |
Test and replace temperature sensor or heating element |
| E06 |
Motor malfunction |
Motor overload, wiring issue |
Reset washer, inspect motor wiring, replace motor if needed |
| E07 |
Spin cycle failure |
Unbalanced load, faulty motor sensor |
Redistribute laundry, inspect motor connections |
| E08 |
Excessive foam detected |
Too much detergent, wrong detergent type |
Reduce detergent use, run extra rinse cycle |
| E09 |
Incorrect water temperature |
Faulty heating element or thermostat |
Check and replace heater or thermostat |
| E10 |
Door open during cycle |
Door lock disengaged |
Ensure door is closed properly, inspect door lock |
| E11 |
Water drain delay |
Slow drainage, weak pump |
Clean drain hose and pump filter, check pump function |
| E12 |
Motor overload error |
Excessive load or drum pressure |
Reduce load, reset washer, check motor |
| E13 |
Water leak detected |
Leaking hose, cracked drum |
Inspect hoses, tighten connections, replace seals if needed |
| E14 |
Communication error |
Faulty control board or sensor failure |
Reset washer, inspect control board connections |
| E15 |
Water pressure issue |
Low water pressure, defective inlet valve |
Check water pressure, clean/replace inlet valve |
| E16 |
Drum speed sensor error |
Drum spinning too fast, sensor issue |
Reset machine, inspect motor and drum speed sensor |
| E17 |
High-speed spin error |
Unbalanced load, motor issue |
Check load balance, inspect motor, reset washer |
| E18 |
Drain pump blocked |
Clogged or obstructed drain pump |
Clean drain pump, remove debris from filter, check hose |
Related Article: Hoover Washing Machine E20 Error
How to Reset a Hoover Washing Machine?
If your Hoover washing machine is displaying an error code, resetting it may help resolve minor issues. Here’s how to reset your washer:
- Turn off the machine and unplug it from the power source.
- Wait for 5 to 10 minutes to allow the system to reset.
- Plug the washer back in and turn it on.
- If the error code persists, consult the error list above for troubleshooting.
Some models may require a specific button combination to reset. Check your user manual for instructions.
How To Prevent Future Hoover Washing Machine Errors?
To avoid common errors and extend the life of your washing machine, follow these maintenance tips:
- Regular cleaning of the drain pump filter prevents blockages.
- Inspect the water inlet hose for kinks or clogs.
- Avoid overloading the drum, as it can cause motor strain.
- Use the correct detergent to prevent excessive foam buildup in washing machine drawer.
- Perform a maintenance wash every few weeks to remove residue and bacteria.
Regular maintenance can prevent many of the common error codes from appearing, saving you time and repair costs.
When to Call a Professional?
While many Hoover washing machine errors can be fixed at home, some problems require professional assistance. You should call a technician if:
- The error code persists after troubleshooting.
- The washing machine won’t start or keeps shutting down.
- You hear unusual noises like grinding, banging, or humming.
- There is a water leak that you cannot locate or fix.
- The drum is not spinning even after resetting.
If needed, contact Hoover customer support or a local appliance repair specialist for further assistance.
Conclusion
Understanding Hoover washing machine error codes allows you to quickly diagnose and fix common problems. By following the troubleshooting steps outlined in this guide, you can save money on repairs and keep your washer running smoothly.
Regular maintenance and proper usage will help prevent future issues. However, if an error persists, don’t hesitate to seek professional assistance.
If you found this guide helpful, consider bookmarking it for future reference.
Related Article: Hotpoint Washing Machine F05 Error
What are the FAQs on Hoover Washing Machine Error Codes?
1. Why does my Hoover washer keep showing error codes?
Error codes indicate specific faults in the washing machine. If an error keeps appearing, there may be an unresolved issue that needs attention, such as a blocked drain or faulty sensor.
2. How do I clear an error code on my Hoover washing machine?
You can try resetting the washer by turning it off, unplugging it for a few minutes, and restarting it. If the code persists, refer to the troubleshooting section above.
3. Can I fix Hoover error codes myself, or do I need a technician?
Many errors, such as blocked drains, faulty door locks, or detergent issues, can be fixed at home. However, motor faults, heating element issues, and control board failures may require professional repair.
4. How often should I clean my washing machine to prevent errors?
To prevent blockages and buildup, clean the drain pump filter, detergent drawer, and drum at least once a month.

by Kanimozhi BV | Feb 7, 2025 | Fencing, Exterior
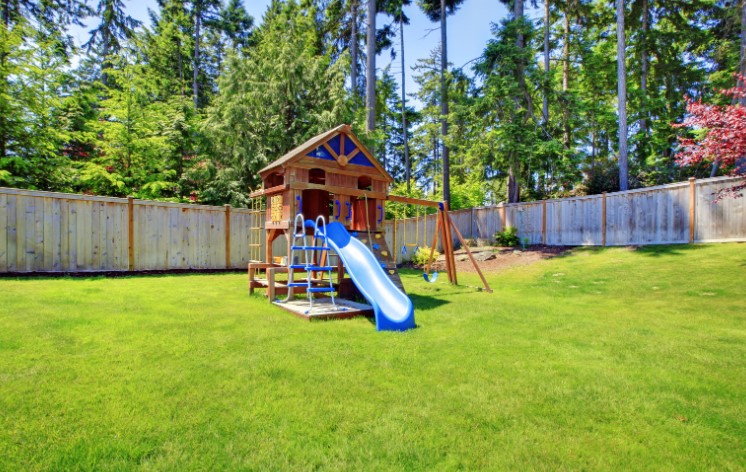
Over time, wooden fences are prone to developing green algae, especially in damp or shaded areas. This not only makes the fence look unkempt but can also lead to wood deterioration, slipperiness, and potential rot if left untreated.
If you’re noticing green patches on your wooden fence, don’t worry—there are several effective ways to remove algae and restore your fence to its original condition. In this guide on how to remove green algae from a wooden fence, I’ll walk you through:
- What causes algae on fences
- DIY and commercial cleaning solutions
- The best methods to remove algae
- How to prevent algae from coming back
By following these step-by-step instructions, you can keep your wooden fence clean, well-maintained, and algae-free for years to come.
What Causes Green Algae on Wooden Fences?
Algae thrive in moist, shaded, and poorly ventilated areas. If your wooden fence is exposed to frequent rain, has limited sunlight, or is close to overgrown plants, it becomes a prime location for green algae growth.
Here are the main factors that contribute to algae on fences:
- Damp Conditions: Rain, high humidity, or poor drainage can create excess moisture.
- Lack of Sunlight: Fences that are shaded by trees, buildings, or other objects are more prone to algae buildup.
- Poor Air Circulation: Limited airflow prevents wood from drying out properly.
- Organic Debris: Leaves, moss, and soil deposits on the fence can trap moisture and encourage algae growth that too on the taller fence which is extended.
Unlike moss or mildew, algae do not have roots and do not feed on wood, but their presence retains moisture, leading to fungal growth and potential wood rot over time.

Best Methods on How To Remove Green Algae from a Wooden Fence
Method 1 – Cleaning Green Algae Off Wood with Vinegar
One of the most effective and eco-friendly ways to remove algae is by using white vinegar. Vinegar is a natural disinfectant that kills algae without damaging the wood.
What You’ll Need:
- White vinegar (undiluted for heavy algae, 50/50 mix with water for lighter growth)
- Spray bottle or bucket
- Stiff-bristle brush
- Water hose
Step-by-Step Instructions:
- Spray or apply the vinegar solution directly onto the green algae patches.
- Let it sit for 20-30 minutes to break down the algae.
- Scrub the area using a stiff-bristle brush to remove the algae.
- Rinse the fence thoroughly with clean water.
- Allow the fence to fully dry before applying any protective sealant.
This method is safe, non-toxic, and does not harm nearby plants or pets.
Method 2 – Using a Commercial Algae Remover
For tougher algae stains, commercial algae removers can be more effective than DIY methods. These solutions are specially formulated to break down algae without harming wood.
Best Algae Removers for Wooden Fences:
- Wet & Forget Moss, Mould, Lichen & Algae Remover
- Algon Organic Path & Patio Cleaner
- Ronseal Decking Cleaner & Reviver
How to Use a Commercial Algae Remover?
- Follow the instructions on the product label.
- Apply the solution using a sprayer, sponge, or brush.
- Allow the cleaner to sit for the recommended time (usually 10–30 minutes).
- Scrub if necessary, then rinse with water.
Most commercial cleaners offer long-term algae prevention, meaning you won’t have to clean as often.
Method 3 – Pressure Washing a Wooden Fence
If your fence has a large amount of algae, using a pressure washer can quickly restore its appearance. However, high-pressure water can damage wood, so it’s important to use the right settings.
Pressure Washing Instructions:
- Use a low-pressure setting (no more than 1500 PSI) to avoid damaging the wood.
- Start at a distance of 12-18 inches from the fence.
- Spray evenly in a sweeping motion, working from top to bottom.
- Let the fence dry completely before applying a wood preservative.
Warning: Avoid using a high-pressure setting, as it can strip away wood fibers, leading to splintering and damage.
Method 4 – Homemade Algae Remover for Fences
If you prefer a chemical-free approach, you can make a DIY algae remover using household ingredients.
DIY Algae Cleaning Solution:
| Ingredient |
Measurement |
Purpose |
| White vinegar |
1 part |
Natural algae killer |
| Baking soda |
½ cup per litre of water |
Gentle scrubbing agent |
| Lemon juice |
2 tablespoons |
Helps break down algae naturally |
| Water |
2 parts |
Dilutes solution |
How to Use?
- Mix the ingredients in a bucket or spray bottle.
- Apply to the affected areas.
- Let sit for 20 minutes, then scrub with a brush.
- Rinse thoroughly with water.
This eco-friendly solution is safe for use around plants and pets.
How to Prevent Green Algae from Growing on a Wooden Fence?
Regular Cleaning and Maintenance
- Wash your fence every 6–12 months to prevent algae build-up.
- Remove leaves, soil, or moss that can trap moisture.
Improve Airflow and Sunlight Exposure
- Trim back trees and bushes to increase airflow around the fence.
- Allow more sunlight to reach the wood, reducing damp conditions.
Apply a Wood Treatment and Sealant
- Use a water-resistant sealant to protect the wood.
- Consider oil-based treatments for better longevity.
Install a Gravel or Stone Barrier
- Add gravel or stones at the base of the fence to reduce soil moisture contact.
- This helps keep the lower sections of the fence dry and algae-free.
Conclusion
Removing green algae from a wooden fence is a straightforward task when using the right methods. Whether you choose vinegar, a commercial cleaner, pressure washing, or a homemade solution, regular cleaning will help maintain the beauty and longevity of your fence.
For long-term protection, keep your fence dry, allow airflow, and apply a wood sealant. By following these steps on how to remove green algae from wooden fence, you can enjoy a clean, algae-free fence all year round.
Would you like recommendations on the best wood treatments for long-term fence protection? Let me know!
Related Article: Cheap Fencing To Keep Dogs Out Of Garden & Best 10 DIY Ideas
FAQs About Removing Green Algae from Wooden Fences
1. Can I use bleach to remove green algae?
Yes, but dilute it properly (1 part bleach to 4 parts water) to avoid damaging the wood. Always rinse thoroughly afterward.
2. Will algae damage my wooden fence?
While algae doesn’t eat wood, it retains moisture, which can lead to mould, mildew, and eventual rot.
3. How often should I clean my wooden fence to prevent algae?
At least once or twice a year, ideally in spring and autumn.
4. Is pressure washing safe for old fences?
It depends. Older fences may be weaker and prone to damage, so use low-pressure settings or hand-cleaning methods.
