- Why is My Button Flush Toilet Running Continuously?
- How Do I Diagnose the Problem in a Button Flush Toilet?
- Step-by-Step Guide on How To Fix a Running Toilet With a Button Flush
- How Much Does Professional Repair Cost?
- Conclusion
- Table: Quick Fixes for a Running Button Flush Toilet
- Frequently Asked Questions (FAQs)
A running toilet can be frustrating and wasteful, especially if your toilet uses a button flush mechanism, common in UK households.
The constant sound of running water not only indicates an internal issue but also leads to significant water wastage, leads to brown stains in the toilet bowl and higher utility bills. Luckily, you can fix this problem yourself with a little patience and guidance.
In this guide, I’ll walk you through how to fix a running toilet with a button flush, addressing common causes and offering clear, actionable steps to resolve the issue.
Why is My Button Flush Toilet Running Continuously?
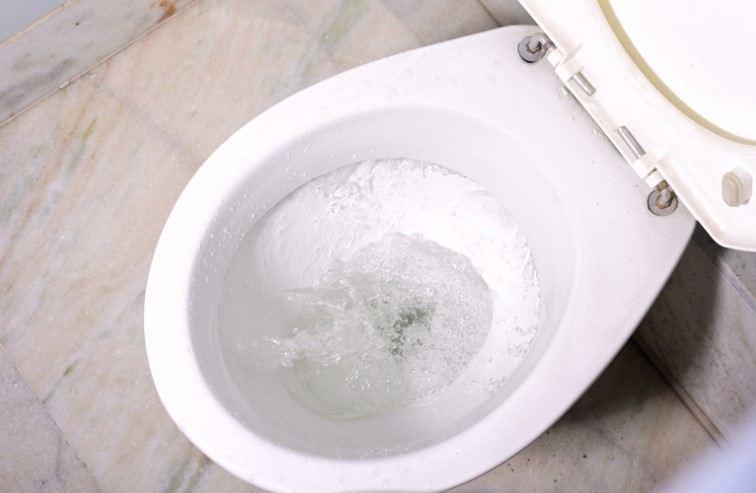
A running toilet means water is flowing into the toilet bowl without stopping, even after flushing. There are several potential reasons why a button flush toilet may continuously run, and understanding the cause is key to fixing it.
Major Causes of a Running Toilet With a Button Flush
- Worn Out Flush Valve Seal: The flush valve seal (or flapper) controls the release of water when you flush. Over time, it can wear out or become loose, allowing water to seep through even when the button is not pressed.
- Faulty or Misaligned Fill Valve: The fill valve controls the amount of water in the cistern. If it’s faulty or incorrectly aligned, it can cause the water to continue running into the tank and overflowing into the bowl.
- Sticking Button Mechanism: If the flush button mechanism is worn out or sticking, it may not return to its proper position, causing water to keep running.
- Malfunctioning Float Adjustment: The float determines the water level in the cistern. If it’s not adjusted correctly, the cistern might overfill, causing continuous running.

How Do I Diagnose the Problem in a Button Flush Toilet?
Before you can fix a running toilet, it’s important to pinpoint the exact cause. Here’s how you can diagnose the problem in your button flush toilet:
1. Checking the Flush Valve Seal
The flush valve seal is a rubber or silicone part that blocks the flow of water when the toilet isn’t flushing. Over time, it can become brittle, misaligned, or worn out, leading to a leak. To check if it’s the problem:
- Turn off the water supply.
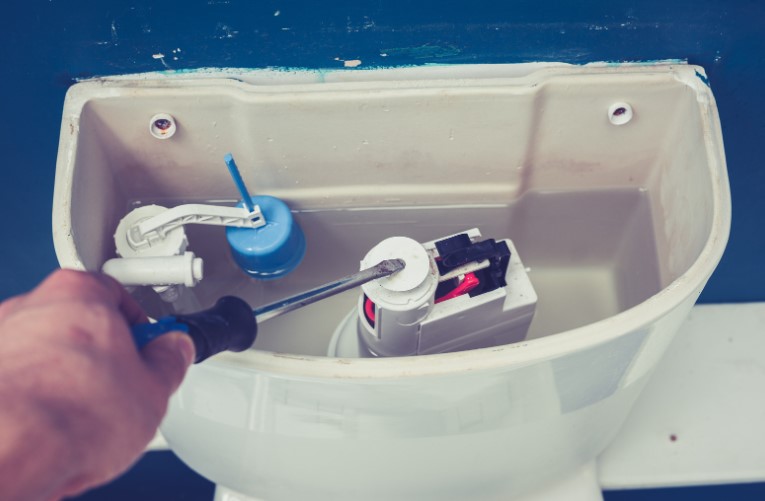
- Remove the cistern lid and you can locate the flush valve at the bottom of the tank.
- Check for signs of wear, cracking, or any misalignment in the valve.
- If the seal looks damaged or isn’t sitting correctly, it needs to be replaced.
2. Examining the Fill Valve for Leaks
The fill valve regulates the water level inside the cistern. If the fill valve isn’t closing properly after flushing, water can continuously flow into the tank. Here’s how to check:
- Watch the water level after flushing. If it keeps rising beyond the fill line, the valve might be faulty.
- Look for water flowing through the overflow tube, which indicates the valve isn’t shutting off.
- Try adjusting the float height to see if it resolves the issue. If not, the fill valve may need to be replaced.
3. Inspecting the Flush Button Mechanism
Sometimes, the issue lies with the flush button itself. If it’s sticking or not returning to the correct position after being pressed, the water will keep running. To diagnose:
- Press the flush button a few times to see if it feels stuck or sluggish.
- Open the cistern and manually check the linkage between the button and the flush valve.
- If the button seems stiff or the linkage isn’t working smoothly, consider cleaning or replacing the button mechanism.

4. Checking the Float Height and Position
The float has the overall responsibility for the control of the water level in the cistern. If it’s not adjusted correctly, the cistern can overfill, leading to continuous water flow. Here’s how to check:
- Have a look at the water level in the tank. If it’s higher than the overflow tube, the float needs to be adjusted.
- Lower the float slightly to reduce the water level and stop the overflow.
- Check whether this adjustment stops the running water. If not, there may be an issue with the fill valve.
5. Looking for Clogged Inlet Holes
Clogged inlet holes can cause uneven water flow and prevent the toilet from flushing properly. If water isn’t entering the bowl at the correct rate, the toilet may not complete its flush cycle, leading to continuous running. Check for mineral buildup or blockages:
- Use a small brush or wire to clean out the holes where water enters the bowl.
- Flush the toilet to see if the flow improves after cleaning.
Step-by-Step Guide on How To Fix a Running Toilet With a Button Flush
Now that you’ve diagnosed the problem, it’s time to fix the issue. Below is a step-by-step guide to help you repair the most common causes of a running button flush toilet.
Step 1: Turn Off the Water Supply and Remove the Cistern Lid
Before beginning any repairs, it is mandatory to turn off the water supply to the toilet. Locate the shut-off valve, usually found behind or next to the toilet. Once the water is off:
- Press the flush button to drain the remaining water from the cistern.
- Remove the cistern lid carefully and set it aside. Be gentle, as the lid can be fragile.
Step 2: Inspect and Replace the Flush Valve Seal
A worn or damaged flush valve seal is often the main culprit in running toilets. To replace it:
- Locate the flush valve at the base of the cistern.
- Remove the old seal by detaching it from the valve.
- Install the new seal, ensuring it sits properly and forms a tight seal.
- Test the new seal by turning the water back on and observing if the leak has stopped.
Step 3: Make Adjustment in the Float and Fill Valve
If the water level in the cistern is too high, you’ll need to adjust the float:
- Check the float mechanism on the fill valve. Most floats can be adjusted by either turning a screw or sliding the float up or down.
- Lower the float so the cistern fills to the correct level (below the overflow tube).
- If adjusting the float doesn’t work, consider replacing the entire fill valve.
Step 4: Test and Replace the Flush Button Mechanism If Necessary
If the flush button is sticking, it might need to be cleaned or replaced:
- Disconnect the button mechanism from the flush valve.
- Clean any dirt or grime that may be causing it to stick.
- If cleaning doesn’t solve the issue, replace the button mechanism with a new one.
Step 5: Reassemble and Test the Toilet
Once all repairs are complete, reassemble the parts:
- Put the cistern lid back in its place to reassemble.
- Allow the cistern to fill by turning on the water supply.
- Test the toilet by flushing a few times to ensure the running issue has been resolved.

How Much Does Professional Repair Cost?
If you prefer to call a professional plumber instead of attempting the repair yourself, it’s helpful to understand the typical costs. In the UK, the cost of hiring a plumber to fix a running toilet can vary depending on the issue. Here’s a breakdown:
- Average cost range:
- £70 to £150, depending on the complexity of the problem.
- Lower-end costs:
- Simple adjustments like setting the float correctly.
- Replacing a flush valve seal.
- Higher-end costs:
- Replacing a fill valve or the entire button flush mechanism.
- Additional factors:
- Emergency call-outs or repairs outside of regular working hours can increase the cost.
- The price may also rise if parts need to be specially ordered or if the toilet model is difficult to access.
By knowing the potential costs, you can decide whether to attempt a DIY fix or call in a professional.
Conclusion
Fixing a running toilet with a button flush isn’t as daunting as it may seem. By diagnosing the problem—whether it’s a worn flush valve seal, faulty fill valve, or sticking button mechanism—and following this step-by-step guide, you can restore your toilet to working condition in no time.
Remember, timely repairs not only prevent water wastage but also reduce your utility bills.
Table: Quick Fixes for a Running Button Flush Toilet
| Issue | Quick Fix |
| Worn Out Flush Valve Seal | Replace the flush valve seal |
| Faulty Fill Valve | Adjust or replace the fill valve |
| Sticking Button Mechanism | Check and replace the button mechanism |
| Incorrect Float Position | Adjust the float height |
| Clogged Inlet Holes | Clean the inlet holes inside the cistern |
Frequently Asked Questions (FAQs)
1. How do I know if my toilet’s fill valve is faulty?
If the water in the cistern keeps rising or flows into the overflow tube, the fill valve may not be shutting off properly and needs adjusting or replacing.
2. What should I do if my toilet button sticks when flushed?
If the flush button sticks, try cleaning it to remove dirt or debris. If this doesn’t work, the mechanism may need replacement.
3. Is it worth fixing a running toilet myself, or should I call a plumber?
Most running toilet issues, like replacing the flush valve seal or adjusting the float, are easy to fix on your own. But if the problem persists or feels complicated, calling a plumber can save time.


0 Comments