- What Are Sleepers and Why Use Them for Garden Edging?
- Tools and Materials You Need to Lay Sleepers for Garden Edging
- How to Lay Sleepers for Garden Edging? – Step-by-Step Guide
- How to Lay Railway Sleepers as a Border?
- How Much Does It Cost to Lay Sleepers for Garden Edging?
- Railway Sleepers Garden Edging Ideas
- Tips for Maintaining Your Sleeper Garden Edging
- Conclusion
- Frequently Asked Questions
Garden edging enhances the visual appeal and structure of an outdoor space, creating a clear boundary between lawns, flower beds, and pathways. One of the best ways to achieve a natural and durable garden border is by using wooden sleepers.
Whether using timber sleepers or railway sleepers, they offer a sturdy, rustic, and long-lasting edging solution that suits both modern and traditional gardens.
This guide provides a step-by-step process on how to lay sleepers for garden edging, covering:
- Types of sleepers and why they are suitable for edging
- How to lay railway sleepers as a border
- DIY installation vs. professional costs
- Sleeper garden edging ideas for inspiration
By the end, you’ll have all the knowledge to successfully install sleepers as garden edging that enhances your outdoor space for years to come.
What Are Sleepers and Why Use Them for Garden Edging?
Sleepers are large wooden beams traditionally used in railway construction but now popular for landscaping due to their strength, durability, and rustic charm. They create defined borders for flower beds, lawns, patios, and pathways.
Types of Sleepers for Garden Edging
| Type | Features | Pros | Cons |
| Softwood Sleepers | Pressure-treated pine or spruce | Affordable, lightweight | Less durable, needs maintenance |
| Hardwood Sleepers | Oak or tropical hardwood | Extremely durable, rot-resistant | Expensive, heavy |
| Reclaimed Railway Sleepers | Previously used on railways | Aged, rustic appearance | May contain creosote (harmful to plants) |
| Treated Timber Sleepers | Chemically treated for longevity | Resistant to rot and insects | Chemical treatment may not be eco-friendly |
Why Choose Railway Sleepers for Garden Edging?
- Strong & Durable: Railway sleepers are thicker and heavier than standard timber sleepers, making them ideal for structural garden borders.
- Rustic Aesthetic: Their weathered look adds a natural, aged feel to garden landscapes.
- Eco-Friendly Option: Reusing railway sleepers is a sustainable choice when sourced responsibly.
However, if using old railway sleepers, ensure they are not treated with creosote, as it can be harmful to plants and soil.
Tools and Materials You Need to Lay Sleepers for Garden Edging
Tools Required:
- Spirit level
- Saw (for cutting sleepers)
- Drill and screws
- Mallet
- Shovel
- Tape measure
- Wheelbarrow
- Landscape fabric (optional)
Materials Needed:
- Timber or railway sleepers
- Metal brackets or wooden stakes
- Concrete (if extra stability is needed)
- Wood preservative (to prevent rot)
- Gravel or sand for a stable base
How to Lay Sleepers for Garden Edging? – Step-by-Step Guide
Step 1: Plan and Measure the Garden Edge
- Mark out the area where you want to install the sleepers.
- Use a string line or spray paint to create a guide.
- For curved edges, cut sleepers into smaller sections for better flexibility.
Step 2: Prepare the Ground
- Dig a shallow trench (50mm deep) to help secure the sleepers in place.
- Remove weeds and level the soil.
- Add a gravel or sand base to aid drainage and prevent rot.
Step 3: Position and Cut the Sleepers
- Lay the sleepers along the trench and check alignment.
- Cut sleepers to size using a saw, ensuring smooth edges for tight joints.
Step 4: Securing the Sleepers in Place
There are three main ways to secure sleepers as garden edging:
- Metal Brackets: Attach brackets to the sleepers and secure with screws.
- Wooden Stakes: Hammer stakes into the ground behind the sleepers.
- Concrete Base: Set sleepers in concrete for maximum durability.
For railway sleepers, due to their weight, concrete or wooden stakes provide the best stability.
Step 5: Finishing Touches
- Apply a wood preservative to protect against moisture and insects.
- Fill gaps with soil, gravel, or decorative stones for a polished look.
- Compact the surrounding soil to hold the sleepers securely.

How to Lay Railway Sleepers as a Border?
Using railway sleepers as a garden border creates a bold and sturdy boundary that lasts for years. Since railway sleepers are heavier and thicker than standard timber sleepers, the installation process requires extra stability.
Steps to Lay Railway Sleepers as a Border
- Choose the Right Sleepers: Opt for hardwood railway sleepers for better longevity. Avoid creosote-treated sleepers if using near plants.
- Dig a Trench: Create a 100mm deep trench to hold the heavy sleepers in place.
- Lay a Gravel Base: This improves drainage and prevents the wood from sitting directly on damp soil.
- Place the Sleepers: Arrange them in a straight line or curve, depending on your design.
- Fix in Place:
- Use long metal rods or wooden stakes hammered into the ground.
- If stacking sleepers, use coach screws or timberlock screws to secure them together.
- Seal and Treat: Apply a wood preservative to enhance durability.
Railway sleepers provide a thick, heavy-duty border perfect for defining pathways, flower beds, or driveways.
How Much Does It Cost to Lay Sleepers for Garden Edging?
| Expense | Estimated Cost (UK) |
| Softwood sleepers (per sleeper) | £15 – £30 |
| Hardwood sleepers (per sleeper) | £30 – £60 |
| Railway sleepers (per sleeper) | £40 – £80 |
| Fixings (brackets, screws) | £5 – £20 |
| Concrete (if needed) | £5 – £15 per bag |
| Professional installation | £100 – £300 |
Using railway sleepers can be more expensive due to their weight and size, but they last decades with minimal maintenance.

Railway Sleepers Garden Edging Ideas
Railway sleepers can be used in creative ways to enhance garden design:
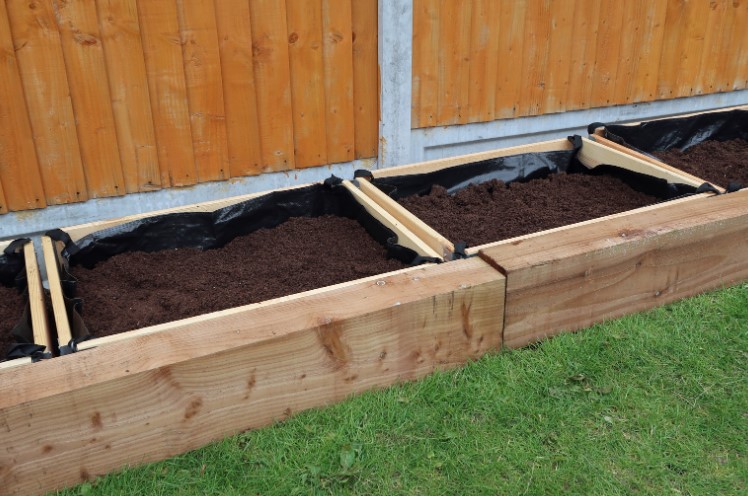
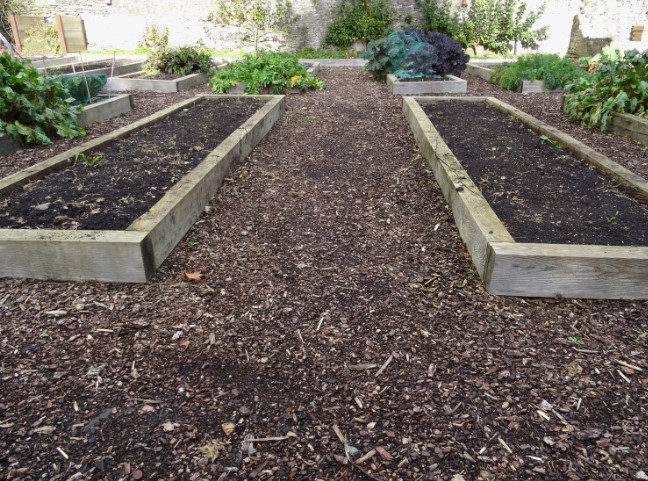
- Raised Planters: Stack sleepers to create deep flower beds.
- Stepped Sleepers: Perfect for tiered edging on sloped gardens.
- Pathway Borders: Use sleepers to frame gravel or stepping stone pathways.
- Lawn Edging: Create a crisp, defined border between grass and flower beds.
- Sleepers with LED Lighting: Drill lights into the sleepers for a modern garden look.
Tips for Maintaining Your Sleeper Garden Edging
- Apply a wood preservative annually to protect against rot.
- Check for movement and re-secure loose sleepers.
- Ensure proper drainage with drain covers to avoid moisture damage.
- Avoid untreated sleepers sitting directly in soil.
Conclusion
Laying timber or railway sleepers for garden edging is an effective way to define outdoor spaces while adding a natural and stylish look. Railway sleepers provide a strong, bold border, while timber sleepers offer a more versatile and budget-friendly option.
By following the step-by-step installation process on how to lay sleepers for garden edging, homeowners can create long-lasting and visually appealing garden borders. Whether using sleepers for flower beds, pathways, or raised borders, they provide both functionality and beauty to any outdoor space.
For larger installations, consider hiring a professional landscaper to ensure a polished and secure finish.
Frequently Asked Questions
1. Can you use railway sleepers for garden edging?
Yes, reclaimed railway sleepers are a popular and durable choice for garden edging, though they can be heavy and may require extra care during installation.
2. What’s the best way to cut garden sleepers?
You can use a hand saw or a power saw for cutting sleepers, depending on the thickness and type of wood. Ensure to sand the edges to avoid splinters.
3. How do you prevent sleepers from moving over time?
Ensure that the sleepers are properly secured using stakes, pins, or brackets, and backfill the trench with compacted soil or gravel to hold them in place.


0 Comments