Are you searching for how to remove the drum from a washing machine? Removing the drum from a washing machine is a task that might seem daunting, but with the right guidance, it can be accomplished effectively and safely. Whether you need to replace worn-out bearings, remove foreign objects, or simply conduct maintenance, understanding the proper steps is crucial. This guide will walk you through the entire process, ensuring you can tackle this repair confidently.
Why Might You Need to Remove the Drum?
What are the Common Reasons for Drum Removal?
There are several scenarios where removing the washing machine drum becomes necessary:
- Replacing Worn-Out Bearings: Over time, the bearings that allow the drum to spin smoothly can wear out, causing noise and inefficiency. Replacing these bearings often requires drum removal.
- Removing Foreign Objects: Items such as coins, buttons, or small garments can sometimes get trapped between the drum and the tub. Removing the drum helps retrieve these objects.
- Fixing a Damaged Drum: Physical damage to the drum, like dents or cracks, can affect the machine’s performance and may need replacement or repair.
- Regular Maintenance and Cleaning: Periodically removing the drum allows for thorough cleaning, which can prevent mold and buildup from affecting your laundry.
What Tools and Materials Do You Need?
Essential Tools
Before starting the drum removal process, gather the following tools and materials:
- Screwdrivers (Phillips and flathead): For removing various screws.
- Wrenches: To loosen and tighten bolts.
- Pliers: Useful for gripping and pulling.
- Socket Set: For bolts that require a socket wrench.
- Rubber Mallet: To gently tap and dislodge parts without causing damage.
- Towels or Rags: To clean up any water or debris.
- Safety Gloves: To protect your hands during the complete process.
- User Manual: Specific to your washing machine model for reference.
How to Prepare Your Washing Machine?
What are the Safety Precautions?
- Unplug the Machine: Disconnect the washing machine from the electrical outlet to avoid any risk of electric shock.
- Turn Off the Water Supply: Shut off the water valves to prevent any water from flowing into the machine.
- Drain Any Remaining Water: Open the drain pump filter and let any remaining water drain out completely.
How to Position the Machine?
- Move the Machine: Shift the washing machine to an open workspace where you have ample room to maneuver and place the removed parts.
- Secure the Machine: Ensure the washing machine is stable and will not tip over during the disassembly process.
What are the Step-by-Step Process to Remove the Drum?
Step 1: Remove the Top and Back Panels
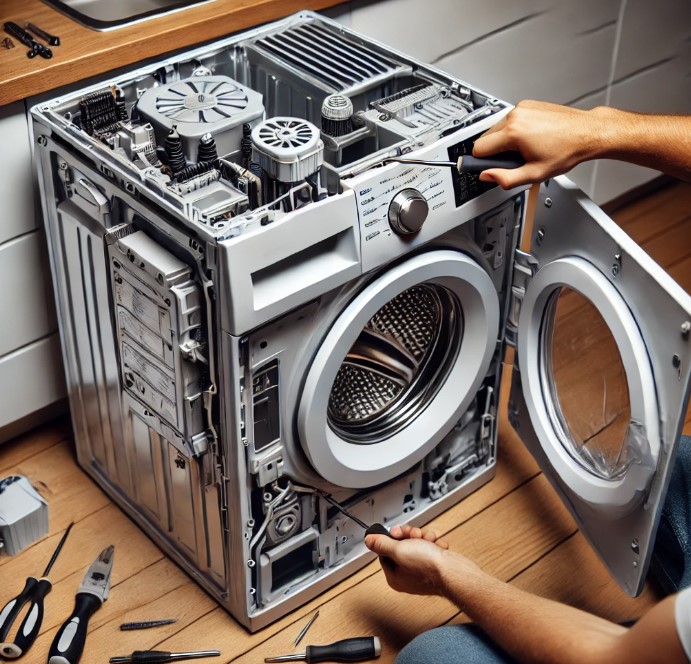
- Locate Screws: Using a screwdriver, locate and remove the screws holding the top panel in place.
- Detach the Top Panel: Lift the top panel off carefully and set it aside.
- Remove Back Panel Screws: Similarly, unscrew the back panel and remove it to access the internal components.
Step 2: Disconnect the Electrical Components
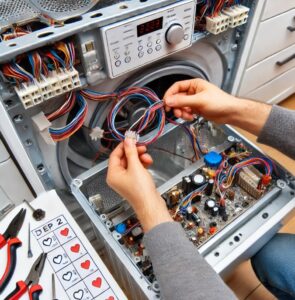
- Identify Connections: Carefully identify and label all electrical connections to ensure correct reassembly.
- Disconnect Wires: Gently unplug the wires and harnesses connected to the control panel and other components.
Step 3: Detach the Detergent Dispenser & the Control Panel
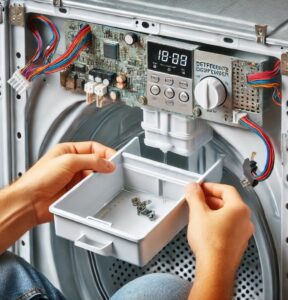
- Take Out the Detergent Tray: Slide out the detergent dispenser tray and remove any screws or clips holding it in place.
- Detach Control Panel: Unscrew and unclip the control panel, carefully setting it aside without damaging the wires.
Step 4: Detach the Door Seal and Front Panel
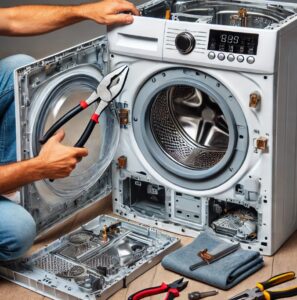
- Remove Door Seal Clamp: Using pliers, remove the clamp holding the door seal to the front panel.
- Take Off Front Panel: Unscrew and detach the front panel, lifting it away to expose the drum.
Step 5: Disconnect the Drum from the Housing
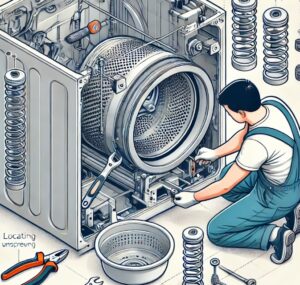
- Remove Drum Support Brackets: Locate and unscrew the brackets supporting the drum.
- Unhook Suspension Springs: Carefully unhook the suspension springs that hold the drum in place.
- Detach Shock Absorbers: Unscrew the shock absorbers connected to the drum.
Step 6: Extract the Drum from the Machine
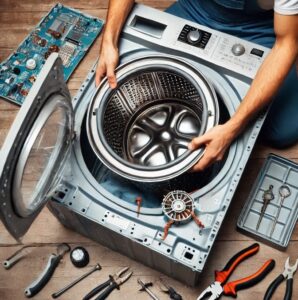
- Lift the Drum: Carefully lift and maneuver the drum out of the washing machine housing. This may require some wiggling to free it completely.
- Handle with Care: Ensure you handle the drum gently to avoid any damage during removal.
How to Inspect and Maintain the Drum?
Inspecting for Damage
- Check for Cracks or Wear: Examine the drum for any signs of physical damage or wear.
- Assess Bearings: Spin the drum by hand to check the bearings. Any grinding or resistance indicates they need replacement.
Cleaning and Maintenance Tips
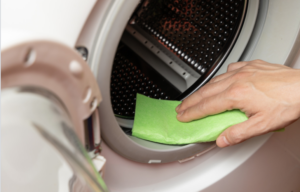
- Remove Lint and Debris: Use a brush or vacuum to remove any lint or debris from the drum.
- Use Cleaning Agents: Clean the drum thoroughly with a mild detergent or a mixture of vinegar and water to remove any mold or buildup.
How to Reassemble Your Washing Machine?
What are the Reassembly Steps After Removing the Drum?
- Reconnect Electrical Components: Carefully reconnect all wires and harnesses, referring to the labels made during disassembly.
- Reattach Front and Top Panels: Secure the front and top panels back in place with screws.
- Secure the Drum: Reconnect the drum’s suspension springs, shock absorbers, and support brackets.
How to Test the Machine After Reassemble?
- Run a Test Cycle: Plug in the washing machine and turn on the water supply. Run a short test cycle to ensure everything is functioning correctly.
- Check for Leaks and Noises: Observe the machine during the test cycle to check for any unusual noises or leaks.
Conclusion
Removing and maintaining the drum in your washing machine is essential for its longevity and performance. By following this step-by-step guide, you can confidently tackle the task, ensuring your machine continues to operate efficiently. Regular maintenance not only extends the life of your washing machine but also ensures your laundry is consistently clean and fresh.
What are the Drum Removal and Maintenance Checklist?
| Task | Frequency | Tools Needed |
| Safety Preparation | Before starting | Gloves, towels, rags |
| Removing Top and Back Panels | Once, during repair | Screwdrivers |
| Disconnecting Electrical Components | Once, during repair | Pliers, wrenches |
| Drum Extraction | Once, during repair | Rubber mallet, socket set |
| Drum Inspection | Annually | Visual inspection, hand spinning |
| Cleaning Drum | Annually | Vinegar, detergent |
| Reassembling Machine | Once, during repair | Screwdrivers, socket set |
| Test Cycle | After reassembly | Water supply, power connection |
By adhering to these guidelines on how to remove the drum from a washing machine, you can maintain your washing machine in top condition, ensuring it serves you well for years to come.
Related Article: How to Remove Agitator From Washing Machine?
Frequently Asked Questions
1. Can I Remove the Drum Myself, or Should I Hire a Professional?
Removing the drum yourself is feasible if you are comfortable with basic tools and have a good understanding of the steps involved. However, if you feel uncertain, it’s always best to consult a professional.
2. How Often Should I Check the Drum for Maintenance?
Regular checks every few months can help you catch any issues early. Thorough cleaning and inspection should be done at least once a year.
3. What Are the Signs That My Washing Machine Drum Needs Attention?
Common signs include unusual noises during operation, visible damage or wear on the drum, and clothes not coming out as clean as they should be.


0 Comments